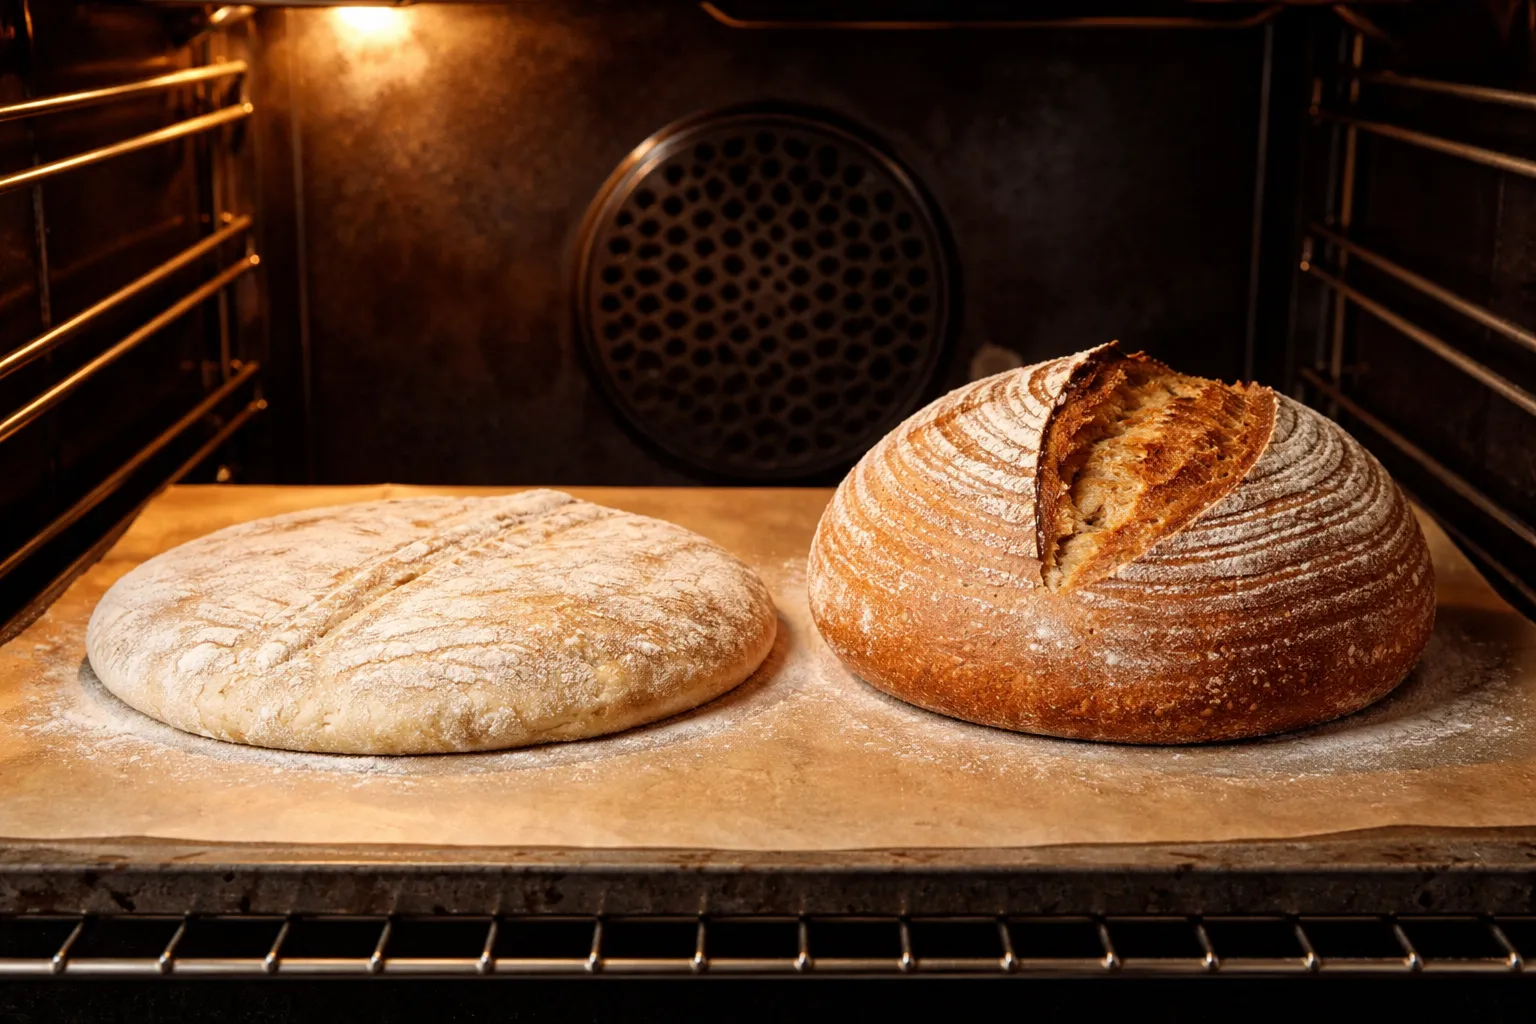
My bench scraper is wedged under the edge of the dough, trying to coax it off the baking sheet, and instead of lifting a domed loaf, I’m peeling up something that looks more like a sourdough tortilla. Twenty-four hours of feeding, folding, and waiting, and this is what greeted me — a wide, flat disc spreading sideways across the pan instead of standing up proud. If you’ve typed “sourdough spreading flat not rising” into a search bar at midnight, apron dusted white and patience running thin, you already know exactly the moment I’m describing.
This particular disaster was attempt number four in a two-week stretch. Two cups of starter gone, an entire bag of bread flour used up, most of a Saturday burned. When I finally cracked open the Dutch oven and found that squat, dense puck sitting where a loaf should’ve been, I actually slid down onto the kitchen floor for a minute. Not joking. My dog wandered over to check whether I was okay. It was rock bottom, baking-wise.
Here’s what I didn’t expect, though: that ruined loaf ended up being the exact push I needed to actually understand my craft. Once I traced the problem back to its source and started correcting it on purpose instead of guessing, my bakes turned a corner for good. So consider this my attempt to spare you a few wasted bags of flour — here’s everything that finally clicked for me.
| Cause of Flat Sourdough | What Happens | How to Fix It |
|---|---|---|
| Underdeveloped Gluten | Dough lacks scaffolding to trap gas; spreads outward instead of rising | Do four rounds of stretch-and-folds within first two hours, roughly 30 minutes apart |
| Over-fermented Dough | Acids eat away at gluten structure; dough flattens in oven | Stop when dough grows 50–75%, looks light and slightly domed, wobbles like gelatin |
| Poor Shaping Technique | Loose outer skin cannot support rise through proof and oven spring | Drag dough across unfloured surface with bench scraper; use friction to tighten skin |
| Lack of Proofing Support | Unsupported dough sags under its own weight during proof | Use banneton basket with heavyweight cloth liner instead of plain towels |
What’s Really Causing Your Sourdough to Go Flat Instead of Up
Nine times out of ten, a flat loaf traces back to one of three things: gluten that never got strong enough, dough that fermented past its window, or shaping that left it without any structure. What makes this tricky is that these three causes tangle together, so a bad bake can feel like everything collapsed simultaneously. Let’s untangle them one at a time.
Underdeveloped Gluten
Gluten is basically the scaffolding inside your dough — the protein web that traps gas and pushes your loaf upward rather than letting it ooze outward. When that scaffolding is thin or incomplete, your dough has nothing to lean on. This was precisely my mistake for a long time. I’d mix everything together, throw in a half-hearted stretch-and-fold or two, and call it done. I convinced myself I was being gentle and patient with the dough. Really, I was just being lazy.
The remedy is showing up fully for your stretch-and-fold sessions throughout bulk fermentation. Plan on four rounds within the first two hours, roughly 30 minutes apart. For each round, pull up one edge of the dough, stretch it firmly upward, then fold it back down over itself. Turn the bowl a quarter turn and repeat until you’ve worked all four sides. With every round, the dough should tighten up and spring back a little more — that increasing resistance is your gluten network taking shape.
Letting Fermentation Run Too Long
This one stung once I finally connected the dots, because my flat loaves weren’t from neglect — they came from overdoing something good. I kept pushing bulk fermentation later and later, convinced I needed extra time to be “sure.” But past a certain point, over-fermented dough starts undoing its own gluten. The acids the bacteria produce eat away at the very structure you spent hours building. What’s left is dough with no backbone, and once it hits the oven, it flattens instead of climbing.
Dough that’s fermented correctly typically grows by roughly 50 to 75 percent, looks light and slightly domed on top, and wobbles like gelatin when you nudge the bowl. What you don’t want is dough that looks like it’s doubled and kept going, or one with a flat, tacky-looking surface. Room temperature plays a huge role here — a warm kitchen speeds fermentation dramatically compared to a cooler one, so if your space tends to run hot, start checking your dough sooner than your recipe timeline suggests.
Shaping That Doesn’t Build Tension
Your gluten could be perfectly built and your fermentation timed just right, and sloppy shaping can still undo everything. Shaping is what creates the taut outer skin that keeps the loaf standing tall through the final proof and the opening minutes in the oven. Handle the dough carelessly, or fail to build that tight surface, and the loaf will slump the second it meets heat.
Shaping works best when it’s done with intention rather than hesitation. Pre-shape the dough, give it 20 to 30 minutes to relax, then move into your final shape. Drag the dough across an unfloured surface using your bench scraper, letting the friction against the counter do the work of tightening the skin. That dragging technique alone changed everything for me. Which brings me to the equipment that made the biggest difference.
The Proofing Basket That Actually Stopped My Dough From Puddling Sideways
An unsupported proof is one of the main reasons behind that flat, spread-out loaf — and swapping in the right banneton basket makes a real difference in keeping your dough upright through both bulk fermentation and the final proof. Skip that support, and even dough with textbook gluten development will still sag under its own weight.
Where it delivers
- The heavyweight cloth liner keeps the dough locked in place instead of sliding or caving to one side, giving you real upward rise instead of the horizontal sprawl I used to fight with plain kitchen towels.
- The bowl’s depth is enough that even dough that softens a bit during final proof stays boxed in and supported — my oven spring noticeably improved after I finally switched over to a real banneton.
- The seam lands right where it should, so flipping the dough onto your peel produces a clean release, ready to score, with no frantic repositioning that can knock the air right out of a well-proofed loaf.
Where it falls short
- Skip drying the liner properly between bakes and it’ll turn damp and moldy — I found this out the hard way after leaving mine slightly wet for a few days and having to toss the cloth insert entirely.
- It eats up genuine counter or fridge real estate, so if your kitchen is already cramped, you’ll need to actually build the habit of using it rather than reaching for a mixing bowl out of convenience.
I was skeptical at first that a basket would solve my spreading problem—I thought it was purely a fermentation timing issue—but the support it provides during proof genuinely changed my results. Saint Germain Bakery Premium Round Bread Banneton Basket with Liner
Frequently Asked Questions
How many stretch and folds should I do during bulk fermentation?
Plan on four rounds of stretch-and-folds within the first two hours, roughly 30 minutes apart. For each round, pull up one edge of the dough, stretch it firmly upward, then fold it back down over itself. Turn the bowl a quarter turn and repeat until you’ve worked all four sides.
What does properly fermented sourdough dough look like?
Dough that’s fermented correctly typically grows by roughly 50 to 75 percent, looks light and slightly domed on top, and wobbles like gelatin when you nudge the bowl. You don’t want dough that looks like it’s doubled and kept going, or one with a flat, tacky-looking surface.
How long should I rest dough between pre-shaping and final shaping?
Give your dough 20 to 30 minutes to relax between pre-shaping and final shaping. During final shaping, drag the dough across an unfloured surface using your bench scraper, letting the friction against the counter tighten the skin.
Can a banneton basket prevent sourdough from spreading flat?
Yes. A banneton basket with a heavyweight cloth liner keeps dough locked in place during both bulk fermentation and final proof, providing real upward rise instead of horizontal sprawl. Even well-developed dough will sag under its own weight without this support.
About This Article

Written by Sam Whitaker. Sam Whitaker has been baking sourdough for over a decade, including three years baking commercially, and now works out of a home kitchen in the Pacific Northwest. Sam's eleven-year-old starter, Harold, is the foundation for every recipe and troubleshooting guide on Sourdough Rising — real bread tested over and over until it works. More about this site.
Scope and limits. Sam is a home baker with no formal culinary training. Follow current food safety guidance for storage and handling, particularly with enriched or filled doughs.
Verify this against a primary source
Specifics change, and your situation may differ from the one described here. These are the authorities worth checking directly:
- USDA FoodData Central — flour and ingredient composition data
- FoodSafety.gov — safe handling and storage