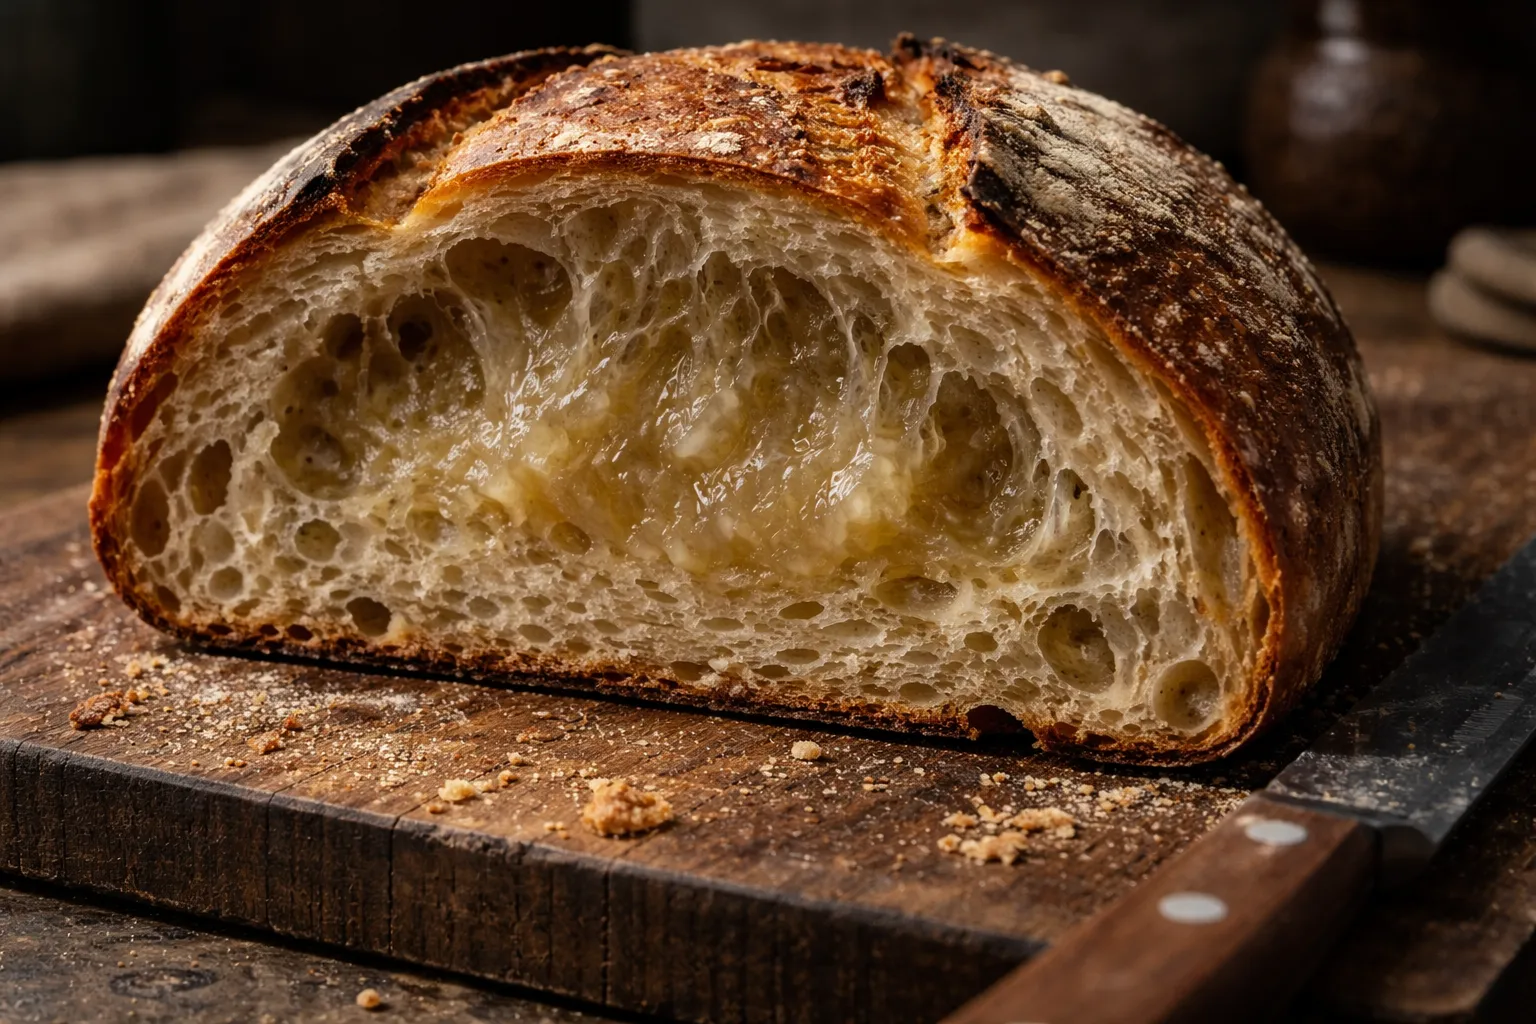
I still remember the exact moment I sliced into what I thought was my best loaf yet. The crust shattered perfectly, the score had bloomed beautifully, and the smell coming out of my oven was absolutely intoxicating. Then my bread knife hit something wrong in the center. Gummy. Dense. Raw. I had a textbook case of sourdough undercooked middle staring back at me, and I wanted to cry into my flour bin. That loaf had taken me three days. Three. Days.
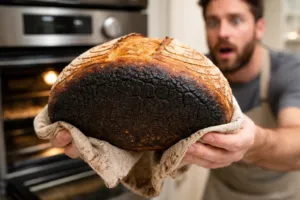
I have made a lot of baking mistakes over the years, and I wear most of them as badges of honor. But this one stung differently. It was my mother-in-law’s birthday. I had promised her a beautiful sourdough boule, talked it up all week, and presented it at the table like I was unveiling a masterpiece. The outside was genuinely stunning. The inside was essentially raw dough wearing a costume. I still cannot fully laugh about it. Almost, but not quite.
What I did not know then, but absolutely know now, is that the fix was embarrassingly simple. A thermometer. That is it. That is the whole secret I wish someone had told me before I ruined a birthday dinner and wasted an entire bag of King Arthur bread flour.
Why Sourdough Gets Undercooked in the Middle
Before we talk about the fix, it helps to understand what is actually happening inside your loaf. Sourdough is dense. It holds moisture differently than commercial yeast breads, and the crumb structure can insulate the center in a way that genuinely fools you. The outside looks done. The crust thumps hollow when you knock it. But the interior has not reached the temperature it needs to fully gelatinize the starches and set the crumb.
There are a few common reasons your loaf might be undercooked in the center even after what feels like a full bake.
- Your oven runs cool. This is far more common than people realize. Many home ovens are off by 25 to 50 degrees Fahrenheit, and sometimes more. You set it to 450°F and you are actually baking at 400°F without knowing it.
- You pulled the bread too early. A golden brown crust does not mean a fully baked loaf. Color alone is not a reliable indicator of doneness.
- The dough was too cold going into the oven. Baking straight from the refrigerator after a cold proof means the center takes much longer to heat through.
- Your Dutch oven or baking vessel is trapping too much steam for too long. This can create a soft, underbaked interior even when the exterior looks great.
In my case, it was a combination of an oven that ran about 30 degrees cool and a loaf I pulled the moment it looked gorgeous, without checking whether the inside agreed. Rookie mistake, even after two years of baking sourdough. We are all still learning.
The Internal Temperature Fix for Sourdough Undercooked Middle
Here is the thing nobody told me early enough: fully baked sourdough should register between 205°F and 210°F (96°C to 99°C) at the very center of the loaf. That is your target. Not color, not crust sound, not timing. Temperature. Once I started using a thermometer consistently, my undercooked loaves became a thing of the past almost overnight.
Insert your thermometer probe into the side of the loaf, angling it toward the very center. You want to measure the coolest, densest part of the crumb, not the area near the crust. If your reading is below 200°F, your bread needs more time, full stop. Put it back in the oven, tent it loosely with foil if the crust is already very dark, and check again in five to eight minutes.
It also helps enormously to let your loaf rest for at least one hour after baking, and honestly two hours is better. The crumb continues to set as it cools, and cutting into a hot loaf can make even a properly baked bread seem gummy and undercooked. I know the wait is painful. I know. But it is worth it every single time.
My Gear: The Tools That Actually Solved This Problem
Getting serious about internal temperature meant getting serious about my equipment. Here is exactly what I use now, and why each one earns its place in my kitchen.
The Thermometer That Stopped Me From Guessing at the Crumb
For years I relied on tap tests and visual cues, which worked fine until they didn’t—and I’d already invested three days in a loaf. A bread thermometer takes the guesswork out of doneness and tells you exactly whether your crumb is actually baked through or still raw in the middle.
What works
- Reads the internal temperature of your loaf in about 3 seconds—fast enough that you can check multiple spots without losing too much oven heat.
- The needle is thin enough to slide into the thickest part of the crumb without leaving a visible hole, and the display is large enough to read without your glasses fogging up from oven steam.
- You can set it down on the counter or hold it steady while checking; it’s not finicky about angle the way some instant-reads are.
What doesn’t
- The battery compartment is a little stiff to open, and I’ve fumbled with it while wearing oven mitts more times than I’d like to admit.
- It doesn’t have a probe guard, so the tip can cool down quickly if you’re not inserting it into the bread right away—you’ll want to preheat it or work fast.
I second-guessed myself the first time I pulled a loaf at 205°F instead of baking it until the crust looked darker, worried I was pulling it too early—but that loaf had the most tender, properly baked crumb I’d ever made. Get the TempPro Digital Instant Read Thermometer and stop losing loaves to doubt.
This post contains affiliate links. As an Amazon Associate, I earn from qualifying purchases at no extra cost to you.