I Baked With a Lodge Combo Cooker vs a Regular Dutch Oven for 30 Days

“`html

This post contains affiliate links. As an Amazon Associate, I earn from qualifying purchases at no extra cost to you.

For months, I baked sourdough in a hand-me-down enameled Dutch oven. The results were fine — decent ear, decent crust — but I kept seeing stunning open crumb shots online. People credited their baking vessel. That sent me deep into a Lodge combo cooker sourdough comparison rabbit hole, and honestly, I came out the other side a convert. This post covers 30 full days of side-by-side baking so you can skip the guesswork I went through.

My biggest frustration was steam management. Every time I lifted the lid of my Dutch oven to check the bake, steam escaped fast. The heavy lid also made loading my shaped loaf a real fumble. I’d preshape, proof, then essentially drop the dough in from a height. More than once, I deflated a beautifully proofed boule. Something had to change.

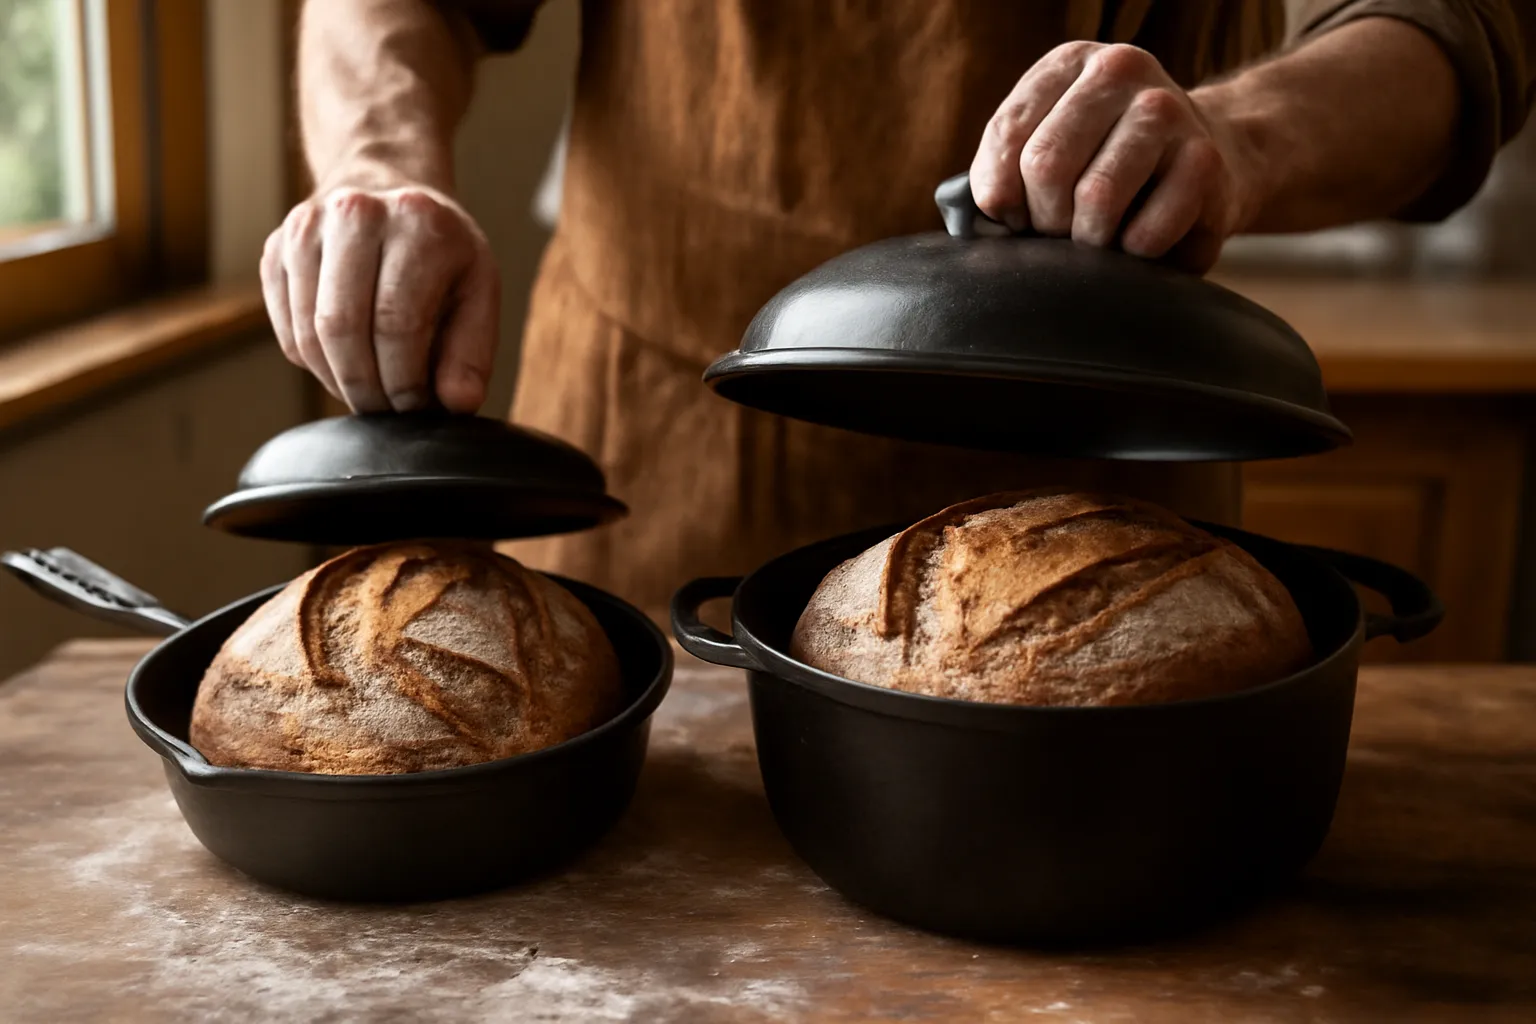
I started paying closer attention to how other home bakers were loading their loaves. Most of the ones getting consistent results were using a combo cooker — where the shallow skillet acts as the base and the deeper pot drops down as a lid. That inverted setup looked like a game changer for scoring and loading. So I decided to test it properly, back to back, for a full month.

Why I Chose the Lodge Cast Iron Combo Cooker

After reading through dozens of forums and watching too many YouTube videos, the Lodge Cast Iron Combo Cooker – PFAS-Free 2-in-1 3.2 Quart Deep Pot and 10.25 Inch Skillet Set kept coming up. It wasn’t just one recommendation — it was consistent across Reddit’s r/Sourdough, The Perfect Loaf community, and several baking blogs I trust. That kind of repeated, independent praise carries weight.

The PFAS-free label also mattered to me. I’d become more conscious about cookware coatings after reading about potential health concerns with certain nonstick surfaces. Knowing this is seasoned cast iron with no synthetic coatings gave me peace of mind. Plus, it’s made in the USA, which was a bonus for my purchasing decision.

Price-wise, it landed squarely in the affordable range for quality cast iron. I’d spent more on the enameled Dutch oven I already owned. The Lodge felt like a low-risk experiment with a potentially high reward. I ordered it and set a 30-day testing window for myself.

First Impressions: Unboxing and Build Quality

The box arrived heavier than I expected. Cast iron always surprises me. Pulling both pieces out, the first thing I noticed was the pre-seasoning — a matte, dark finish that looked well-applied and even. No rough patches, no bare spots that I could see.

The 10.25-inch skillet is shallow, which is the whole point. Your shaped loaf sits on that flat surface. Scoring becomes straightforward because nothing is in your way. The deep pot — the 3.2-quart section — drops over the top as a dome. It fits snugly without wobbling. That seal is what traps steam during the first 20 minutes of baking.

I did notice the handles felt slightly awkward compared to my Dutch oven. The skillet handle, in particular, runs parallel to the cooking surface, which means it gets hot fast. A good pair of oven mitts is non-negotiable. That’s worth flagging upfront. Overall, though, the build quality felt solid and serious — this is a workhorse, not a showpiece.

My Testing Protocol Over 30 Days

I kept the recipe and process identical for every single bake. Same flour blend (80% bread flour, 20% whole wheat), same hydration (76%), same starter percentage (20%), same bulk fermentation target, same shaping technique. The only variable was the baking vessel.

I baked two loaves every Saturday and one loaf mid-week throughout the month. One loaf used the Lodge Cast Iron Combo Cooker – PFAS-Free 2-in-1 3.2 Quart Deep Pot and 10.25 Inch Skillet Set. The other used my 5-quart enameled Dutch oven. Both preheated in the oven at 500°F for 45 minutes before loading.

Here’s the protocol I followed for each bake:

  • Preheat oven and vessel to 500°F for 45 minutes
  • Transfer dough from banneton directly onto the skillet (combo cooker) or into the Dutch oven
  • Score immediately and cover
  • Bake covered at 500°F for 20 minutes
  • Remove lid, reduce to 450°F, bake 20-25 more minutes
  • Cool on wire rack for at least one hour before slicing

I photographed every loaf from the same angle and noted crust color, ear development, and crumb openness after slicing. By the end of week one, patterns were already emerging.

What Actually Changed: Honest Results With a Timeline

Week One: Noticeably Easier Loading

The loading difference was immediate. Placing a shaped loaf onto a flat, preheated skillet felt dramatically more controlled than lowering dough into a hot pot. My scores were cleaner right away because I wasn’t rushing. The ear on the combo cooker loaf in week one was visibly more pronounced than the Dutch oven loaf baked the same day.

I’ll be honest — I thought maybe I was imagining it. One loaf doesn’t prove a pattern. But the difference was consistent enough that I started to feel optimistic.

Week Two: Crust Development

By the second week, the crust differences became harder to ignore. The combo cooker loaves consistently came out with a thicker, crispier crust that stayed crackly for longer after cooling. The Dutch oven loaves had good crust too — but it softened faster. I suspect the tighter steam seal on the combo cooker was creating a better initial environment, then releasing more efficiently once the lid came off.

Crumb structure looked comparable between the two at this stage. Both had decent open crumb. I couldn’t call a clear winner there yet.

Weeks Three and Four: The Full Picture

By the end of the month, my notes showed a clear trend. The combo cooker loaves scored higher on ear development in 9 out of 12 head-to-head bakes. Crust crispness was better in 10 out of 12. Crumb structure was roughly equal — maybe a slight edge to the combo cooker in 6 out of 12 bakes, but nothing dramatic.

The biggest takeaway wasn’t just the results — it was how much less stressful each bake felt. Loading without fear of deflation made a real psychological difference. I was more confident scoring. That confidence likely fed back into better technique over time.

The Downsides: What I Didn’t Love

No review worth reading skips the negatives. Here’s what genuinely frustrated me during 30 days with the Lodge Cast Iron Combo Cooker – PFAS-Free 2-in-1 3.2 Quart Deep Pot and 10.25 Inch Skillet Set.

The handle heats up fast. I burned my wrist once reaching past the skillet handle to grab the deep pot lid. After that, I always used silicone oven mitts that extended past my wrists. It’s a manageable issue, but it’s worth knowing before your first bake.

The 3.2-quart capacity is limiting. If you regularly bake large loaves — say, 1,000g of dough or more — this combo cooker will feel tight. My standard recipe at around 850g of dough fit comfortably, but there wasn’t much headroom. Larger batches are not ideal here.

Seasoning maintenance is real. Unlike enameled cast iron, bare cast iron needs attention. After the first couple of bakes, I noticed some discoloration and minor surface dryness. A light re-seasoning with flaxseed oil sorted it, but it added a maintenance step that enameled cast iron doesn’t require.

It’s not as versatile for other uses. Yes, you can fry and camp with it. In practice, though, I used mine almost exclusively for bread. The shallow skillet is great for that. However, it doesn’t replace a full-sized Dutch oven for soups, stews, or no-knead bread recipes that call for more volume.

There was also a moment around week two when I got a loaf that was noticeably flatter than usual — worse than anything the Dutch oven had produced that month. I panicked briefly and questioned whether I’d over-proofed the dough or whether the combo cooker was somehow the problem. After reviewing my notes, the issue was clear: I’d let bulk fermentation run too long that day. The vessel wasn’t to blame. But that moment of doubt reminded me that no piece of equipment fixes fermentation errors.

Final Verdict: Lodge Combo Cooker Sourdough Comparison Winner

After 30 days and roughly 18 head-to-head loaves, the Lodge combo cooker sourdough comparison has a clear winner for my baking style: the combo cooker. It improved the two things I cared most about — crust development and loading confidence — without requiring any recipe changes.

Buy the Lodge combo cooker if you:

  • Bake standard-sized sourdough loaves (700g–900g of dough)
  • Struggle with loading dough into a deep Dutch oven
  • Want better ear development and crust crispness
  • Prefer PFAS-free cookware
  • Are comfortable with basic cast iron seasoning maintenance

Skip it if you:

  • Regularly bake large loaves over 1,000g
  • Want one vessel for both bread and stovetop cooking
  • Prefer low-maintenance enameled cookware
  • Are just starting out and aren’t sure if sourdough will stick as a habit

For most dedicated home sourdough bakers, this is genuinely one of the most impactful equipment upgrades you can make. Check the current price on Amazon here.

What About the Alternative: Lodge Wanderlust Cabin Combo Cooker?

If the standard version is sold out or you want something with a bit more personality, consider the Lodge Cast Iron Wanderlust Series Cabin Combo Cooker, 3.2 Quart. It shares the same 3.2-quart capacity and core design. The Wanderlust Series features decorative exterior details that make it more visually appealing, particularly if you bring it to the table or use it for camping. Performance should be comparable for sourdough baking. The main differences are aesthetic and, typically, a slightly higher price point. For pure baking function, both are solid choices.

“`