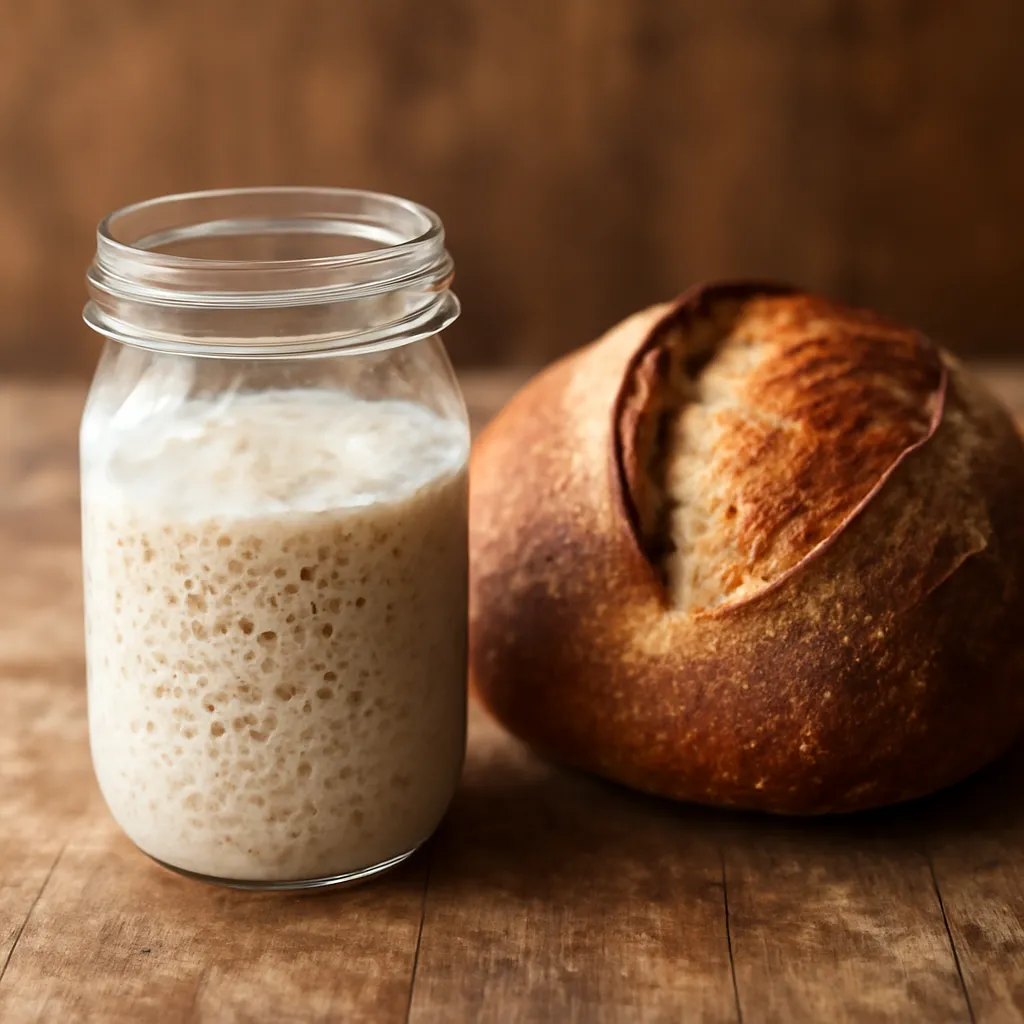
The smell hit me before I even saw the jar — something sharp and almost boozy, way past the pleasant tang I’d gotten used to. When I finally looked, the starter had climbed clean over the rim, dried into crusty ridges down the outside of the glass, and left a sticky trail creeping across my counter like it was trying to make a break for the back door. That’s what tipped me off that something in my routine was badly out of sync. These beginner sourdough tips exist because of moments exactly like that one — the ones nobody warns you about before you dive into wild yeast baking.
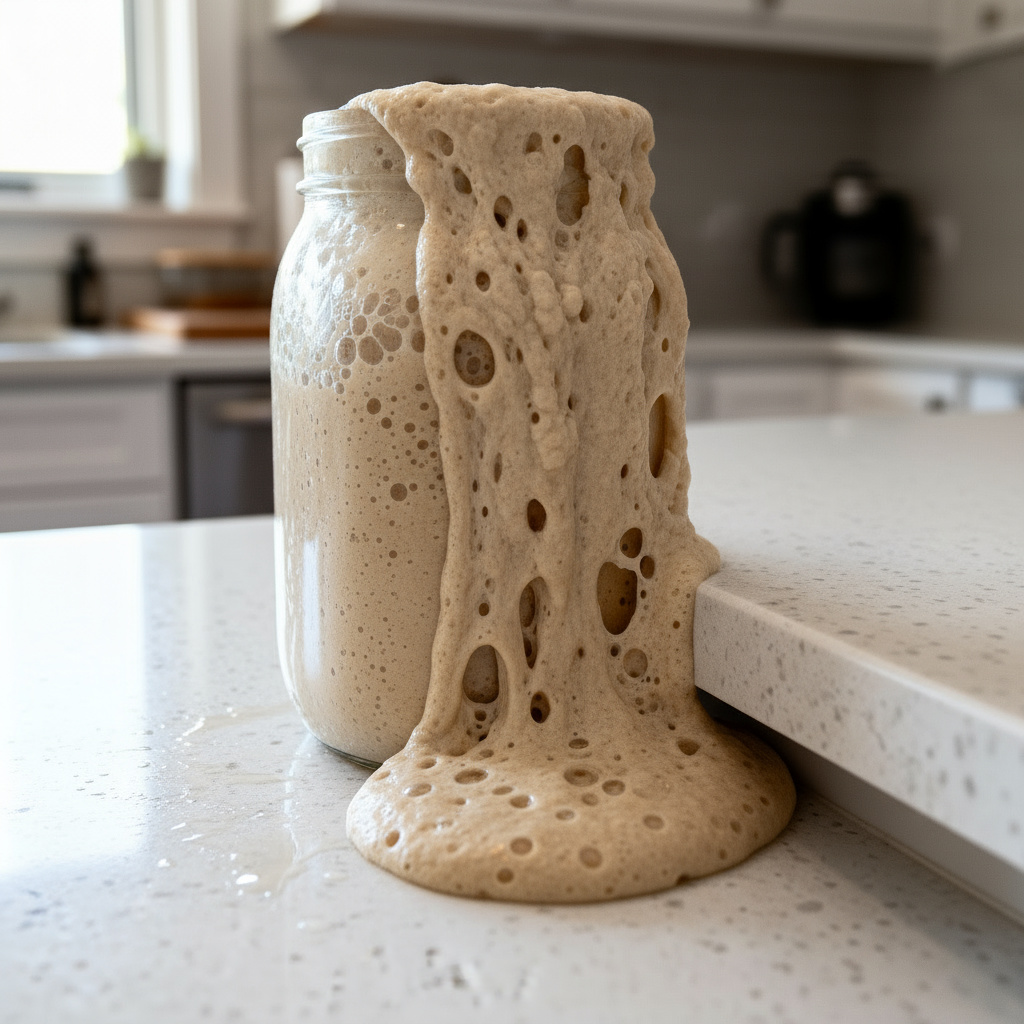
My first reaction was relief, honestly — at least the thing was clearly alive. My second reaction was that I’d chosen the wrong name for it entirely; something like “The Blob” would’ve fit far better than what I’d actually called it.
This is the deal with sourdough: you end up adopting a jar of fermented flour that needs babysitting more often than a houseplant, though thankfully less than an actual cat. Scroll through enough feeds and you’ll see loaves with flawless crumb, dramatic ears, picture-perfect everything. What those shots leave out is the flour dusted across every surface in your kitchen, the string of flat failures before the good one, and the small identity crisis that hits when your starter suddenly refuses to cooperate.
Truth is, sourdough sits somewhere between a chemistry experiment, an art class, and unpaid therapy. It’ll wear down your patience, make you second-guess every decision you’ve ever made in a kitchen, and then out of nowhere hand you a loaf so good you could cry. If you want to come out the other side with your sanity mostly intact, here are the ten beginner sourdough tips that’ll get you there.
| Stage | Indicator | What It Means |
|---|---|---|
| Starter readiness | Floats in water | Packed with gas bubbles; ready to bake |
| Starter readiness | Sinks in water | Not enough gas yet; needs more time |
| Gluten development | Stretches translucent | Gluten network properly developed |
| Gluten development | Tears immediately | Dough needs more working or rest |
| Bake result | Crisp ridge along score | Fermentation, shaping, and scoring aligned |
| Bake result | Hollow ring when tapped | Proper steam, bake, and fermentation |
1. Give That Starter a Name — It’s Family Now (And Occasionally More Dependable Than Actual Family)
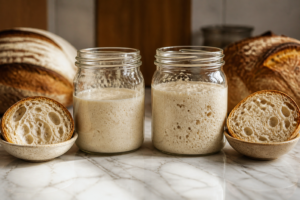
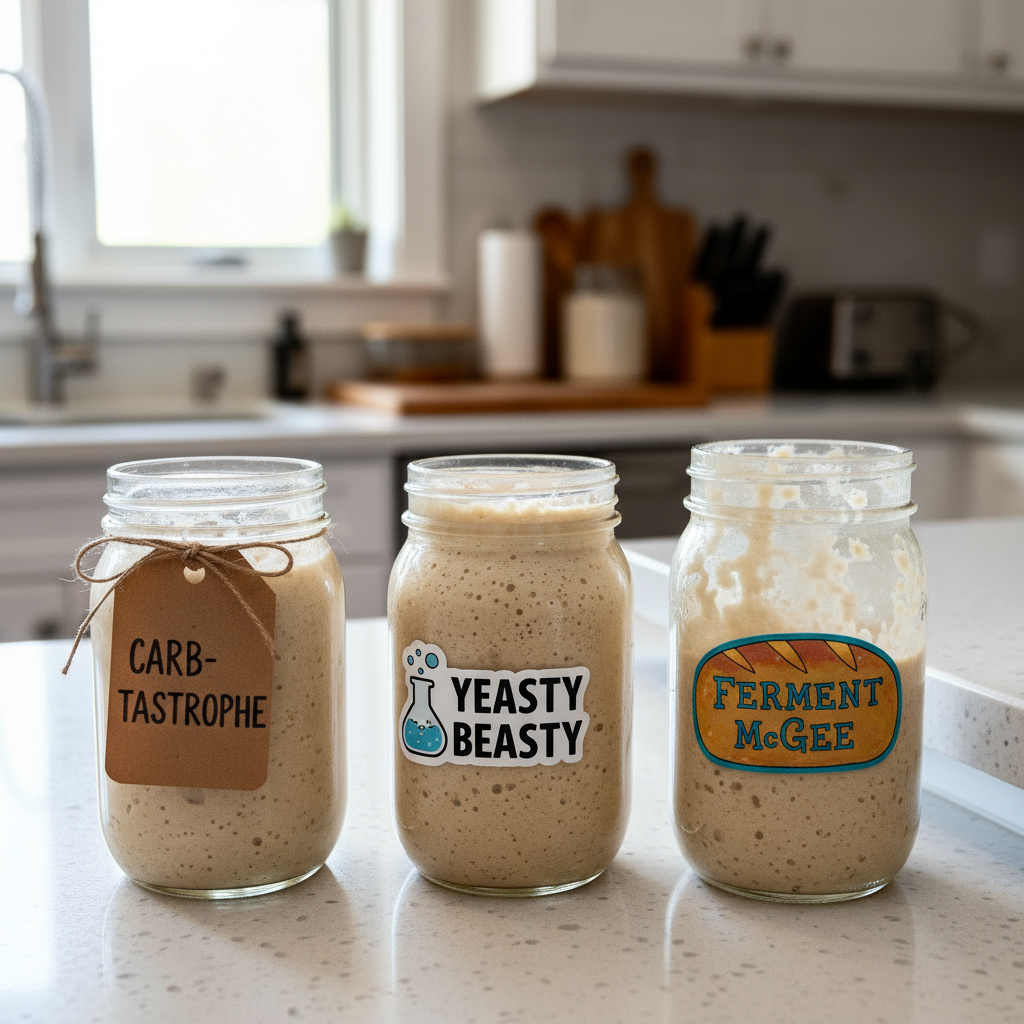
Let’s begin with the bond that matters most in this whole hobby: you and your starter. That bubbling jar isn’t just flour and water sitting around — it’s an entire colony of wild yeast and bacteria that has settled in and made your kitchen its permanent address. Since you’ll be feeding it far more consistently than you water any plant you own, you might as well give the thing a proper name.
Here’s a wild detail worth knowing: one sourdough starter out there has been kept alive since 1847. Seriously — Carl Griffith’s sourdough starter made it through the Oregon Trail, several wars, the Great Depression, and very likely at least one remodeled kitchen. It’s been handed down generation to generation, riding along in covered wagons and passing from baker to baker over more than a century. Sit with that for a moment — your own starter could technically outlast you. It’s basically a pet that never dies, never needs a leash, and every so often turns into bread.
I’ve come across starters called everything from “Doughy McDoughface” to “Yeastie Boys” to “The Mother Dough.” Plenty of bakers name theirs after historical figures or beloved characters. A friend of mine named hers “Betty White,” reasoning that “it’s old, it’s dependable, and it just keeps going.” I know one baker whose starter answers to “Steve” — a name so plain it’s almost funny for something that could probably survive a nuclear winter.
There’s genuine psychology at work here. Naming something makes you more likely to actually take care of it. You remember the feedings. You check in on it. You talk to it out loud (we all do, don’t pretend you don’t). Somehow you end up forming a real relationship with a jar of fermented flour. And the payoff: the moment your starter does something bizarre — grows a layer of hooch, starts smelling like a gym bag — you can just tell your partner “Steve’s hungry again” and they’ll know precisely what’s going on.
2. Think of Your Starter as a Gold Rush Prospector, and Your Kitchen as the Saloon
Here’s a piece of trivia that connects your kitchen counter to actual history: sourdough has real roots in the California Gold Rush. Miners heading west carried their starters along because commercial yeast simply didn’t exist yet. These cultures were precious enough that men tucked them into their bedrolls at night to keep them from freezing. You read that right — grown men sleeping next to jars of fermented flour to protect their bread supply.
And here’s another layer to it: the signature tang in San Francisco sourdough traces back to a bacteria actually named after the city itself. Lactobacillus sanfranciscensis (rebranded Fructilactobacillus sanfranciscensis because scientists can never leave a good name alone) thrives especially well in San Francisco’s particular climate, and it’s largely responsible for that distinctive sour bite. If you want to dig into the science further, sourdough starter resources and other baking-science sites cover it in depth. Here’s the strange part: this bacteria is so tied to that one location that even a starter built somewhere else, once relocated to San Francisco, eventually gets taken over by the local strain. Your culture essentially goes native.
What that tells you is that your own starter is basically a snapshot of your specific environment. The wild yeast and bacteria living in it are shaped by where you are — your flour, your local water, your kitchen’s temperature, even the microbes drifting through your home all leave their mark. Your starter is essentially a fingerprint of your kitchen’s own microbiome.
So every time you feed your starter, you’re not just prepping for bread — you’re keeping alive a culture that genuinely couldn’t exist in quite the same form anywhere else. Pretty remarkable, if you think about it. And if you ever move house, don’t be surprised if your starter slowly shifts to match its new surroundings — like a microbial transplant settling into a new home while still carrying traces of where it came from.

3. Somewhere Out There, There’s Literally a Library Just for Starters
If naming your starter already felt like too much, brace yourself for the Puratos Sourdough Library over in Belgium. This isn’t a metaphor — it’s a genuine physical facility that preserves sourdough cultures from every corner of the globe instead of books. Picture something like the Library of Alexandria, except built entirely around fermented flour.
The whole point of the place is safeguarding sourdough diversity worldwide. Every culture housed there gets kept alive, tended carefully, and fully documented — starters from countless countries, regions, and eras, some of them centuries old. It’s not just the cultures being preserved, either; it’s the techniques, the backstories, and the history riding along with each one.
The reason this matters: sourdough diversity has been quietly shrinking. Once commercial yeast took over, plenty of traditional cultures simply disappeared. This library is one of the few places actively working to hold onto what’s left — think of it as a seed vault, but for bread. It’s a good reminder that your own starter isn’t just a kitchen tool; it’s a small piece of cultural history.
Keeping your starter going ties you into a practice that stretches back thousands of years. You’re doing exactly what humans have always done — coaxing wild yeast and bacteria into turning flour and water into something worth eating. Your jar links you to bakers across centuries, a connection running both backward into history and forward into whatever comes next.
So next time you’re stumbling to the kitchen at 2 AM because you forgot the evening feeding (it happens to everyone), remember you’re part of something much older than your own routine. You’re tending a living culture that could theoretically get passed down for generations, taking part in a practice that predates every modern convenience and ties you straight back to your ancestors. Not bad for something living quietly in a jar on your counter.

4. The Float Test: Basically Your Starter’s Pool Exam
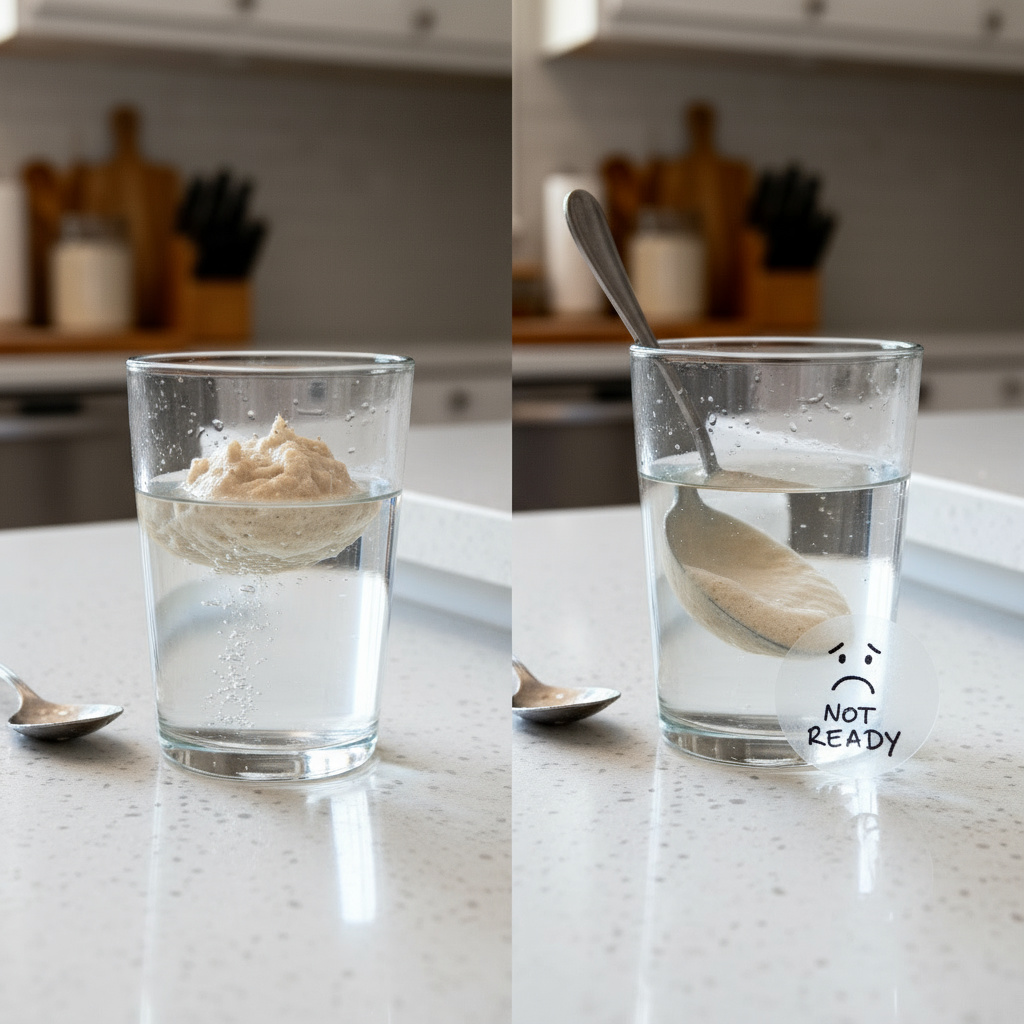
Let’s cover one of the genuinely fun milestones in this process: the float test. Drop a small spoonful of your starter into a glass of water — if it stays on top, it’s ready to bake with. Simple, satisfying, and one of those small wins that makes you feel like you finally know what you’re doing.
Here’s what’s actually going on underneath: an active, ready starter is packed with gas bubbles — carbon dioxide, generated as the yeast works through the flour. Those trapped bubbles make the starter lighter than water, so it floats. A starter that sinks just hasn’t built up enough gas yet — the yeast hasn’t had the time or fuel to make it buoyant.
That said, the float test isn’t a perfect science. Occasionally a starter floats without actually being at peak strength. Other times it sinks even though it’s plenty active. Temperature, hydration, and your starter’s own quirks can all throw off the result. Still, it’s a handy tool, particularly for beginners still learning to read what their starter’s telling them.
Think of the float test as your starter proving it can swim. You’re asking it to show off its bubble power, and you get an instant answer. There’s something oddly satisfying about watching that little dollop bob up to the surface, knowing all those microorganisms teamed up to make it happen.
The first time my starter actually passed this test stands out. I’d been feeding it faithfully for two weeks, watching it bubble and expand, never fully certain it was ready. Then I dropped a spoonful in a glass, and up it floated. I did an honest-to-goodness happy dance right there in the kitchen — my husband looked at me like I’d finally cracked. But in that moment it felt like a real accomplishment: I’d grown something alive in a jar, and it was ready to become bread.
5. Think of Scoring as Ink for Your Loaf — And You Hold the Blade
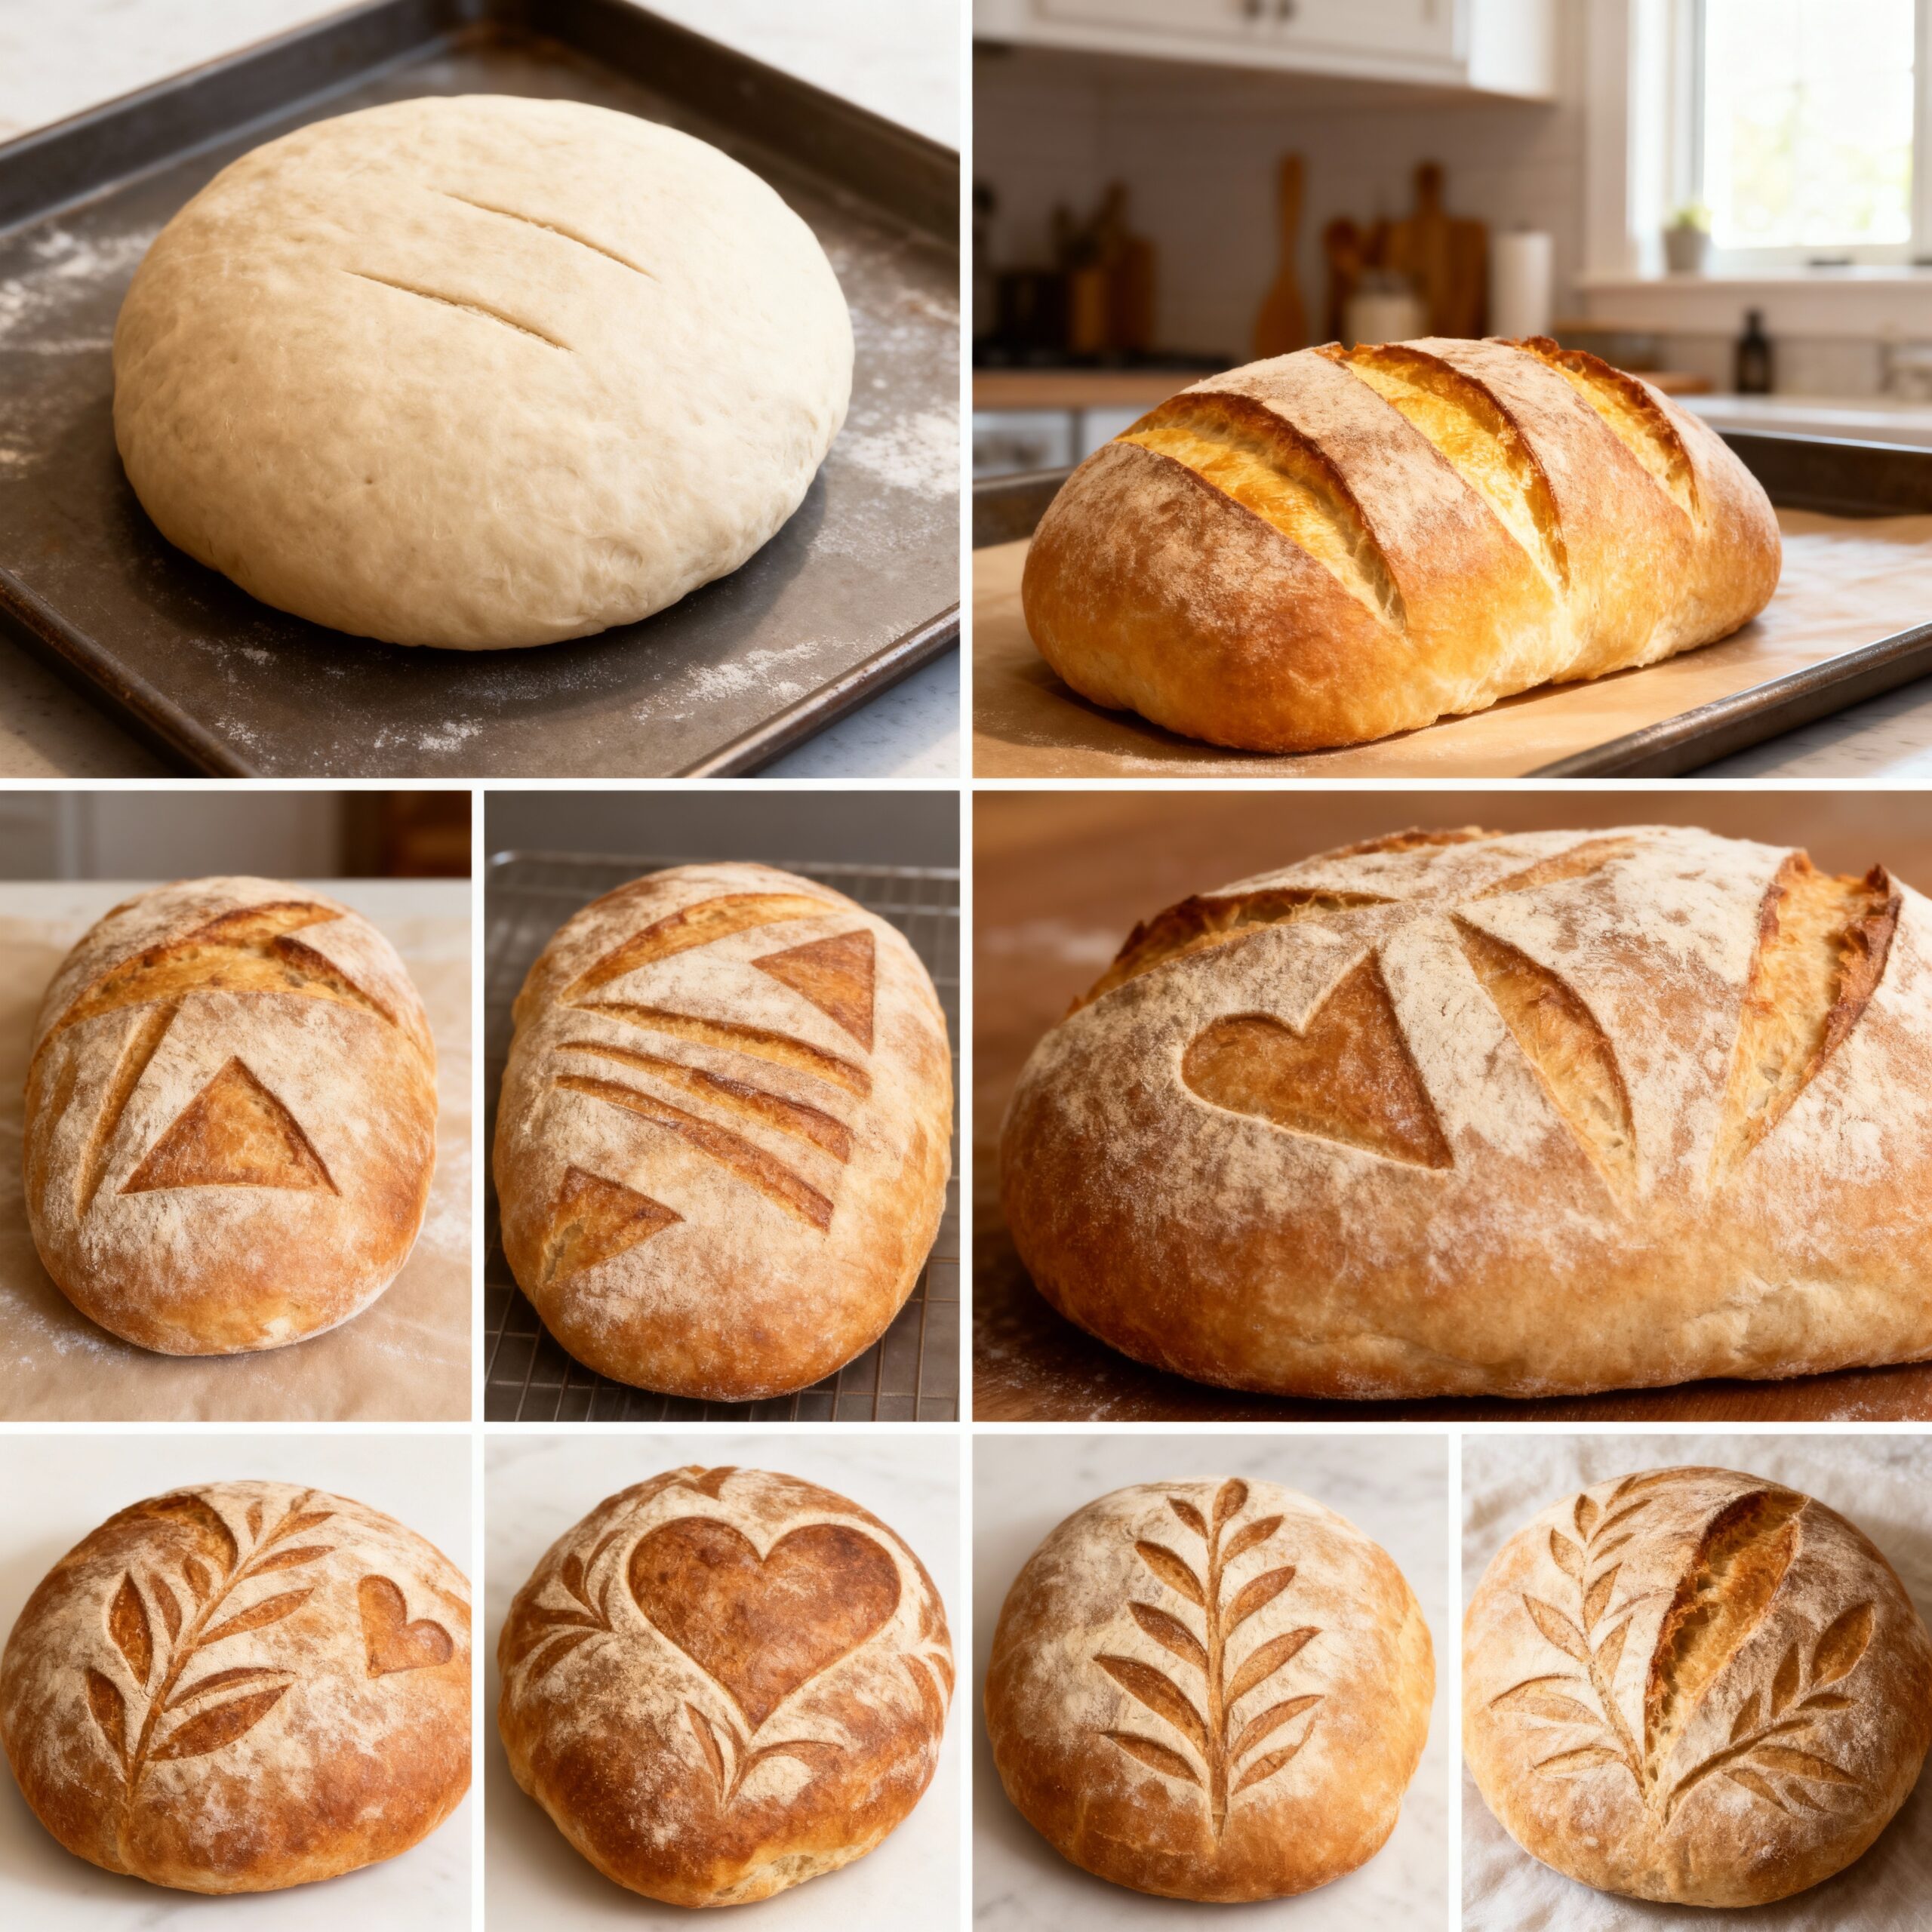
Before that dough ever hits the oven, it needs to be scored. That means taking a sharp blade — a “lame” (pronounced “lahm,” courtesy of the French) — and cutting into the surface of the loaf. It’s far from purely decorative, though the results can look genuinely striking. Scoring’s real job is controlling exactly how the bread expands once the heat kicks in.
Skip the scoring, and your loaf will still puff up, just erratically. All that steam building inside has to escape somewhere, and without a designated path, it’ll blow out wherever it finds weak spots — random cracks, odd bulges, sometimes a loaf that looks like it’s actively trying to break free of its own crust.
Score it correctly, though, and you’ve built a controlled release valve. The dough rises exactly along that cut, forming what bakers call an “ear” — that crisp, raised ridge running along the score. Pulling a loaf from the oven and spotting a great ear, a great rise, everything expanding just right — that’s one of the genuine highs of this hobby.
And here’s where things get creative: scoring doubles as an art form. Some bakers stick to a single clean slash, others go for elaborate patterns, and some even carve words into the crust. I’ve seen intricate geometric designs, delicate minimalist cuts, and everything used purely to add texture and visual depth. Whatever pattern you land on becomes part of your loaf’s personality.
I’ve come across loaves marked with everything from a plain cross to detailed wheat-stalk motifs to abstract shapes. One loaf I saw had “BREAD” carved across it in flowing script. Another baker I know always adds a tiny star as a personal signature. Over time, scoring becomes part of your identity as a baker — your style, your little trademark.
Good scoring really comes down to commitment. Clean, decisive cuts win every time — hesitate, and you’ll end up with jagged, uneven lines. It’s a lot like drawing: you have to trust the line once you start it. And just like drawing, it takes reps. Your earliest attempts might resemble modern art in all the wrong ways, but stick with it and your own style will emerge.
6. The Windowpane Test: Stretch Your Dough Until Light Shows Through
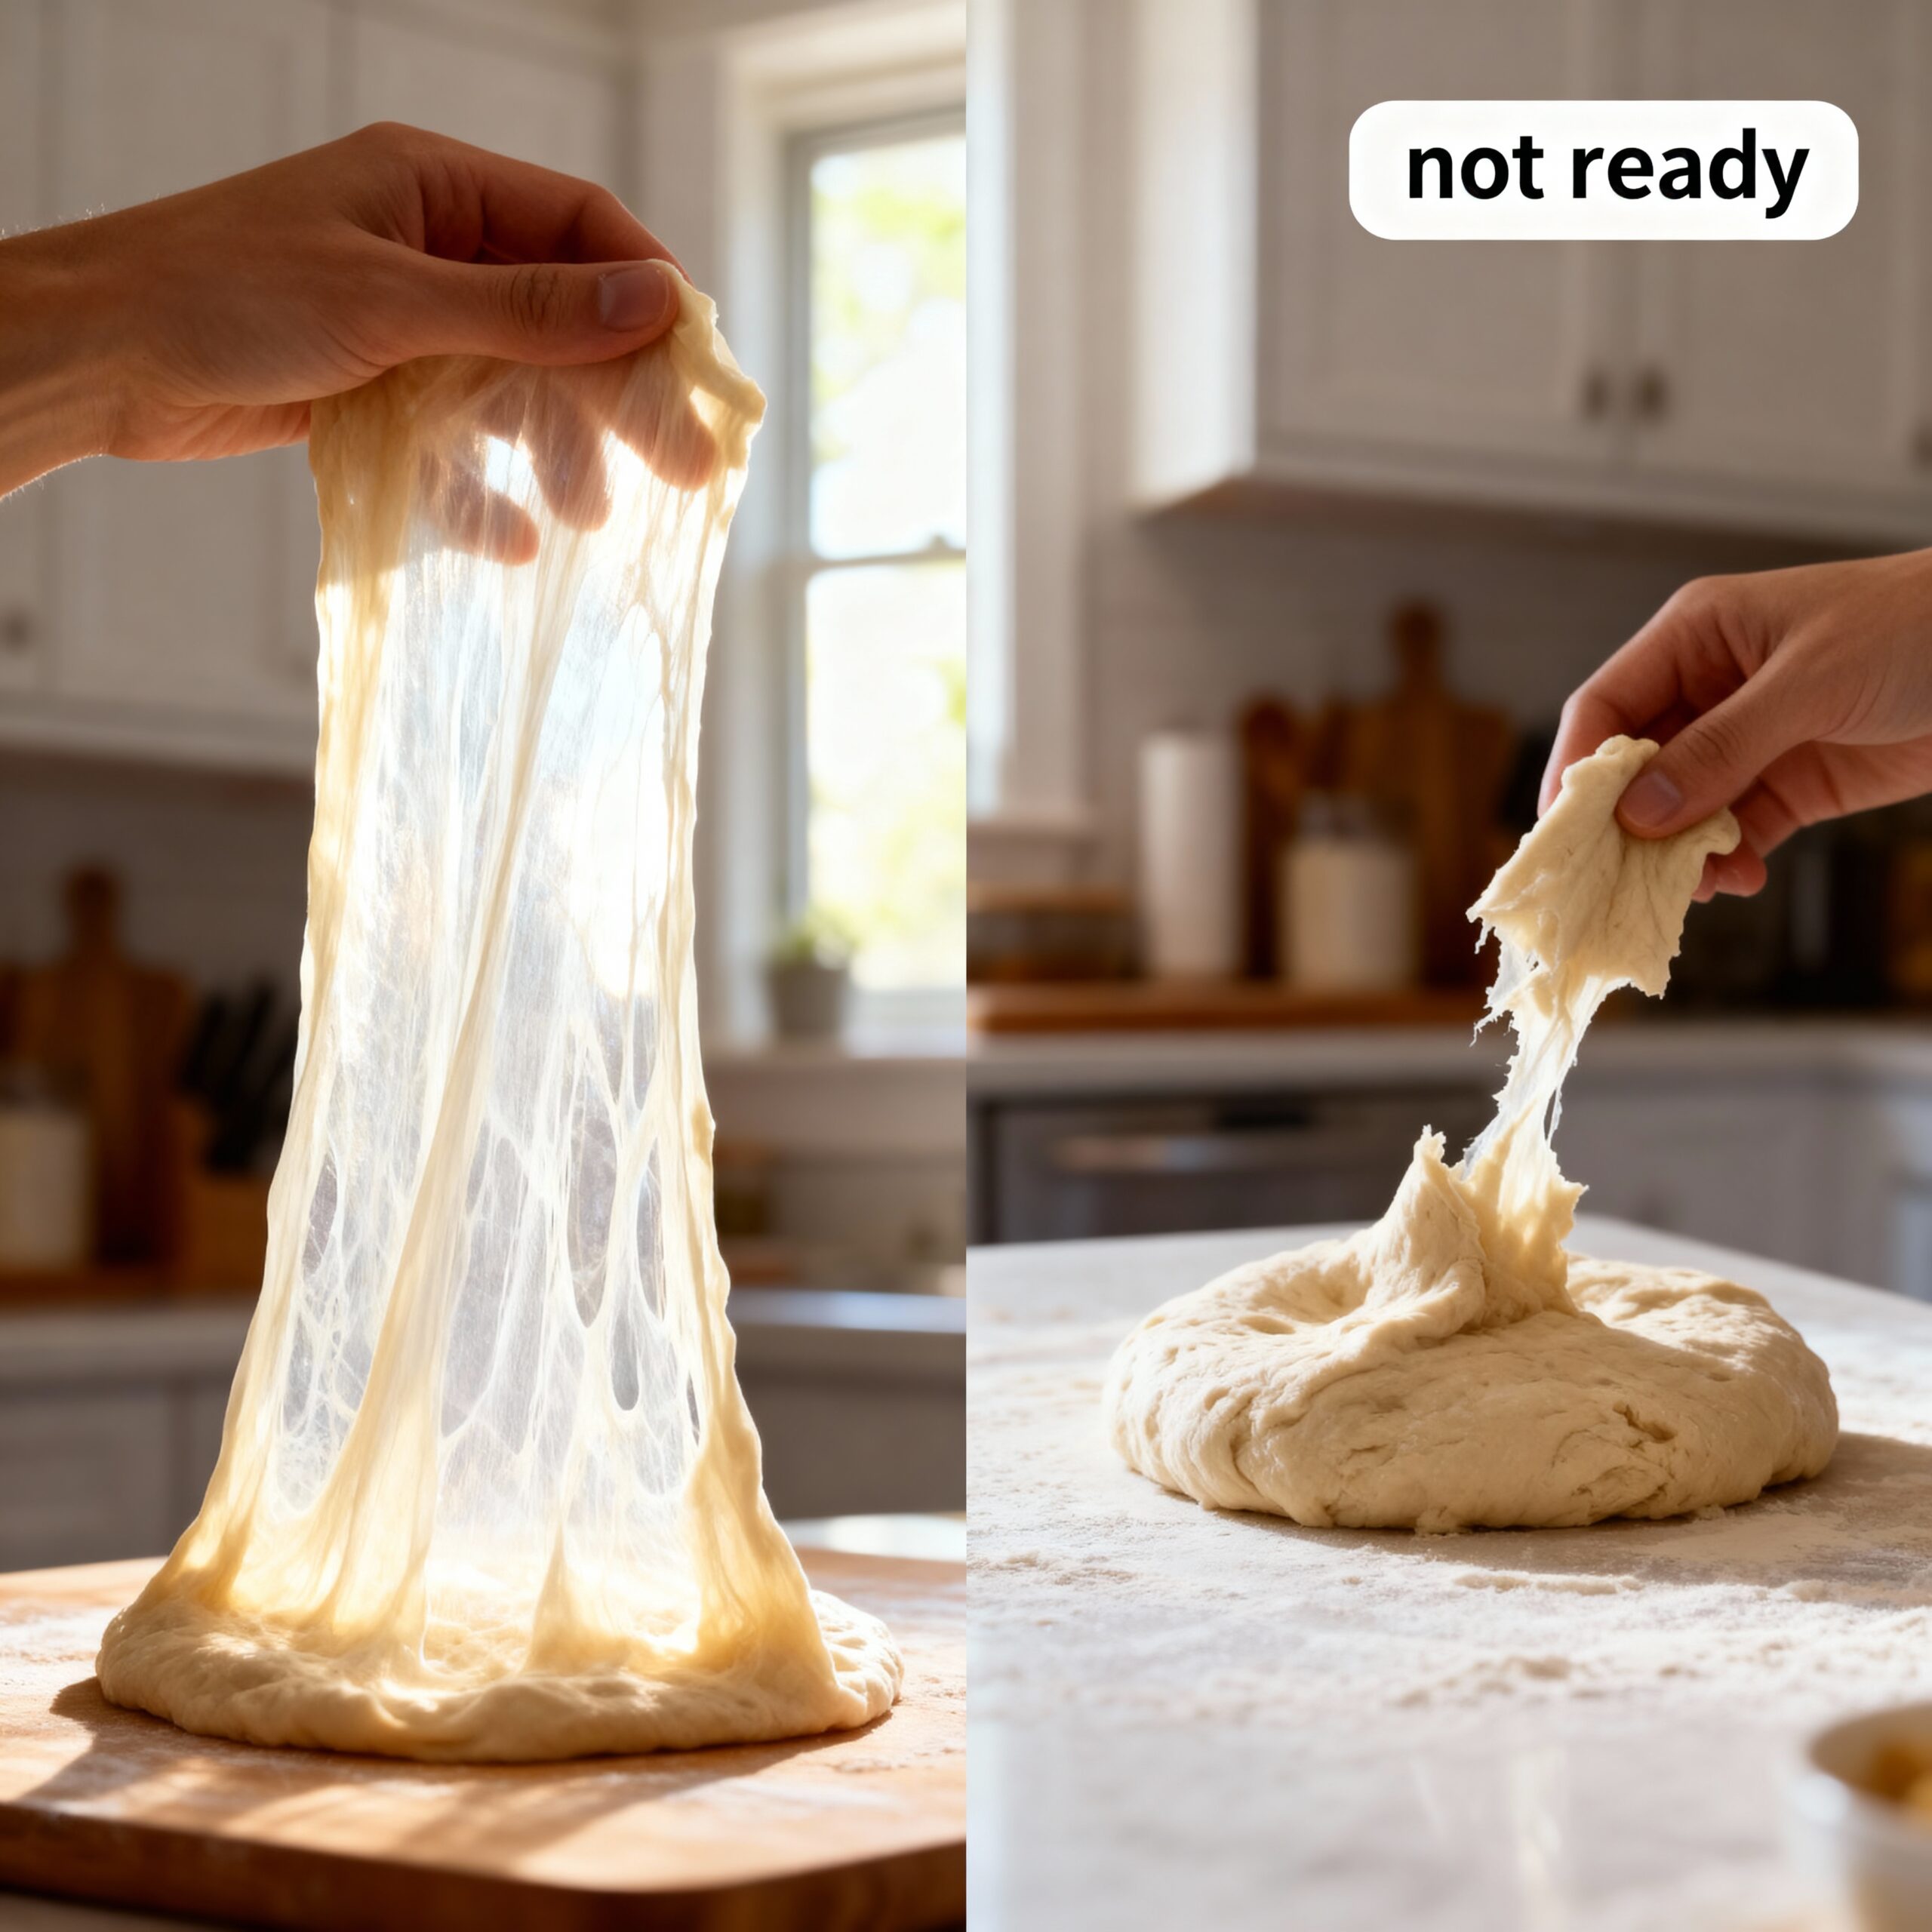
Here’s one that’ll make you feel like you’re running an experiment: the windowpane test. Pinch off a small piece of dough and stretch it gently between your fingers. If it thins out enough to let light pass through without ripping, your gluten’s developed properly. If it tears right away, the dough needs more work.
This test sits right at the intersection of science and gut feeling. You’re essentially checking whether the gluten network in your dough is strong enough to go translucent. It’s a small, simple check, but it tells you an enormous amount about where your dough actually stands.
Gluten is the backbone of bread’s structure. Mix flour with water, and the proteins inside start forming gluten strands. Kneading or folding then aligns and toughens those strands over time. The windowpane test simply reveals whether that whole process actually took hold.
Worth noting: not all flours behave the same here. Bread flour carries more protein than all-purpose, so it builds stronger gluten networks. Whole wheat flour has less gluten potential but brings more flavor and nutrition to the table. Knowing your flour’s tendencies helps you set realistic expectations for the test.
It’s also a lesson in patience. A few minutes of kneading might feel like enough, but the stretch will tell you the truth every time. Sometimes the dough genuinely needs more working. Sometimes it just needs to rest and develop on its own timeline. Either way, the test doesn’t lie to you.
I remember finally pulling off a proper windowpane after what felt like endless kneading and mounting frustration. Then, out of nowhere, the dough stretched into this thin, glowing sheet — I could actually see my fingers through it. Felt like magic. That was the moment I realized gluten development isn’t really about a clock; it’s about learning to read what the dough is telling you.
7. Temperature Runs the Whole Show (Your Starter Is Pickier Than Goldilocks)
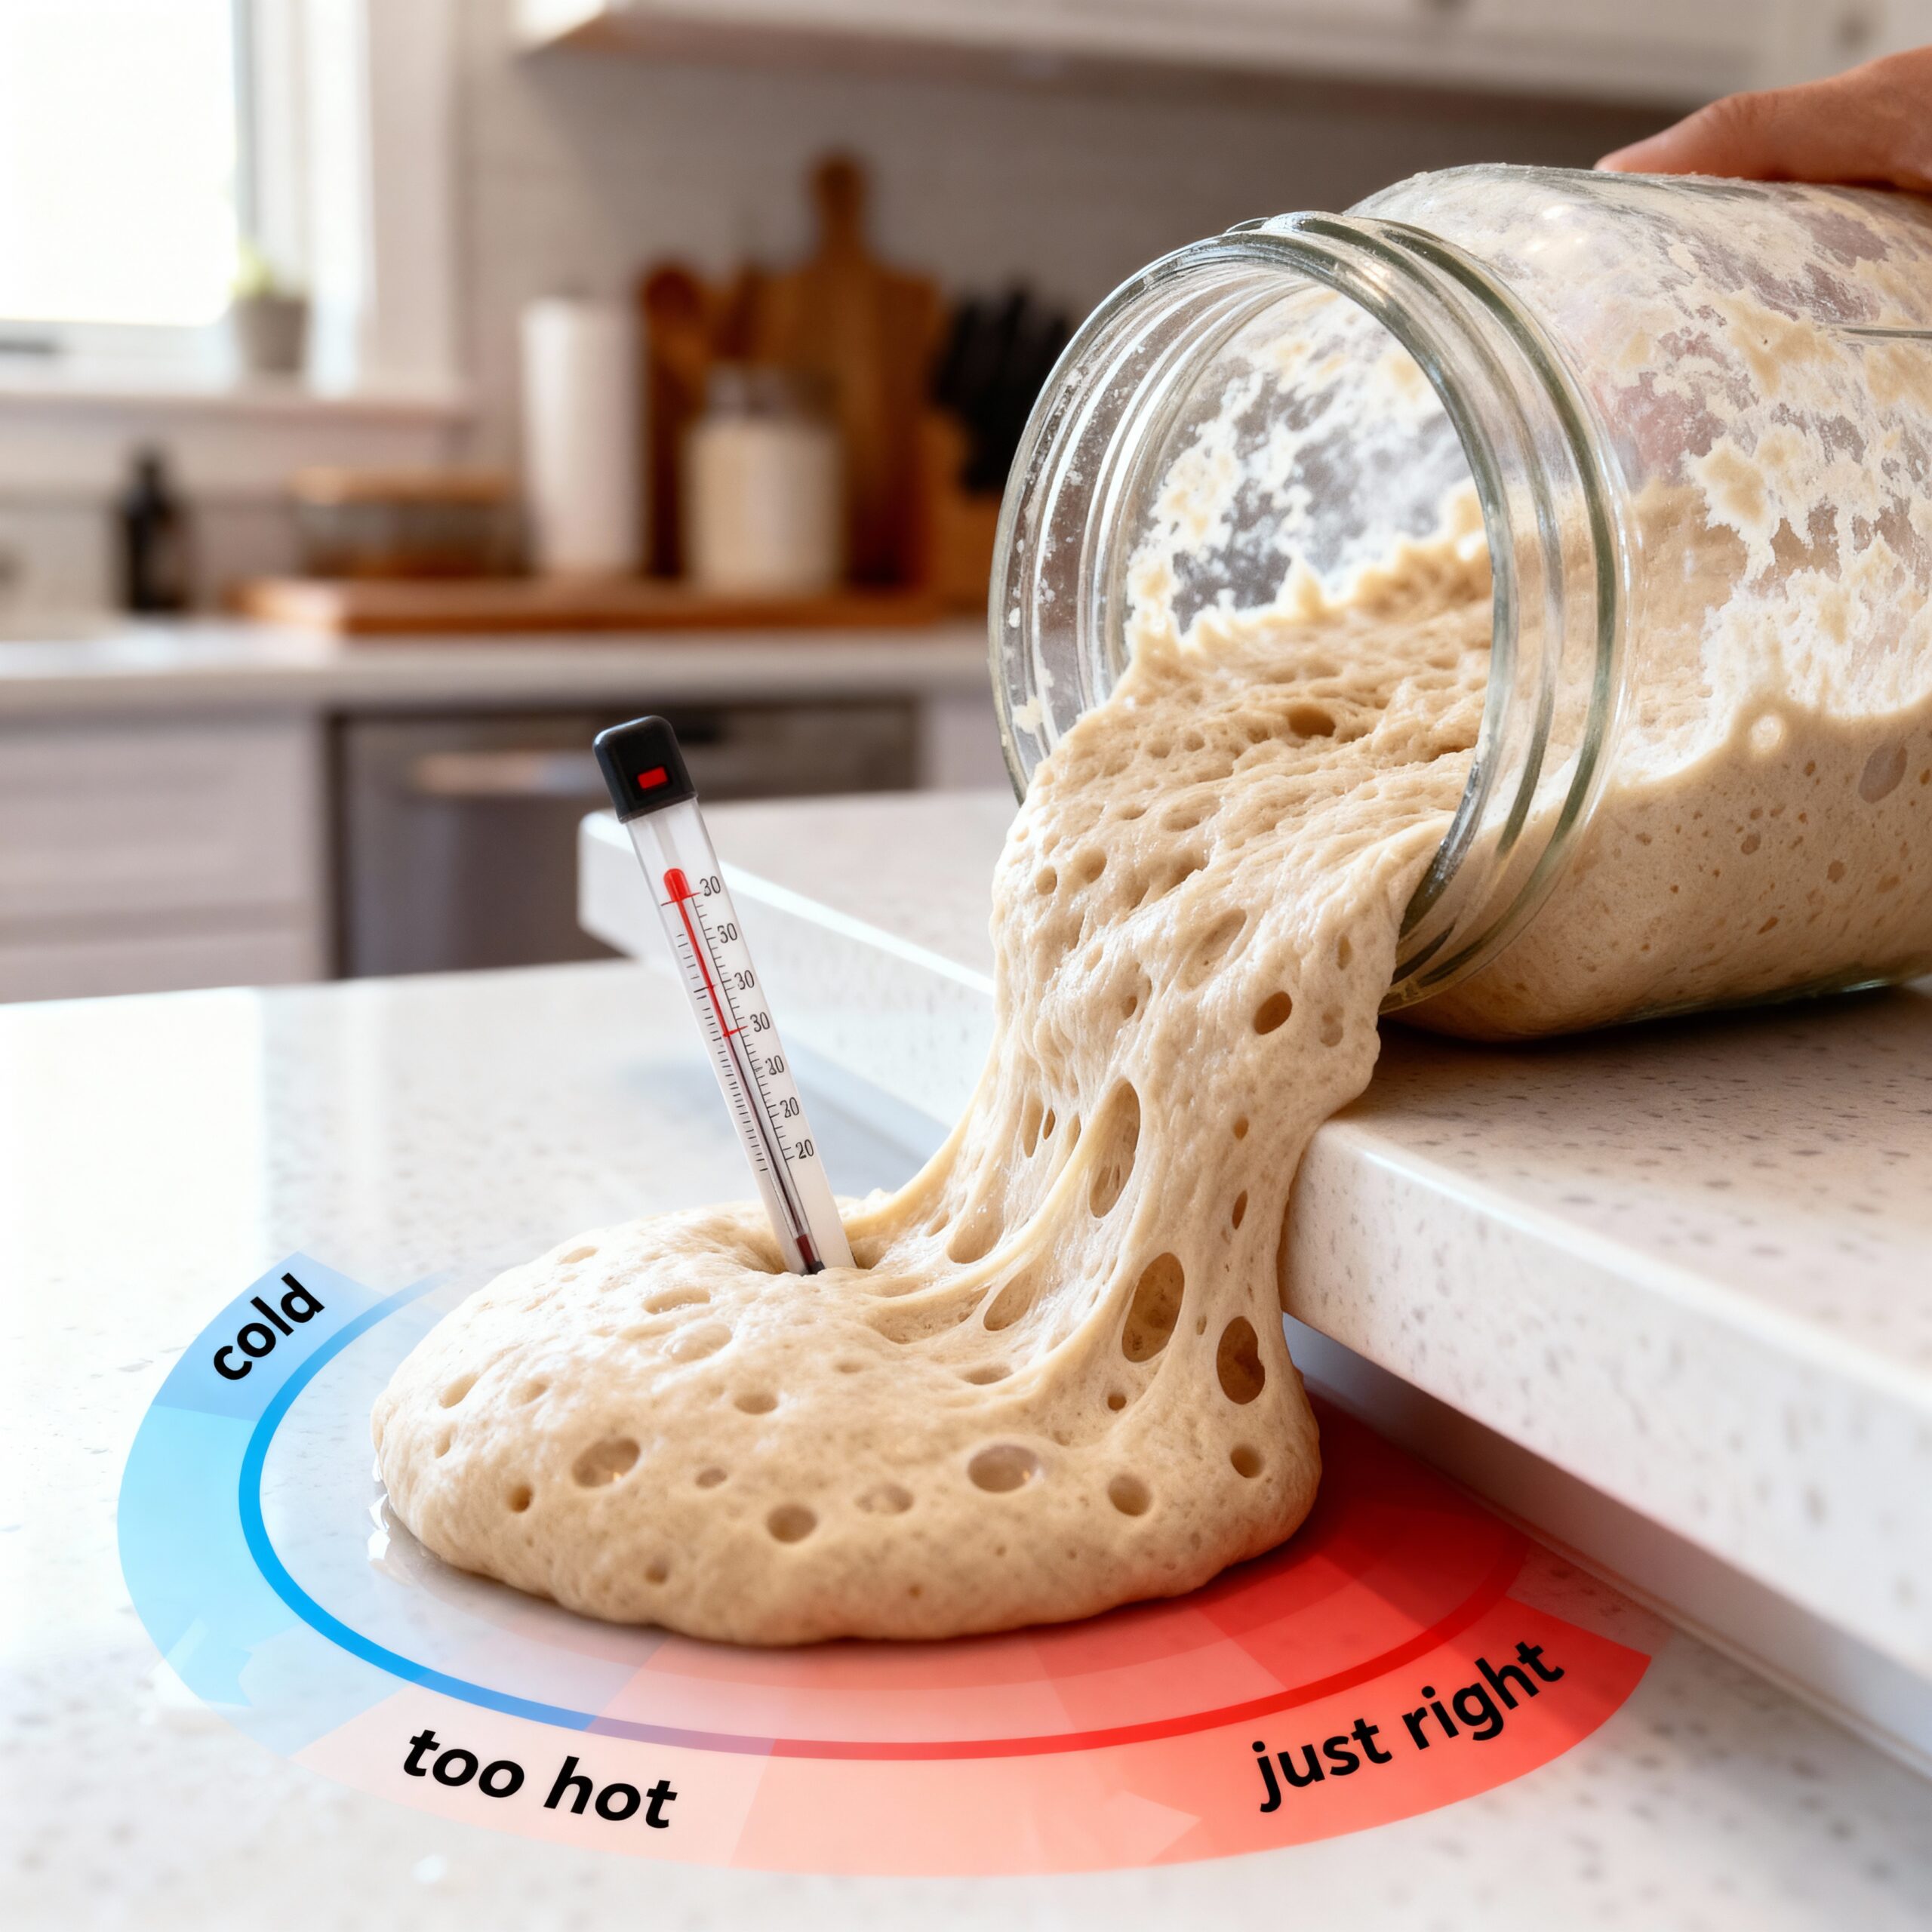
Your starter behaves a lot like Goldilocks — nothing works unless conditions are exactly right. Too cold, and the yeast basically hibernates. Too hot, and it dies outright. A little too warm, and bacteria start dominating, pushing your starter toward excessive sourness. Whatever temperature surrounds it directly shapes how fast it rises, how active it gets, and how sour your final bread tastes.
Here’s the mechanism: yeast and bacteria don’t share the same comfort zone. Yeast thrives in warmth, roughly 75-80°F, while certain bacteria actually prefer it cooler. Whichever organism gets the upper hand shapes your starter’s overall personality. Push things warmer, and bacterial activity dominates, giving you sharper sourness. Keep things cooler, and overall activity slows — a lazier rise, less flavor built up.
It gets even more layered once you factor in dough temperature during fermentation itself. Warmer dough moves faster through fermentation; cooler dough drags its feet. That means you can essentially dial in your bread’s schedule just by adjusting temperature. Need bread in about 4 hours? Warmer water, warmer spot. Want to stretch the timeline out? Cooler water, cooler spot.
Plenty of bakers lean into this deliberately — a warm bulk fermentation during daylight hours, followed by a cold overnight proof in the fridge. That slower, chilled stretch lets flavor build further while also firming the dough up, making it easier to handle and score cleanly. It’s a technique that hands you more control and, usually, better bread.
Your kitchen’s baseline temperature matters too. A consistently chilly kitchen tends to slow your starter down. A consistently warm one speeds things up but can push it toward extra sourness. Getting a feel for your own environment goes a long way toward understanding why your starter acts the way it does.
I’ve watched bakers build genuinely elaborate setups — dedicated proofing boxes with controllers, warm corners near the oven, even using an oven’s interior light as a makeshift heat source. None of that is strictly necessary. A reliably warm spot, or a reliably cool one, in your own kitchen does the job. What matters most is consistency and understanding how your specific space influences your bakes.
8. The “Ear” Is Basically Your Loaf’s Trophy
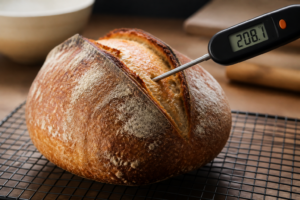
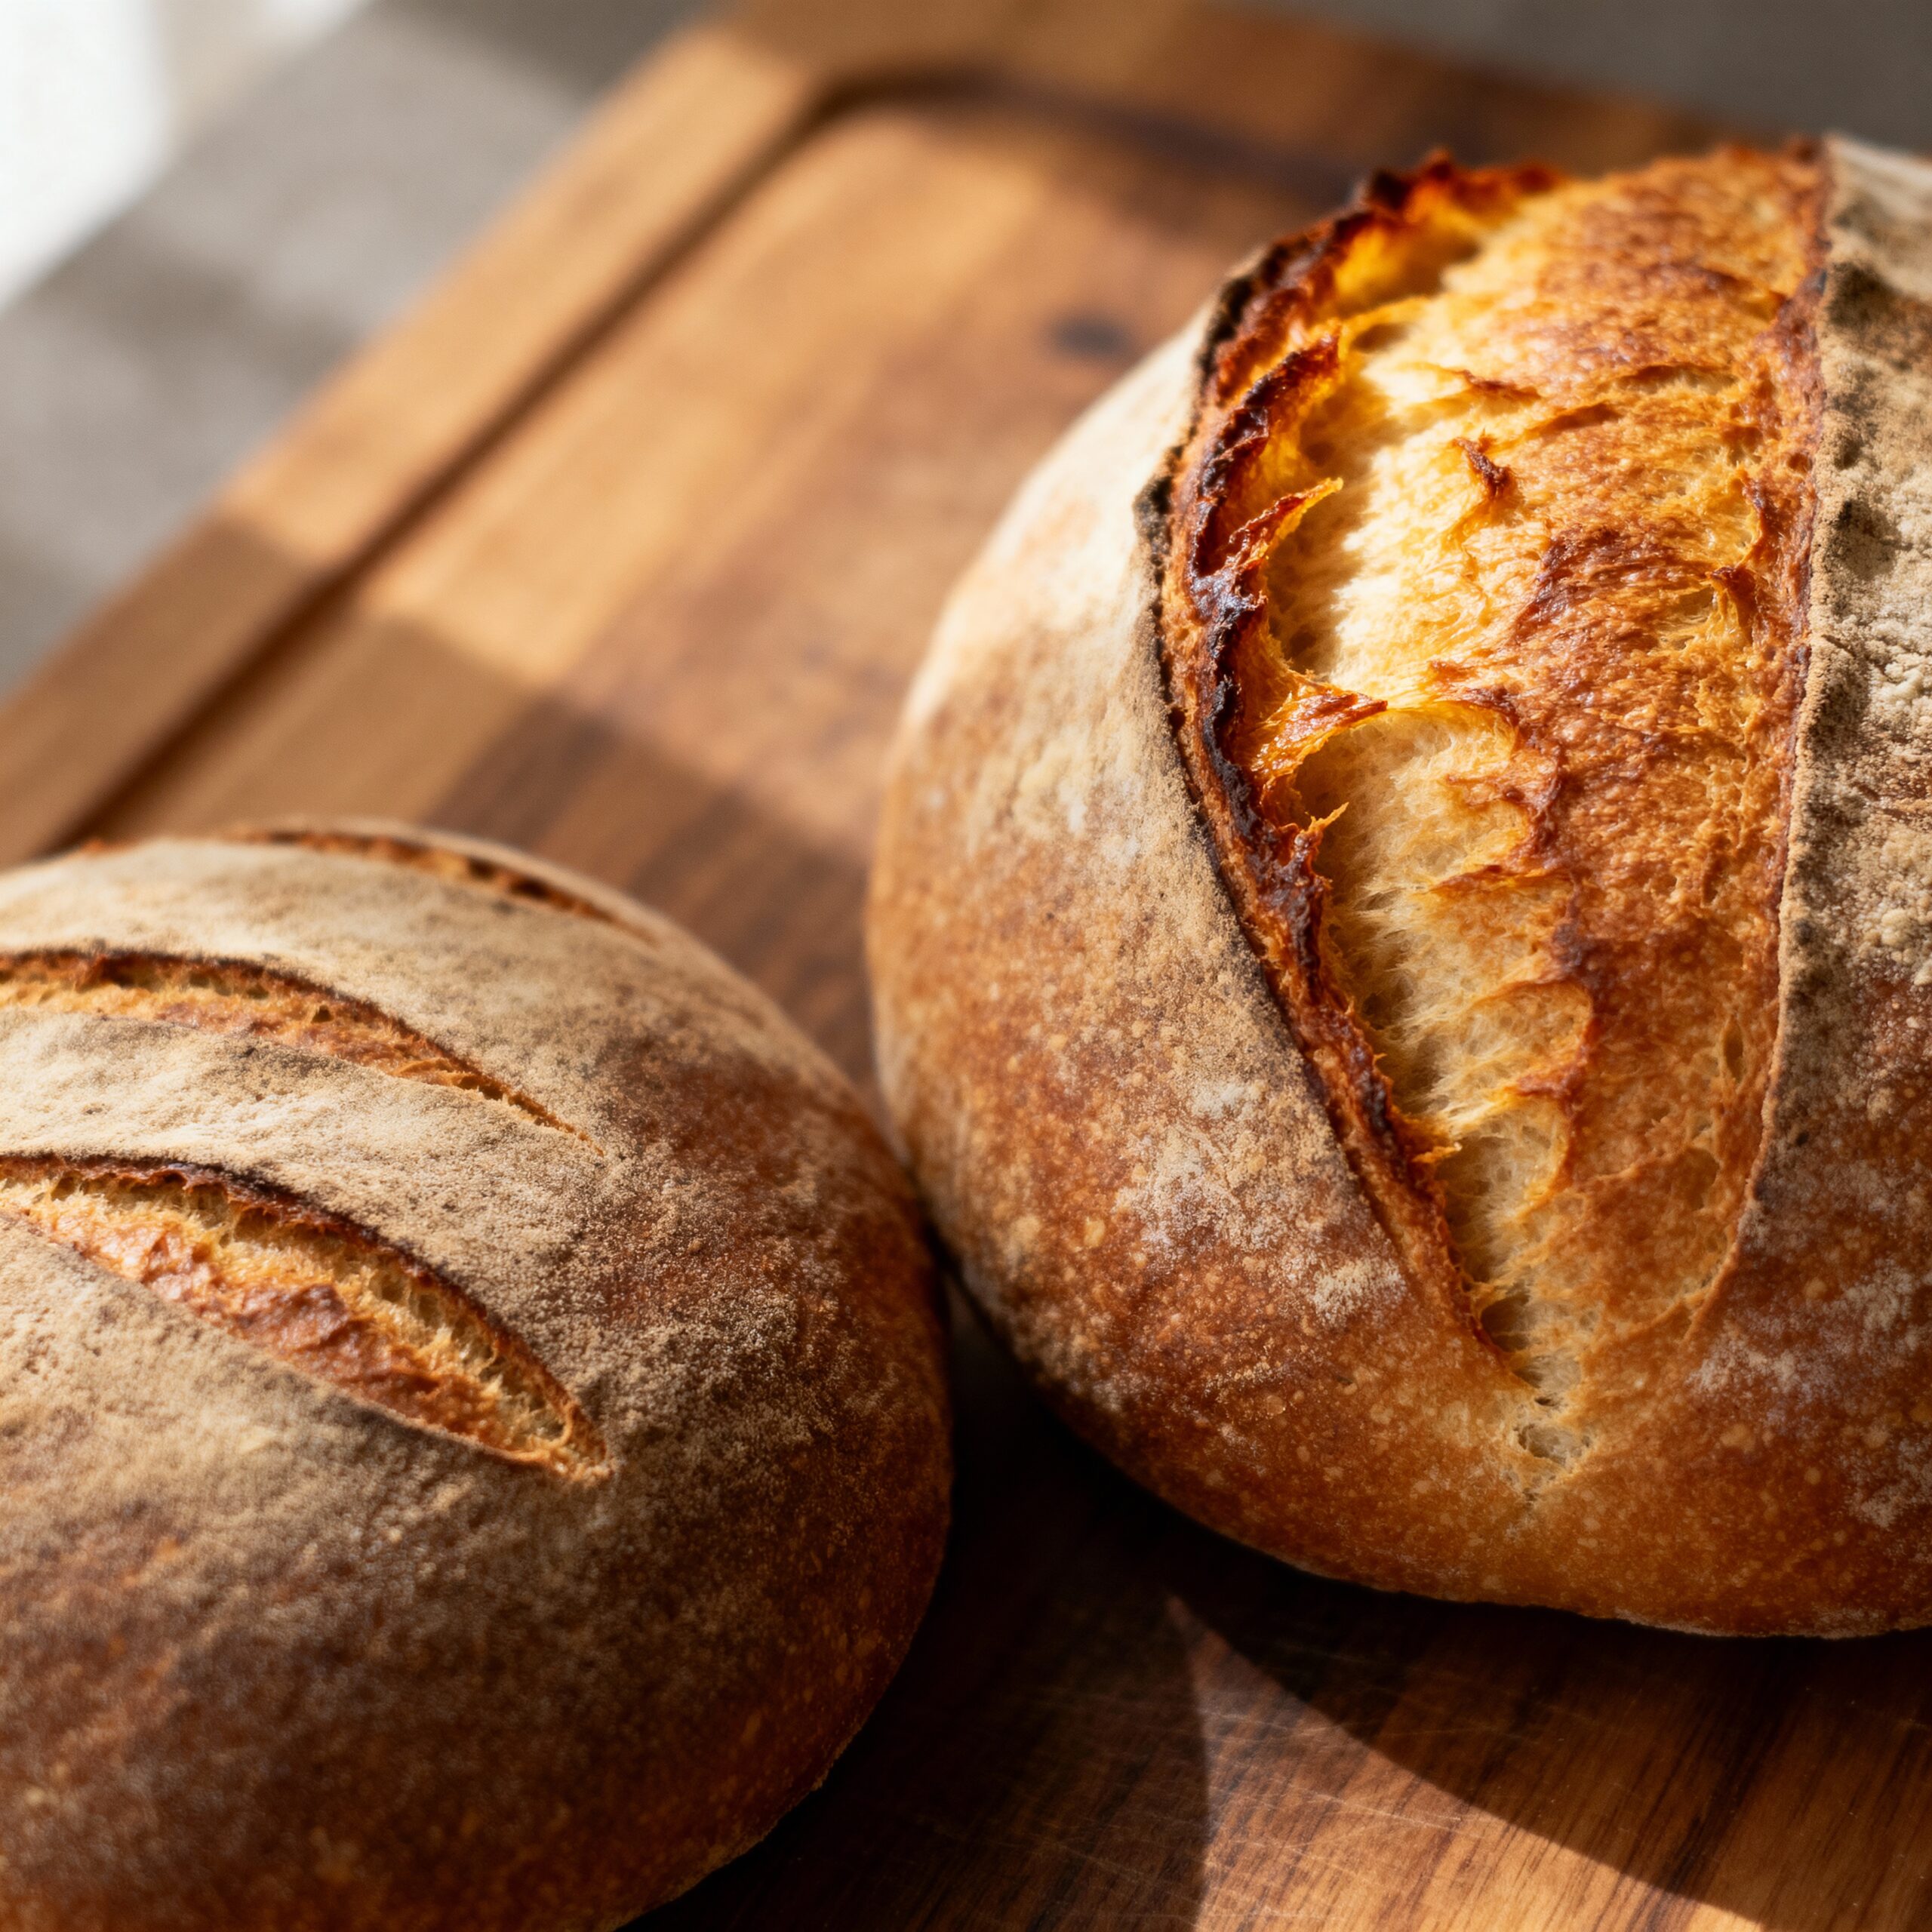
See that raised, crisp ridge running along the score once your bread’s baked? That’s the “ear,” and landing a good one ranks among the most satisfying payoffs in this whole hobby. A solid ear tells you everything lined up: fermentation, shaping, scoring, and baking all did their job.
The ear takes shape when the loaf explodes upward in the oven — what bakers call “oven spring.” Steam trapped inside the dough expands fast, and if your scoring and fermentation were on point, the bread rises precisely along that cut, forming that crisp, elevated ridge in the process.
Landing a good ear is essentially a gold star on your technique. It confirms your dough fermented properly (not over-proofed), your shaping built solid surface tension, your scoring cut was confident, and your bake had the right heat and steam. Every piece had to click into place.
That said, the ear isn’t the whole story. Plenty of loaves taste incredible without ever developing one, and certain bread styles never form an ear at all. It’s more about technique and looks than flavor. Still, there’s no denying the thrill of pulling a loaf out and spotting that dramatic ear, that clean rise, that full expansion.
I still think about the first time I nailed one. I’d been baking for months by then, turning out decent loaves, but never anything with that dramatic lift or crisp ear. Then one bake, everything just clicked — fermentation timed perfectly, shaping nice and tight, scoring confident, oven blazing hot. That loaf came out with the best ear I’d ever produced. I snapped a photo and sent it to basically everyone in my contacts. Overkill, sure, but I was thrilled.
9. That Crackly Crust You’re After? Steam Does the Heavy Lifting
A crust that shatters slightly and sings when you knock on it is one of the true pleasures of sourdough baking, and getting there comes down to a single factor: steam. Without it, you’re left with something pale and soft. With it, you get that shattering, golden-brown exterior sourdough is known for.
Here’s what happens behind the scenes: early in the bake, steam keeps the loaf’s surface pliable, giving it room to fully expand before the crust locks in place. As that steam dissipates and the surface dries out, it hardens into something crisp. That contrast — crackly shell, soft interior — is exactly what makes sourdough so good to eat.
A lot of bakers rely on a Dutch oven to hold steam in place — preheat it, drop the dough in, cover it, and bake. The steam gets trapped and creates ideal conditions for that crisp shell. You don’t strictly need a Dutch oven, though; a pan of water in the oven, a mist of water on the oven walls, or even ice cubes tossed into a hot pan can get you there too.
Timing matters more than anything. Steam needs to be present for roughly the first 20-30 minutes, then it should clear out so the crust can brown and firm up. Leave the steam in too long, and the crust stays soft. Cut it too early, and the loaf can’t expand the way it should.
I’ve watched bakers rig up elaborate steam systems — spray bottles, ice cubes, water trays, even dedicated injection setups. But honestly, the simplest option — a Dutch oven — does the job beautifully, trapping steam naturally and delivering that crackly crust without much fuss at all.
You’ll know a great crust the second you tap it — a sharp, hollow ring that confirms everything went right: proper steam, proper bake, proper fermentation all coming together. It’s a small sound, but it means a lot.
10. Make Peace With the “Ugly” Loaf — It’s a Milestone, Not a Failure
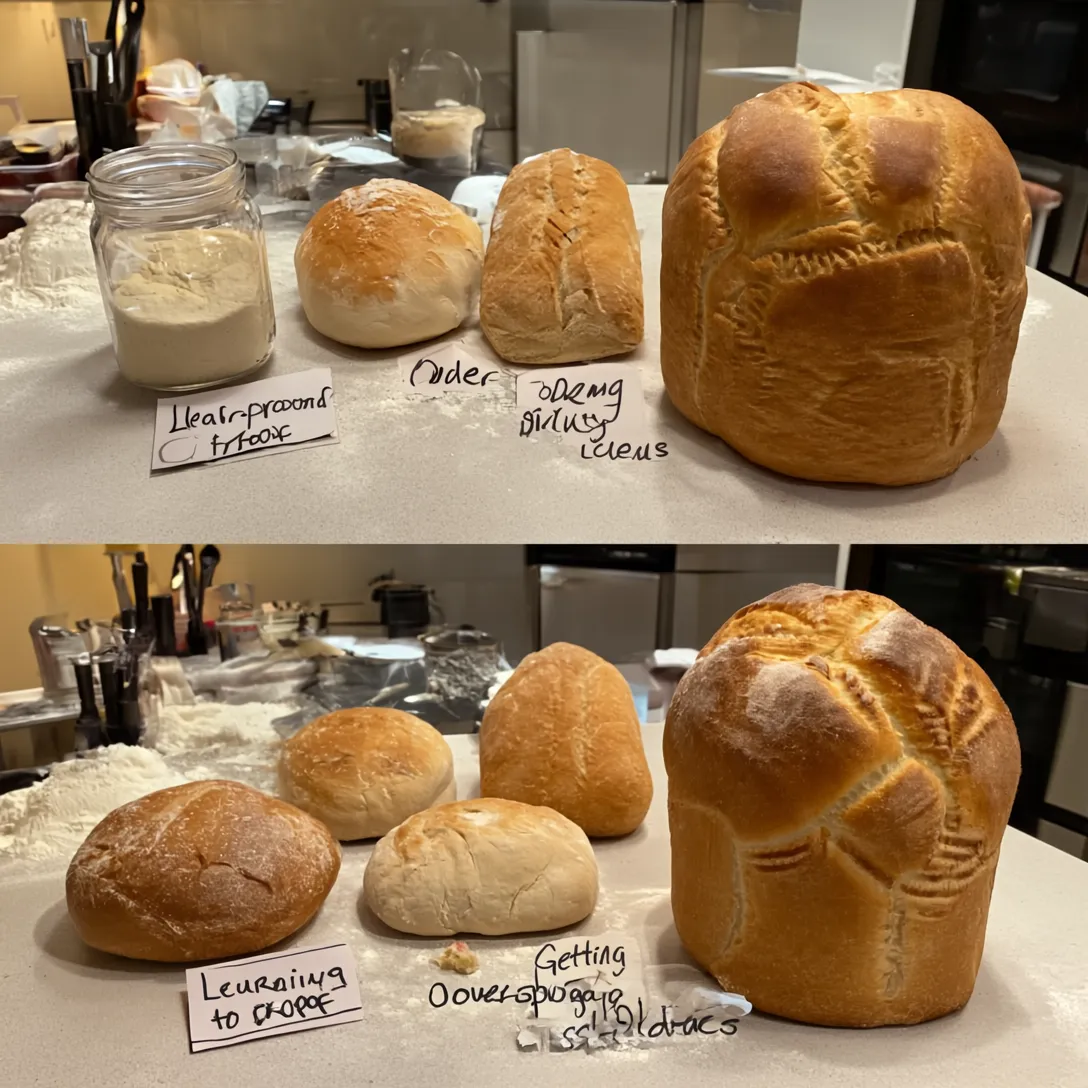
Here’s the honest reality: not every bake is going to look camera-ready. Some come out flat. Some turn dense. Some resemble abstract art in the worst possible way. Some taste fantastic despite looking rough, and some look gorgeous but taste flat. All of that is completely normal — it’s part of how you actually learn this craft.
Every baker builds up a personal gallery of “ugly” loaves over time. None of them are failures — they’re lessons in disguise. Each one flags something specific: maybe the starter wasn’t active enough, maybe the dough over-proofed, maybe the score wasn’t deep enough, maybe the oven wasn’t hot enough. Every so-called failure is really just information, and it makes your next loaf better.
I keep a photo album on my phone literally titled “Bread Fails.” It’s full of loaves that looked bad, tasted bad, or both — but I’ve also jotted down notes on what went wrong with each. That flat one? Needed a longer starter build. That dense loaf? Classic over-proofing. That scorched one? My oven runs hotter than the dial suggests. Every single “failure” taught me something worth knowing.
The trick is refusing to let those rough loaves get in your head. They’re simply part of the path. Even seasoned bakers have bad days — even the most practiced hands slip up occasionally. What separates them is knowing how to actually extract a lesson from each mistake, treating every loaf, ugly or not, as one more step forward.
And here’s the upside: even a rough-looking loaf can still be worth eating. A flat loaf can make excellent toast. A dense one turns into great breadcrumbs. An over-proofed loaf might carry surprising flavor despite its droopy shape. Don’t toss your “failures” — repurpose them into croutons, breadcrumbs, or bread pudding. No sense wasting good flour.
The path toward a great sourdough loaf twists and turns plenty. You’ll hit setbacks. You’ll produce your fair share of “ugly” loaves. But you’ll also land moments of real triumph — that perfect ear, that ideal crumb, that flavor that makes the whole process worthwhile. Those wins make every rough loaf along the way worth it.
Where This Journey Keeps Going
Sourdough is a moving target, not a finish line. There’s always something new to learn, tweak, or refine. But armed with these tips, you’re in decent shape to handle whatever your starter throws your way next — quite literally, if it decides to stage another overflow.
Keep this in mind: your starter is a living thing, a small thread connecting you to history, and a piece of your own kitchen’s unique character. Treat it well, give it a name, keep it fed, and it’ll pay you back in genuinely good bread. And when things go sideways — because they absolutely will — remember every ugly loaf is a lesson, every misstep is useful information, and every single bake pushes your skills forward.
So get out there and bake. Name that starter. Get comfortable with the float test. Score with real confidence. Make steam your ally. And above everything, don’t let the “ugly” loaves rattle you — they’re woven into your story, part of the climb, part of what actually shapes you into a sourdough baker.
Now if you’ll excuse me, I’ve got to go check on Steve. He’s due for another feeding, no doubt.
Ready to Get Your Sourdough Journey Rolling?
Want more direction? Take a look at our sourdough cookbook reviews for pointers on the best resources to lean on as you keep baking. And remember — every skilled baker started out exactly where you are now. Your best loaf is still out there, waiting on you to bake it.
Happy baking, and may your starter always float!
Why I Stopped Guessing Ratios and Got Consistent Loaves (It Was the Scale)
Starting out in sourdough, you’re basically guessing if you’re scooping flour with cups or eyeballing your water. A digital scale is what separates a loaf that actually works from one that spreads flat because your hydration was off from the start.
What works
- Measures down to 0.1 grams, so you can finally nail your exact hydration percentage instead of guessing whether 500g of flour wants 350g or 375g of water.
- The tare function zeroes out between additions, letting you build everything in a single bowl while knowing precisely how much starter went in — no more “a handful” guesswork.
- Readings are quick and stable — no sitting around for 5 seconds waiting for the number to settle, which counts for a lot when you’re feeding your starter to a specific strength.
What doesn’t
- Battery life isn’t great — mine has died mid-bake more times than I care to admit, so stash spares somewhere handy.
- The screen runs small and gets hard to read under dim kitchen lighting, especially late at night when you’ve just poured 500g of water into what was meant to be a 350g addition.
I was skeptical that a scale would actually change my baking until I realized I’d killed three starters in a row because I had no idea how much I was actually feeding them. digital kitchen scale
Frequently Asked Questions
How do I know if my starter is ready to bake with?
Use the float test: drop a small spoonful of your starter into a glass of water. If it stays on top, it’s ready to bake with. An active starter is packed with gas bubbles from yeast working through the flour, making it lighter than water. Temperature, hydration, and your starter’s quirks can occasionally throw off the result, but it’s a handy tool for beginners learning to read their starter.
What temperature does my sourdough starter prefer?
Your starter behaves like Goldilocks — conditions must be exactly right. Yeast thrives around 75-80°F, while certain bacteria prefer cooler temperatures. Too cold and yeast hibernates; too hot and it dies. Warmer temperatures make bacteria dominate, giving you sharper sourness. Consistency and understanding how your specific kitchen space influences your bakes matters most.
Why is scoring my sourdough loaf important?
Scoring controls exactly how your bread expands in the oven. Without it, steam escapes erratically, causing random cracks and odd bulges. A confident score creates a controlled release valve, letting dough rise precisely along the cut and form an “ear” — that crisp, raised ridge. Scoring also doubles as an art form, becoming part of your identity as a baker.
How do I get a crackly crust on my sourdough?
Steam does the heavy lifting. Early in the bake, steam keeps the loaf’s surface pliable, allowing full expansion before the crust locks in. As steam dissipates, the surface hardens into something crisp. A Dutch oven traps steam naturally, though a pan of water, misting, or ice cubes work too. Steam needs to be present roughly the first 20-30 minutes, then should clear out so the crust can brown.
About This Article

Written by Sam Whitaker. Sam Whitaker has been baking sourdough for over a decade, including three years baking commercially, and now works out of a home kitchen in the Pacific Northwest. Sam's eleven-year-old starter, Harold, is the foundation for every recipe and troubleshooting guide on Sourdough Rising — real bread tested over and over until it works. More about this site.
Scope and limits. Sam is a home baker with no formal culinary training. Follow current food safety guidance for storage and handling, particularly with enriched or filled doughs.
Verify this against a primary source
Specifics change, and your situation may differ from the one described here. These are the authorities worth checking directly:
- USDA FoodData Central — flour and ingredient composition data
- FoodSafety.gov — safe handling and storage