Warning: a beautiful crust tells you nothing about what’s happening inside your loaf. I learned that the hard way on a Tuesday morning, slicing into a loaf I was sure was my best yet, and watching the knife drag through a dense, gummy crumb instead of clean, open slices. Eleven years into this hobby—including a stretch of a few years where I was cranking out six to eight loaves every weekend for neighbors and friends—I had no idea what had gone wrong. Fermentation had gone exactly as planned. The crust was deep gold and crackly. The scoring bloomed the way it should. And then I cut it open and found a wreck. My family’s faces fell. Part of me just wanted to bin the whole loaf.
For the following fortnight I picked apart every possible culprit. Was my starter off? Was hydration to blame? Could the room temperature be the issue? I flipped back through years of scribbled notes, pushed bulk fermentation an extra hour, tried a different proofing routine—and none of it fixed things consistently. Then, mid-frustration, it hit me: I’d spent over ten years baking sourdough and had never once actually measured the internal temperature of a finished loaf. I’d been guessing the whole time. And that guesswork was quietly draining my flour, my hours, and my confidence as a baker.
If you’re wrestling with gummy, undercooked centers—or if you bake purely by feel the way I used to—what follows is going to shift things for you completely. The fix isn’t fancy, but it’s the kind of small change that rewires how you bake.
| Doneness Method | Reliability | Time to Result |
|---|---|---|
| Internal temperature (205–210°F) | Reliably confirms doneness | Under 1 second |
| Visual crust appearance | Let down more than once | Immediate |
| Hollow-sound tap test | Can let you down | Immediate |
Why Temperature Never Made My Checklist (Until It Had To)
Starting out as a self-taught baker before YouTube tutorials were the default way to learn something meant picking up habits that never really left. My education came from library books and plenty of trial and error. Those books preached poke tests and spring-back, trusting your hands and your gut over any gadget. Thermometers barely got a mention. In my head, thermometers belonged to roast chicken and turkey, or to bakers who apparently didn’t trust themselves enough.
I wore that instinct-only approach like a badge of honor—right up until my instincts kept failing me and I was tossing wasted ingredients in the bin.
The actual issue was that I had no reliable way to tell a genuinely finished loaf from one that merely looked done on the outside. A sourdough crust keeps hardening and setting well after the interior has actually finished cooking. So you can pull a stunning, crackly-crusted loaf from the oven that’s still raw-ish in the middle. I was consistently pulling bread the second it looked ready, never realizing the center needed another five to ten minutes of actual baking.
The Number That Changed Everything: Internal Temperature
Here’s the single fix that turned things around: paying attention to internal temperature.
So I actually did the homework—asked other bakers questions, dug into modern books on baking science, and finally bought myself a decent thermometer. Inside of a single weekend, I discovered that a properly baked sourdough loaf needs to hit somewhere between 205°F and 210°F right at its center. My gummy loaves, it turned out, were finishing at 195°F to 200°F. Those five to ten missing degrees were exactly what separated a soft, underdone crumb from one that had set properly.
Why that particular range matters: somewhere around 205°F to 210°F, the starch throughout your dough has fully gelatinized and the gluten structure has locked into place. The proteins have coagulated enough to actually hold the crumb up. Fall short of that window and you end up with a heavy, sticky, dense center. That’s not an underproofing problem—it’s a straightforward case of underbaking.
The second I started confirming internal temperature instead of trusting appearance alone, my results flipped almost overnight. Honestly, it was a little embarrassing how easy the solution turned out to be.
Checking Internal Temperature, Step by Step
This step scared me off for years, for absolutely no reason. Here’s the whole process:
- Pull the loaf once it’s reached a deep, even golden-brown all over—typically somewhere between 35 and 45 minutes, depending on your oven and how large the loaf is
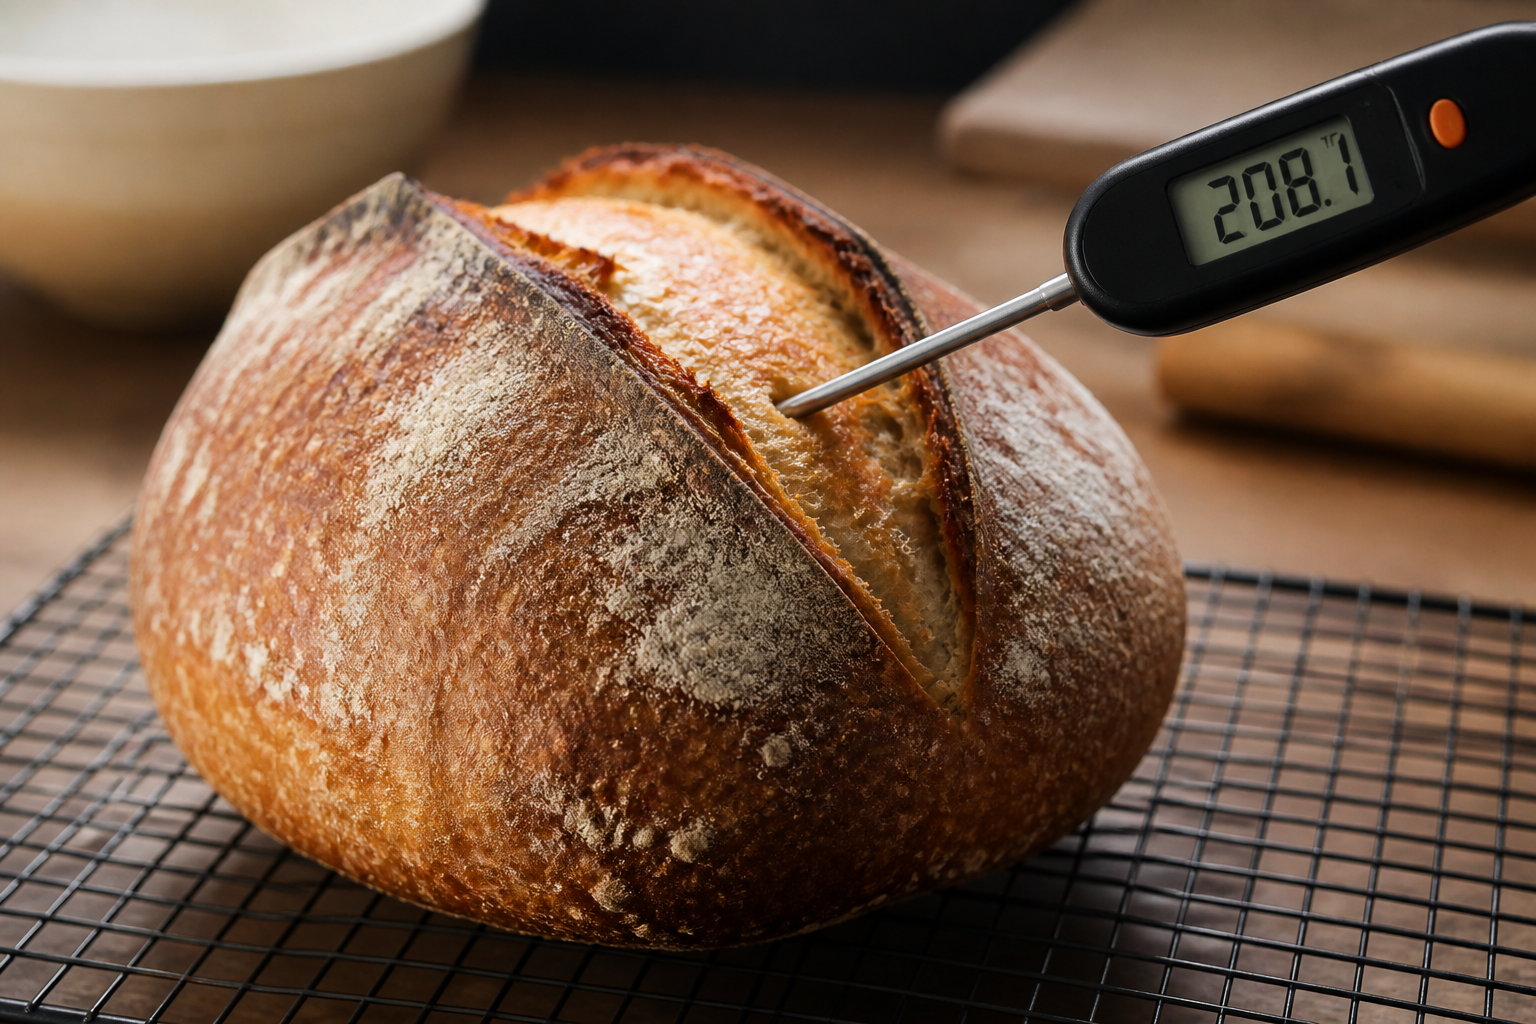
- Slide a dependable instant-read thermometer into the middle of the loaf at a slight downward angle, making sure the tip lands dead center rather than just under the crust
- Anything reading under 205°F goes back into the oven for another 3 to 5 minutes, then gets rechecked
- The moment your reading lands between 205°F and 210°F, pull it—you’re finished
That’s genuinely the whole method. The loaf comes out properly baked every time—no gumminess, no overbaking, just right.
What My Oven Taught Me Once I Started Measuring
One of the fastest lessons the thermometer taught me is that no two ovens behave the same way. I’d been using the same oven for years, but that familiarity didn’t mean I actually understood its quirks. Once I started tracking temperatures, I discovered mine was running about 15 degrees hotter than the dial claimed. That gap alone had been overbaking some loaves while leaving others undercooked, purely based on where they sat on the rack.
Suddenly I had actual numbers to work with. And real numbers meant I could diagnose problems instead of just taking wild guesses.
Thermometers I’ve Actually Put to the Test
Kitchen thermometers are not interchangeable, especially when the goal is hitting dead center on a loaf fresh from a hot oven. In the three years since this whole realization, I’ve run several models through their paces in my own kitchen. These are the ones I genuinely stand behind and still reach for.
The Thermometer That Ended My Guesswork on Doneness
A gummy crumb is almost always a sign of an underbaked interior, but for years I leaned on visual cues and the classic hollow-sound tap test—and both let me down more than once. The guessing stopped the moment I began actually measuring internal temperature.
Where It Works Well
- Gives you a center-crumb reading in under a second, so the oven door isn’t hanging open long enough to deflate your oven spring.
- The display is easy to read at a glance, even when you’re bleary-eyed and squinting at a steaming loaf under dim kitchen lighting at 6 in the morning.
- Reliably confirms the moment you’ve reached that 205–210°F window where the crumb finishes setting without the crust drying out.
Where It Falls Short
- The probe is slim enough to leave barely a pinhole, but placement still matters—get too close to the edge and the reading skews inaccurate.
- Battery life is nothing special—I’ve swapped it out twice over two years of regular baking, which is a hassle when it dies mid-bake.
I almost returned this after my first loaf still came out slightly underbaked (I’d tested at 202°F and pulled too early), but I realized the problem was user error, not the tool. Now it’s indispensable. Grab the Feinbäck Pro Instant Read Food Thermometer and stop second-guessing yourself.
Frequently Asked Questions
What internal temperature should sourdough bread reach?
A properly baked sourdough loaf needs to hit somewhere between 205°F and 210°F right at its center. At that range, the starch has fully gelatinized and the gluten structure has locked into place, allowing the crumb to set properly without gumminess.
How do I check sourdough bread doneness with a thermometer?
Pull the loaf once it’s reached deep, even golden-brown—typically between 35 and 45 minutes. Slide an instant-read thermometer into the middle at a slight downward angle, making sure the tip lands dead center. If reading is under 205°F, bake another 3 to 5 minutes and recheck.
Why is my sourdough gummy inside but looks done outside?
A sourdough crust hardens well after the interior finishes cooking, so a stunning loaf can still be raw-ish in the middle. If your loaf reads 195°F to 200°F internally, those five to ten missing degrees are what separate a soft, underdone crumb from one that’s properly set.
Can I tell sourdough doneness by tapping the bottom?
The hollow-sound tap test can let you down. Internal temperature is the reliable way to confirm doneness. An instant-read thermometer gives you a center-crumb reading in under a second without leaving the oven door open long enough to deflate your oven spring.
About This Article

Written by Sam Whitaker. Sam Whitaker has been baking sourdough for over a decade, including three years baking commercially, and now works out of a home kitchen in the Pacific Northwest. Sam's eleven-year-old starter, Harold, is the foundation for every recipe and troubleshooting guide on Sourdough Rising — real bread tested over and over until it works. More about this site.
Scope and limits. Sam is a home baker with no formal culinary training. Follow current food safety guidance for storage and handling, particularly with enriched or filled doughs.
Verify this against a primary source
Specifics change, and your situation may differ from the one described here. These are the authorities worth checking directly:
- USDA FoodData Central — flour and ingredient composition data
- FoodSafety.gov — safe handling and storage