There’s a spot on my counter, just to the left of the stove, where my dented steel mixing bowl always lives — and one particular evening it held a dough I’d thrown together in a rush, certain that autolyse was a fussy extra step “real bakers” didn’t need to bother with because I was already late for a dinner party. I dumped flour, water, starter, and salt in together all at once, plopped it in that same bowl, and watched it sit there for four hours, dense and unyielding, refusing to do anything useful. My guests ended up with store-bought crackers instead of bread. What I got instead was a hard lesson about shortcuts I hadn’t earned the right to take. Later that night, nursing a glass of wine next to my flat, sad loaf, I finally sat down and actually researched the autolyse sourdough science I’d been brushing off for months. Fair warning: it rewired how I bake entirely.
Autolyse, Broken Down Plainly
Autolyse (you say it “AW-toh-lyze”) sounds fancier than it is: combine flour and water, then leave it completely alone for somewhere between 20 minutes and a full hour before your starter and salt ever enter the picture. There’s no kneading involved, no stretching, no hovering over the bowl. Just a quiet mixture of flour and water resting while you sip your coffee.
Despite how unimpressive that sounds, this short pause transforms your dough in ways that genuinely matter. French baker Raymond Calvel brought the method into wider use back in the 1970s, and home bakers have been reaping the benefits ever since. But knowing the mechanics behind why it works turns you into a baker who understands dough, not just one who follows steps blindly. So let’s get into what’s actually taking place inside that bowl.
What’s Actually Occurring Inside That Resting Dough
Water Meets Flour: Gluten Starts Building
The instant flour and water touch, two proteins tucked inside the flour, glutenin and gliadin, begin soaking up moisture and linking together. That linking is gluten formation, and it doesn’t happen instantly — it needs time to develop properly. Skip autolyse and mix everything in one go, and you’re forcing along a process that naturally prefers to happen gradually. Dough that’s been given a proper rest builds a gluten network that’s more orderly and stretchier, far easier to handle than gluten that’s been muscled into existence through hard mixing.
It’s a lot like letting butter warm up before creaming it. Sure, you could hammer cold butter until it gives in, but there’s no reason to. Giving something the chance to reach the right condition first just makes the whole job smoother and the outcome noticeably better.
Enzymes Quietly Doing the Work
This is the piece that genuinely surprised me once I finally looked into it. Flour naturally carries enzymes — proteases and amylases among them — and during autolyse, those enzymes start functioning on their own. Proteases loosen up some of the protein bonds within the flour, leaving the dough looser and more pliable. Amylases meanwhile convert damaged starch molecules into sugars that will eventually fuel your starter once fermentation begins. Essentially, your dough is handling groundwork on its own, before the starter even joins the mix.
That’s the reason a properly autolysed dough tends to feel almost smooth compared to a dough that skipped this rest entirely. Those enzymes have already been quietly untangling and rearranging things on a microscopic level. The payoff is less fighting the dough, more stretch, and a stronger final structure once it’s baked.
How Moisture Spreads Through the Dough
Flour doesn’t soak up water uniformly the second they meet. Autolyse gives water the time it needs to work its way completely through every flour particle, reaching all the way to the starch at the core instead of just wetting the surface. What you end up with is dough that’s evenly hydrated throughout and far more predictable to handle. On my failed dinner-party loaf, skipping this step meant I was working with unevenly hydrated dough — and that inconsistency throws off fermentation, texture, and how much the loaf rises in the oven, all at the same time. It’s no surprise it turned out like a brick.
How to Actually Nail Autolyse in Practice
Now that the underlying reasoning makes sense, here’s how to put it to use without turning your baking day into a science experiment.
- Stick to just flour and water. Hold off on adding starter or salt while autolyse is happening. Salt firms up gluten structure and slows down enzyme activity, which undermines the whole point of this rest. Starter brings acidity into the mix that also disrupts the gentle enzymatic action you’re trying to encourage. Keep the combination minimal — flour, water, and patience.
- Somewhere between 20 and 60 minutes works best for most bakers at home. Whole grain flours and high-protein flours do better with a shorter window (20 to 30 minutes) since they absorb water quickly and their proteins react faster. Lower-protein all-purpose flour can handle a longer rest, up to the hour mark. Push past 90 minutes, though, and you risk letting enzyme activity run too far, which can actually break down gluten structure rather than build it.
- Keep your bowl covered. This stops a dry skin from forming across the top of your dough. A damp towel, a lid, or even a plate set on top does the job just fine.
- Pay attention to how warm your kitchen is. Higher temperatures speed up enzyme activity, so shorten your autolyse time in the summer months. A cooler kitchen slows the process down naturally, giving you more room to stretch the timing.
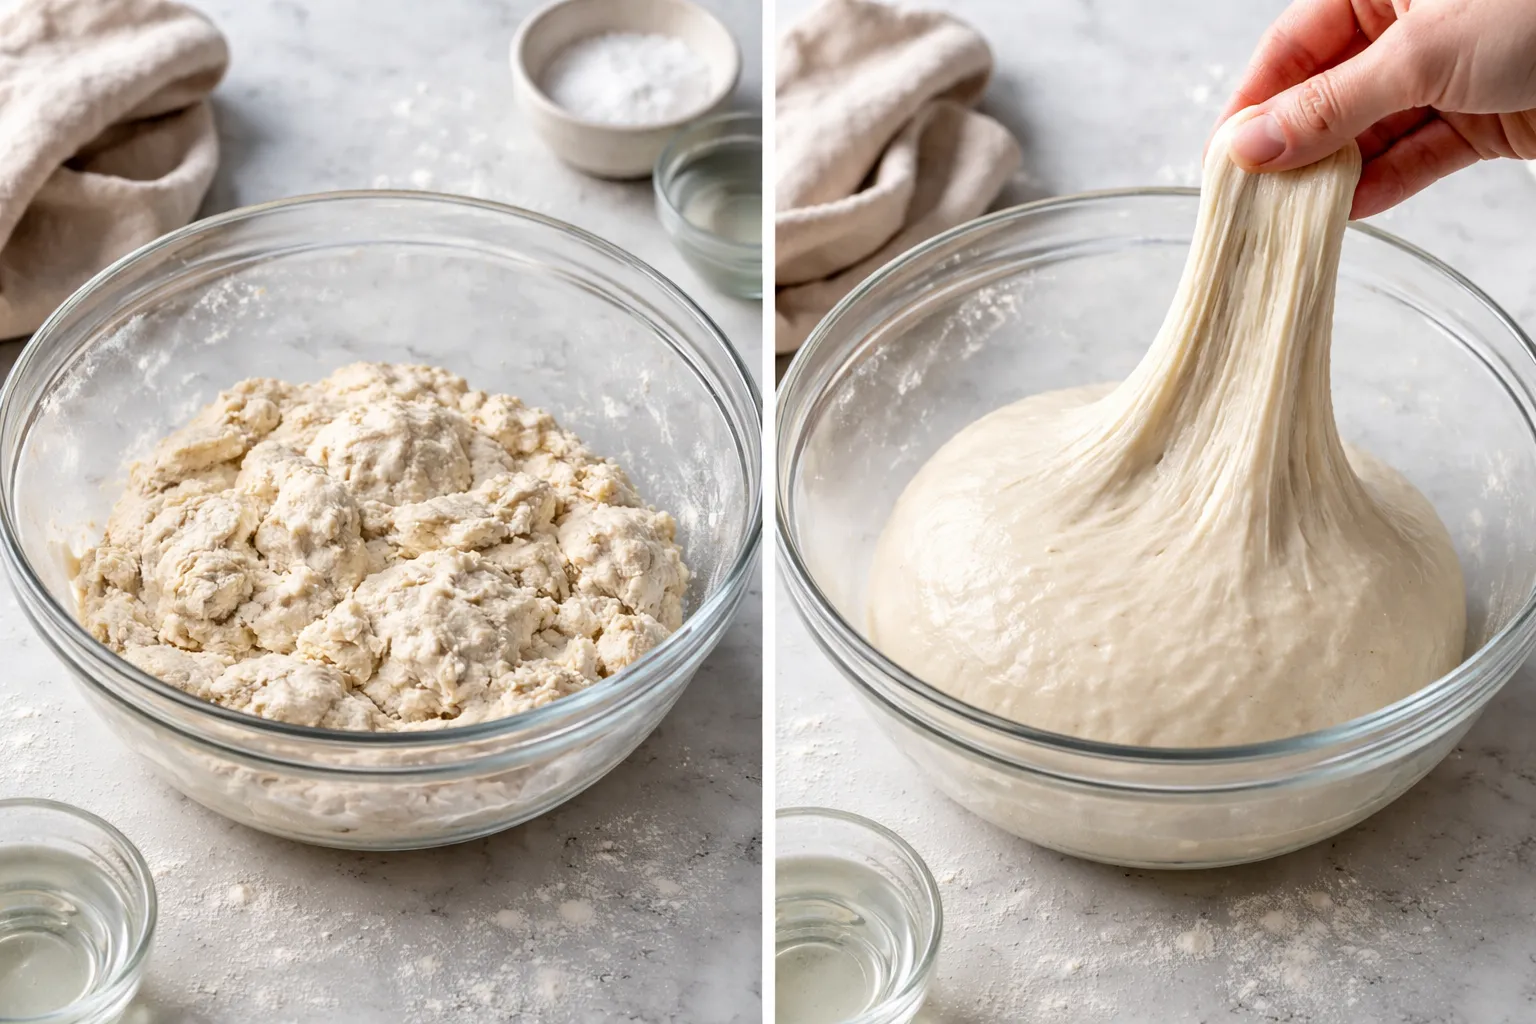
- Expect a rough, shaggy texture at the start and a smoother one by the end. That change in appearance is the clearest sign the autolyse has done its job. If nothing has really shifted visually, let it rest another 10 minutes before moving on.
Why Your Bowl Choice Determines Whether You Can See Autolyse Happening
During autolyse, you’re essentially watching flour slowly take on water while gluten quietly organizes itself — but that’s only useful information if your bowl actually lets you see it. A see-through glass bowl with straight sides means you can track the dough’s progress without constantly peeling back the cover and interrupting the whole process.
Where it earns its keep
- Clear glass sides let you actually witness the flour absorbing water and the dough pulling together — you’ll notice the rough, shaggy mixture turning cohesive right around the 20-minute mark, no guesswork required.
- Because the sides are straight, scraping the bowl clean once autolyse ends doesn’t send flour everywhere, and you can spot dry, unmixed patches clinging to the edges immediately.
- Having a full set on hand means you won’t be stuck scrubbing a bowl between the autolyse stage and bulk fermentation — you can keep feeding your starter or getting your next loaf started without breaking your rhythm.
Where it falls short
- Glass offers zero insulation, so in a chilly kitchen, autolyse will stretch past the 30 minutes you had in mind — go by how the dough actually behaves, not just what the timer says.
- These bowls carry real heft compared to plastic ones, which barely registers until you’re scrubbing a dozen of them after baking three loaves in one day and your wrists start complaining loudly.
I told myself once that I’d set a timer and leave the dough alone during autolyse instead of watching it — and then caught myself lifting the lid every few minutes anyway. Switching to a clear bowl killed that urge completely and ended up saving me real time. If you actually want to see this process instead of just trusting the clock, grab the Viking Mixing Bowls Set.
Frequently Asked Questions
What should I combine during autolyse before adding starter?
Combine only flour and water during autolyse, then leave it alone for 20 minutes to an hour. Hold off on adding starter or salt—salt slows enzyme activity and starter’s acidity disrupts the enzymatic action you’re trying to encourage during this rest.
How long should autolyse take for all-purpose flour?
All-purpose flour can handle an autolyse up to the hour mark. Whole grain and high-protein flours work better with a shorter 20 to 30 minute window since they absorb water quickly and their proteins react faster than all-purpose flour does.
What happens if autolyse goes longer than 90 minutes?
Push past 90 minutes and you risk letting enzyme activity run too far, which can actually break down gluten structure rather than build it. Stick to somewhere between 20 and 60 minutes for best results in your home kitchen.
Why use a clear glass bowl for autolyse?
A see-through glass bowl with straight sides lets you track the dough’s progress without constantly peeling back the cover. You’ll notice the rough, shaggy mixture turning cohesive around the 20-minute mark, and straight sides let you spot any dry, unmixed patches immediately.
About This Article

Written by Sam Whitaker. Sam Whitaker has been baking sourdough for over a decade, including three years baking commercially, and now works out of a home kitchen in the Pacific Northwest. Sam's eleven-year-old starter, Harold, is the foundation for every recipe and troubleshooting guide on Sourdough Rising — real bread tested over and over until it works. More about this site.
Scope and limits. Sam is a home baker with no formal culinary training. Follow current food safety guidance for storage and handling, particularly with enriched or filled doughs.
Verify this against a primary source
Specifics change, and your situation may differ from the one described here. These are the authorities worth checking directly:
- USDA FoodData Central — flour and ingredient composition data
- FoodSafety.gov — safe handling and storage