“How do you pull off fresh bread on a Tuesday when you’re at a desk all day?” A friend asked me that at a farmers market a few years back, and I didn’t have a tidy answer ready. For my first two years of sourdough, I only baked on weekends — that was just how everyone said to do it. Start a levain Friday night, mix Saturday, bake Saturday afternoon or Sunday. Tidy, contained, low-stress. And that setup works fine if your calendar cooperates.
Mine quit cooperating once I began turning out much larger volumes for neighbors and friends on a weekly basis. Suddenly Monday, Wednesday, and Friday all needed finished loaves waiting. I had to build a sourdough baking schedule weekday version — one that didn’t demand midnight mixing sessions or 4 a.m. alarms every single time. Across three years of shaping 40 to 60 loaves a week from my home kitchen, I reworked my whole approach around ordinary work hours. What follows is where that process landed.
None of this is hypothetical. It’s the routine I actually ran, tweaked over hundreds of bakes, and it’s still what I reach for whenever I want bread mid-week without upending my life.
Why People Assume Weekday Sourdough Is Hard — And Where That Idea Falls Apart
There’s a persistent idea floating around that sourdough belongs on weekends because it demands constant babysitting. That’s simply wrong. What sourdough actually asks for is attention at the right moments, not attention nonstop. Bulk fermentation and the cold proof are almost entirely hands-off stretches. The parts that truly need you there are feeding the starter, mixing the dough, shaping it, and baking it — realistically about 90 minutes of hands-on effort split across two days.
The whole game is placing those 90 minutes into windows you’re actually around for. If you work a typical daytime job, that usually looks like prepping Sunday evening, mixing Monday morning or night, and baking Tuesday evening — or some shifted variation of that. Below is the exact version I lean on.
My Go-To Weekday Timeline: From Sunday Night to Tuesday’s Bake
Sunday Night: Wake Up the Starter (About 5 Minutes)
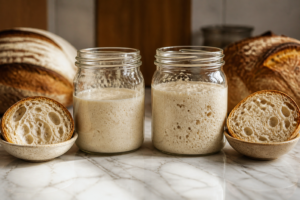
Between bakes, my starter lives in the fridge. Sunday evening, I take it out and give it a 1:5:5 feed — 20g starter, 100g flour, 100g water — using a roughly 90/10 blend of bread flour and whole wheat. That balance produces a strong, dependable rise without blowing past its peak overnight.
Come Monday morning, after sitting 8 to 10 hours at room temperature (my kitchen hovers around 68–70°F), the starter has crested and is ready to go. I never mix dough with a starter that hasn’t obviously peaked — domed surface, at least doubled in size, and it floats. If yours isn’t hitting that mark reliably overnight, tweak your ratio or reconsider your flour.
Monday Evening: Mixing, Autolyse, and Kicking Off Bulk (45–60 Active Minutes)
This evening carries the whole schedule on its back. I get home around 6 p.m. and go straight into mixing. Here’s how the hours actually break down:
- 6:00 p.m. — Mix flour and water together, let it autolyse for 30–45 minutes
- 6:45 p.m. — Work in the levain and salt, hand-mix using the Rubaud method for about 5 minutes
- 7:00–9:30 p.m. — Bulk ferment with 4 rounds of stretch-and-fold, spaced every 30 minutes across the first two hours
- 9:30 p.m. — Pre-shape, let it rest on the bench 20 minutes, final shape, then straight into the fridge
From there the dough sits in the refrigerator for a 14- to 18-hour cold retard. This single step is what makes the whole weekday plan hold together. Retarding overnight in the cold hands you full control over your bake time — no more racing a room-temperature dough against the clock.
Worth flagging: how long bulk fermentation actually takes depends heavily on your kitchen’s temperature and how vigorous your starter is. Around 70°F with a robust starter, 2.5 to 3 hours generally does it for a 20% levain dough aiming for roughly 50–60% rise during bulk. A colder room or a younger starter means adding more time. I trust what the dough looks and feels like over what my watch says, every time.
Tuesday Evening: Bake Day (30–35 Active Minutes)
I heat my Dutch oven at 500°F for a solid 45 minutes ahead of baking — I won’t skip this. Cast iron needs longer than most people give it to fully soak up heat. Score the loaf, load it, bake covered at 500°F for 20 minutes, then uncover, drop the oven to 450°F, and finish for another 20–25 minutes.
That loaf coming out of the oven Tuesday evening began its life Sunday night. Two full days, nearly all of it unattended, with real effort limited to evenings when I’m home anyway.
Working the Cold Retard to Buy Yourself Wiggle Room
One of the sharpest lessons from those heavy-volume weeks: the cold retard is basically a scheduling escape hatch. A shaped dough sitting at 38°F in the fridge will typically hold, without meaningfully overproofing, for 18 hours and sometimes as long as 24. So if Tuesday falls apart on you, baking Wednesday morning before work — or Wednesday night — is still completely on the table.
I’ve pulled loaves after a 36-hour retard that turned out excellent, arguably some of the best-tasting bread I’ve made. Stretching the cold fermentation out builds more acidity and depth of flavor. Tom Cucuzza over at The Sourdough Journey has written up similar findings with extended retards, and what I’ve seen in my own kitchen matches his.
One thing I’d steer you away from: retarding a dough that hadn’t finished bulk properly. The fridge slows things down — it doesn’t rescue a dough that needed more time on the counter. Nail bulk fermentation first; the cold is just extra time on the back end.
Keeping a Starter Alive on a Weekday Rhythm
If you’re only baking once or twice a week on weeknights, your starter belongs in the fridge, fed 8 to 12 hours before you plan to use it. I feed mine every 5 to 7 days during a regular baking stretch — not daily. There’s no real science behind daily feeding for a refrigerated starter; it’s a habit that mostly wastes flour and stresses people out for no reason.
My starter is 11 years old at this point. I’ve forgotten about it for two-week stretches and it’s bounced right back with a single feeding. Starters that have been around a while are tougher than most baking advice gives them credit for.
Gear I Actually Reach For
After years of baking in bulk, I’ve gotten opinionated about my containers. Here’s the setup I genuinely use:
For individual dough batches and starter storage, I rely on Cambro Food Storage Containers with Lids (BPA-Free) – 4 Quart – Food Grade Buckets with Lids (2 Pack). Cambro is what commercial kitchens use — they’re durable, the markings stay legible, and the translucent walls let you actually see your dough rise without opening the lid. I went through cheap plastic containers before switching and I haven’t looked back.
For bigger batches or when I’ve got several doughs going at once, I reach for the Brod & Taylor Proofing Container with 6L Capacity, Fits Up to 3000 Grams of Dough. That larger 6-liter size earns its keep — you can bulk-ferment a doubled batch in one tub and still watch exactly what’s happening inside. It’s dishwasher-safe, BPA-free, and holds up over time.
If you’re the type of person who thinks better on paper (I am, even now), The Simple Sourdough Bread Baking Schedule Planner by Caterina Milano is a genuinely useful tool for mapping out your weekday baking timeline. I wish something like this had existed when I was first scaling up my bakes — I used a lot of scrap paper and sticky notes that didn’t survive contact with wet hands.
A Necessary Word of Caution
This routine holds up consistently for me because my kitchen sits between 68°F and 72°F most of the year. If yours runs warmer — think 76°F or higher in summer — bulk fermentation will move quicker, and you’ll likely need to trim it back or shift the dough into the fridge sooner. Temperature is the biggest variable in this whole craft, and no fixed schedule survives an unadjusted 78°F kitchen. Pick up a probe thermometer. Learn how your own kitchen behaves. Treat this schedule as a starting framework, not a rulebook.
Bending This to Fit Your Own Week
Sunday-Monday-Tuesday is simply what lines up with my life. Yours might call for Tuesday-Wednesday-Thursday instead, or a Monday-night mix followed by a Wednesday bake. The underlying logic never changes: feed the starter the night before, mix that evening, let the cold retard carry the dough overnight and into the following day, then bake the next evening.
Sourdough works around a weekday life once you quit wrestling the fermentation timeline and start letting it do the work for you. The cold retard isn’t a workaround — it’s an actual tool. Once that clicked for me, baking on weeknights stopped feeling like a mad dash and started feeling like a routine I could rely on. Eleven years in, having fresh sourdough ready on a Tuesday feels as ordinary to me as cooking dinner. It can be that ordinary for you too.
| Stage | Time | Duration | Temperature |
|---|---|---|---|
| Starter feed | Sunday evening | 5 minutes | 68–70°F |
| Starter peak | Monday morning | 8–10 hours after feed | 68–70°F |
| Autolyse | 6:00–6:45 p.m. Monday | 30–45 minutes | Room temperature |
| Bulk fermentation | 6:45–9:30 p.m. Monday | 2.5–3 hours (4 rounds S&F) | 70°F |
| Cold retard | 9:30 p.m. Monday–Tuesday evening | 14–18 hours | 38°F |
| Bake | Tuesday evening | 40–45 minutes total | 500°F then 450°F |
The Containers That Finally Kept My Multiple Doughs Straight
Baking on weeknights usually means juggling several doughs at once — a levain chilling in the fridge, a bulk ferment going on the counter, another dough shaped and waiting its turn. Without containers that were clearly marked and dedicated to a single job, I kept losing track of which dough was which and how far along each one actually was.
What earns its place
- The 4-quart size fits a full bulk batch without cramping it, and the clear sides let me track fermentation progress by eye instead of popping the lid every 20 minutes.
- I can stack several of these in the fridge without them sliding, and the tight-fitting lids keep fridge odors from getting into the dough — or the dough smell from spreading through the fridge.
- They’re inexpensive enough that I’ve bought four, so there’s always a clean one on hand — no scrambling to wash a container between Monday’s batch and Wednesday’s.
Where they fall short
- After several months of swinging between a warm counter and a cold fridge, the lids warp just slightly and stop sealing quite as snugly as they did new.
- The plastic marks up easily if your dough scraper isn’t gentle with it, and over time that makes it harder to see through the sides clearly.
I almost ditched these containers after the lids started warping, convinced I needed something more expensive, but honestly they still work fine for a home baker on a real schedule. If you’re balancing weekday baking around actual work, grab the Cambro Food Storage Containers with Lids (BPA-Free) – 4 Quart – Food Grade Buckets with Lids (2 Pack).
Frequently Asked Questions
Can you really bake sourdough on weeknights with a day job?
Yes. Sourdough needs attention at specific moments, not constantly. You need about 90 minutes of hands-on work split across two days—feeding your starter, mixing, shaping, and baking. A cold retard overnight lets you control your bake timing, making weeknight baking fit around regular work hours.
How long can dough stay in the fridge before baking?
A shaped dough at 38°F typically holds for 18 hours without overproofing, and sometimes as long as 24 hours. Sam has pulled loaves after a 36-hour retard with excellent results. Extended cold fermentation actually builds more acidity and depth of flavor.
How often should I feed my refrigerated sourdough starter?
Feed it every 5 to 7 days during regular baking stretches, not daily. Sam feeds his 11-year-old starter this way and has even forgotten about it for two-week stretches—it bounced back with a single feeding. Daily feeding mostly wastes flour without benefit.
What temperature does your kitchen need to be for this schedule?
Sam’s kitchen sits between 68°F and 72°F, which works well for his timeline. Warmer kitchens around 76°F or higher will speed up bulk fermentation, requiring you to trim time or refrigerate sooner. Temperature is the biggest variable—use a probe thermometer and treat this schedule as a framework, not a rulebook.
About This Article

Written by Sam Whitaker. Sam Whitaker has been baking sourdough for over a decade, including three years baking commercially, and now works out of a home kitchen in the Pacific Northwest. Sam's eleven-year-old starter, Harold, is the foundation for every recipe and troubleshooting guide on Sourdough Rising — real bread tested over and over until it works. More about this site.
Scope and limits. Sam is a home baker with no formal culinary training. Follow current food safety guidance for storage and handling, particularly with enriched or filled doughs.
Verify this against a primary source
Specifics change, and your situation may differ from the one described here. These are the authorities worth checking directly:
- USDA FoodData Central — flour and ingredient composition data
- FoodSafety.gov — safe handling and storage