The jar on my counter smelled sharp and boozy, almost like nail polish, and the surface sat completely flat — not a bubble in sight. That smell is what sent me down the “why is my sourdough starter not bubbling” rabbit hole at midnight, and this sourdough for beginners complete guide is what I wish had existed back then. Eleven years ago, I killed my first starter twice, produced one truly horrifying dense brick I still call “the incident,” and came close to quitting for good. These days I bake two to three loaves a week, and Harold — my eleven-year-old rye starter — lives in the fridge like a beloved, slightly funky houseplant. Going from clueless beginner to someone who bakes with confidence is entirely doable. You just need someone willing to tell you the truth about what actually matters.
Most beginner sourdough guides skip straight over the messy, confusing middle stretch. They show you a stunning ear on a picture-perfect loaf and conveniently leave out the part where your dough is a sticky disaster at 11pm. I won’t do that here. This guide walks through the whole thing: building a starter from nothing, understanding how fermentation actually works, baking your first real loaf, and troubleshooting the stuff nobody warns you about. Expect real numbers, real timelines, and no sugarcoating.
Save this page. You’ll want to return to it more than once. That’s exactly what it’s for.
So What Exactly Is Sourdough?
Sourdough gets its lift from wild yeast and lactic acid bacteria — not the commercial yeast that comes in a packet. That living culture is your starter, and it’s doing three jobs at once: fermenting the dough, driving the rise, and building the tangy, complex flavor sourdough is known for. The mechanics are pretty elegant once you see them: Lactobacillus bacteria churn out lactic and acetic acids, while wild yeasts release the carbon dioxide that puffs your dough up. These two microbial populations coexist in a kind of balance, and as the baker, your whole job is keeping that balance steady.
This distinction matters because sourdough isn’t just a tweaked recipe — it’s an entirely different way of working. Commercial yeast moves fast, behaves predictably, and forgives a lot of sloppiness. Wild fermentation is slower, reacts to your environment, and pays back close attention. From what I’ve seen, the bakers who struggle hardest at the start are the ones trying to rush sourdough the way they’d rush a packet-yeast dough. Things clicked for me the second I stopped forcing the process and started actually watching it instead.
Here’s the honest part: sourdough demands patience. Expect 7 to 14 days before your first starter becomes reliably active, and 24 to 36 hours from start to finish on your first bake. Both of those are normal — that’s simply the nature of the craft. And the payoff, in flavor, texture, and sheer satisfaction, more than earns the wait.
Building a Sourdough Starter From Nothing
Everything downstream depends on your starter, so nailing this part makes the rest of the process far less painful. The good news is you only need two ingredients: flour and water. Nothing else. If you’ve already got a jar sitting around, this costs you basically nothing to begin.
Before anything else, get yourself a dedicated jar — trying to track your starter’s rise in a random leftover container is a headache you don’t need. The INOBYO Sourdough Starter Jar Kit, 24 oz Wide Mouth Sour Dough Jars Glass is a solid pick for beginners because the wide mouth makes feeding and stirring genuinely easy, and the 24 oz size gives your starter plenty of room to double without overflowing onto your counter.
Supplies to Have on Hand
- A clean glass jar, at least 500ml in size
- Whole wheat or whole rye flour to kick things off on Day 1 (the bran brings its own wild yeast to the party)
- Unbleached all-purpose or bread flour for every feeding after that
- Filtered water, or tap water left at room temperature (chlorine can slow fermentation down)
- A digital kitchen scale — weighing is way more dependable than measuring by volume
A Day-by-Day Feeding Timeline
This is the exact rhythm I follow whenever I’m starting a brand-new culture. Find a warm spot for the jar — somewhere between 70°F and 78°F (21°C–26°C) works best. My kitchen gets cold in winter, so I park the jar in the oven with only the light bulb switched on.
- Day 1: Combine 50g whole wheat flour with 50g lukewarm water. Stir it hard. Cover it loosely and set it at room temperature.
- Day 2: Scoop out everything but 50g of the mixture. Mix in 50g all-purpose flour and 50g water, stirring thoroughly.
- Days 3–5: Keep repeating that same 1:1:1 discard-then-feed cycle every day. Bubbles might show up around Day 3, but hold off on celebrating — that’s frequently just Leuconostoc bacteria putting on a false show, not stable wild yeast yet.
- Days 6–10: Keep feeding it once or twice a day. What you’re watching for is a dependable doubling in size within 4 to 8 hours of each feed — that’s your real sign of progress.
- Day 10–14: Once it doubles consistently, passes the float test (a spoonful floats when dropped in water), and gives off a pleasantly tangy smell, it’s ready for baking.
Harold hit that reliable stage on Day 11, and I remember feeling absurdly proud of a jar of goo. Don’t cut corners on the discard step — skipping it lets the culture turn overly acidic and can smother the yeast.
Making Sense of Feeding Ratios
Feeding ratios trip up nearly every new baker. Here’s the boiled-down version: a ratio expresses starter to flour to water, by weight. A 1:1:1 ratio means equal weights of all three. A 1:5:5 ratio means you’re giving the culture five times more flour and water than starter. Bump the ratio up and you’re feeding it more, which stretches out fermentation; lower the ratio and fermentation speeds up because there’s less food to work through.
For someone just starting out, I’d suggest a 1:1:1 ratio, fed once a day if your kitchen sits at room temperature, or twice a day if it runs warm. It’s simple, and it builds a rhythm you can count on. That consistency lets your starter behave predictably, and you start to learn its own internal clock — which turns out to matter a lot once you begin baking.
If you’re baking often, leave the starter out on the counter. If you’re baking once a week or less, tuck it in the fridge and feed it weekly. Cold slows fermentation way down — Harold once went three weeks in the fridge untouched during a family trip and came back completely fine. Your starter can take more neglect than you’d guess.
Signs of a Thriving Starter (Sight and Smell)
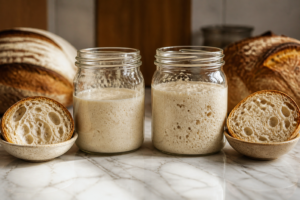
A starter in good shape is bubbly all the way through, doubles like clockwork, and smells like yogurt or a faintly tangy beer. You might notice a liquid layer sitting on top — that’s “hooch” — if it’s gone a while without a feed. Hooch shows up grey or clear and smells strongly of alcohol; it just means the starter’s hungry. Either tip it off or stir it back through, then feed as usual — nothing’s wrong. But if you spot pink, orange, or fuzzy patches, that’s mold, full stop. Toss the entire batch and start fresh rather than trying to rescue it.
Your First Sourdough Bake, Walked Through Start to Finish
Once your starter’s active and ready, the real fun begins. Below is the process I rely on for a simple, open-crumb country loaf — the exact one behind my first genuinely successful bake.
What Goes Into One Loaf
- 450g bread flour (look for 12–13% protein)
- 325g water (roughly 72% hydration — a manageable level for a first attempt)
- 100g active, ripe starter (fed 4 to 8 hours before you use it)
- 9g fine sea salt
A Quick Look at the Whole Process
Two phases carry the weight of sourdough baking: bulk fermentation and proofing. Neither one is optional, and neither should be rushed. These aren’t gentle suggestions — this is literally where the loaf’s structure, flavor, and texture get built.
- Autolyse (30–60 minutes): Combine just the flour and water, then let it sit. This lets the flour hydrate and gluten start forming before anything else happens.
- Mix in starter and salt: Work in your active starter first, then the salt. Blend it fully using pinch-and-fold until everything’s combined.
- Bulk fermentation (4–6 hours at 75°F/24°C): In the first two hours, run four rounds of stretch-and-fold, spaced 30 minutes apart. After that, leave the dough alone. You’re aiming for a 50–75% size increase and a light, jiggly feel once it’s ready.
- Pre-shape and bench rest (20–30 minutes): Form the dough into a loose round and let it sit, uncovered, on the counter to relax.
- Final shaping: Shape it firmly into a boule or batard, building genuine surface tension so it holds together through the bake.
- Cold proof (8–16 hours in the fridge): Set the shaped dough seam-side up in a floured banneton or a lined bowl, cover it, and let it proof overnight in the fridge.
- Bake (500°F/260°C in a Dutch oven): Let the Dutch oven preheat for at least 45 minutes. Score the cold dough, bake it covered for 20 minutes, then uncovered for another 20–25 minutes until it’s a deep golden brown.
Skipping the Dutch oven isn’t really an option here. It locks in steam through that critical opening 20 minutes, giving the loaf room to fully expand before the crust hardens. That same principle is why professional bakeries rely on deck ovens with built-in steam injection — a Dutch oven copies that effect at home, for free.
Once you’ve got your feeding routine dialed in, having the right vessel makes a real difference in how well you can read your starter’s activity. The Weck Tulip Jars 1 Liter – Large Sour Dough Starter Jars with Wide Mouth – Suitable for Canning and Storage – 2 with Glass Lids are a favorite of mine because the straight sides make it easy to judge how much your starter has risen, and having two jars means you can keep a backup going without scrambling for a clean container. They’re also just genuinely beautiful on a counter, which shouldn’t matter but kind of does.
Telling When Bulk Fermentation Has Finished
This is the question people ask me more than any other. Short answer: read the dough, not the clock. Time is only a rough map, not a rule to follow blindly. A dough that’s fermented properly will have expanded 50–75%, feel light with slightly domed edges, and wobble like firm Jell-O when the bowl gets a shake. You should see bubbles on the surface, and running a wet hand along the bowl’s edge should reveal visible air pockets. Under-fermented dough bakes up dense and gummy. Over-fermented dough turns slack and sticky and refuses to hold shape.
Sourdough for Beginners Complete Guide — What Your Loaf Is Telling You
Nothing teaches you faster than your own first loaf. Still, knowing how to actually read the results is what turns experience into improvement. Slice your loaf open and study the crumb — the inside structure is basically a report card on what happened during fermentation and baking.
Decoding the Crumb
- Tight, dense crumb with almost no holes: Points to under-fermentation, under-proofing, or a starter that isn’t strong enough yet. Give bulk fermentation more time on the next attempt.
- Big irregular holes up top with a dense bottom: A sign of over-fermentation — the dough ran out of steam. Cut back on bulk fermentation time or bring your dough temperature down.
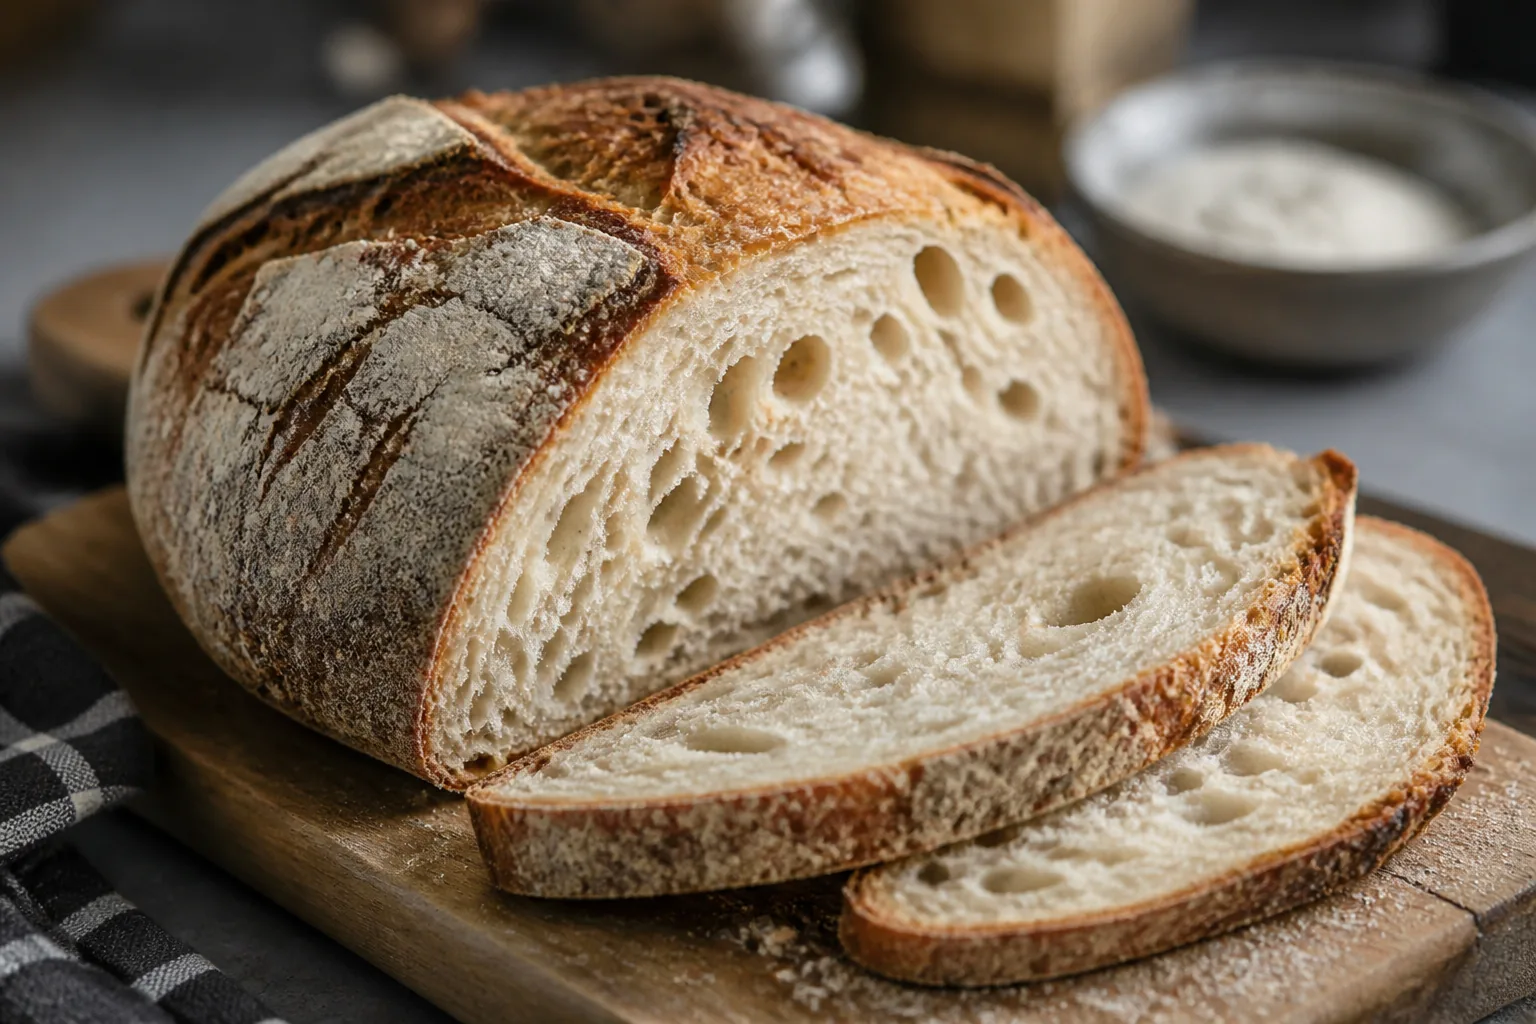
- Open, even crumb with medium-sized bubbles: Signals solid fermentation, good shaping, and a good bake. This is what you’re aiming for.
- Wet, gummy interior even after a full bake: Usually means under-proofing or slicing too soon. Give the loaf at least 1–2 hours to cool before cutting — the crumb keeps setting as it cools.
Keeping a basic baking log, in my experience, speeds up improvement enormously. Jot down room temperature, how long fermentation ran, how active your starter was, and how the crumb turned out. By your fifth or sixth loaf, patterns start jumping out at you, and you shift from guessing to making deliberate adjustments.
Rookie Errors Worth Knowing (and Fixing)
Error #1 — Baking With a Starter That Isn’t Mature
This one got me on my very first bake. My starter was only six days old and barely managing to double, and the loaf barely rose in return. A young or weak starter simply can’t leaven dough consistently yet — it hasn’t built up enough active wild yeast. Hold off until it doubles reliably within 4 to 8 hours of feeding, on at least two or three consecutive days, before you commit it to a bake. That patience pays off big time down the road.
Error #2 — Treating the Clock as Gospel
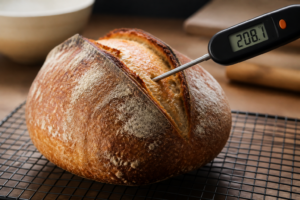
Fermentation runs on temperature, not the calendar. At 65°F (18°C), bulk fermentation could take 8 to 10 hours; at 80°F (27°C), it might wrap in 3 to 4. Following a recipe’s stated times without ever checking the dough itself is asking for inconsistent results. Once this clicks, though, adjusting on the fly becomes second nature. A cheap probe thermometer — most run under $15 — can dramatically sharpen your accuracy overnight.
Error #3 — Skipping the Score Before Baking
Scoring isn’t just for looks. A firm, confident cut with a sharp blade or lame right before baking gives your loaf a controlled place to expand. Skip it, and the crust sets unevenly, sometimes blowing out along the sides instead. Cut at a 30–45 degree angle, about 1/4 inch deep, in one committed motion — no hesitating, no dragging the blade, just one clean pass.
Error #4 — Slicing Into a Loaf That’s Still Hot
I get the pull here — that smell drifting out of the oven is hard to resist. But cutting a hot loaf cuts off the carryover cooking that keeps setting the crumb for up to two hours after baking ends. You’ll end up with a gummy center even if fermentation was actually right on target. Wait it out. Set a timer if that’s what it takes — it genuinely pays off.
Error #5 — Blaming the Starter for a Bad Loaf
Your starter and your loaf aren’t the same problem. A flat, dense loaf doesn’t automatically mean your starter has died. Check the starter on its own terms first — feed it, watch it, confirm it still doubles — before you start troubleshooting the recipe. In nearly every beginner failure I’ve witnessed or lived through myself, the starter was fine and the real culprit was bulk fermentation timing, dough temperature, or shaping. Test one variable at a time.
Growing Into a Confident Sourdough Baker
Nobody tells new bakers this part: your first three to five loaves will almost always be mediocre. That’s not failure — that’s just how learning works here. Every single bake hands you information, and every flawed crumb is a data point. Those bakers online with the jaw-dropping loaves have hundreds of bakes under their belt, and yes, they had ugly ones early on too.
Adjust one thing per bake, nothing more. Dense loaf? Add 30 minutes to bulk fermentation next round. Slack and flat? Trim it down instead. Don’t touch your flour, hydration, and timing all in the same bake — you’ll have no idea what actually caused the change. Keep the recipe locked for your first four or five loaves, changing only fermentation time based on how the crumb turns out.
Go find your people. The online sourdough world is honestly one of the most generous, enthusiastic communities I’ve come across. Forums, subreddits, and Facebook groups are packed with experienced bakers happy to look at your crumb shot and hand back real feedback within hours. Use it. Nobody figures sourdough out alone, and nobody should have to try.
What a Realistic Timeline Actually Looks Like
Here’s a sane timeline to expect: about two weeks to get a starter you can trust, another two to three weeks of weekly baking to land a consistently decent loaf, and roughly two to three months before you’re tweaking recipes with real confidence. That’s genuinely quick for a craft that trained professionals spend years refining. Go easy on yourself — sourdough rewards sticking with it far more than it rewards natural talent.
Closing Thoughts — Where Your Sourdough Story Begins
This sourdough for beginners complete guide holds everything I needed on day one and never had. From building Harold out of nothing more than flour and water, to finally understanding why loaf number three had that ear I’d been chasing for weeks — every lesson I’ve picked up lives in these sections. The real truth about sourdough boils down to this: it’s a living process, and your role is to watch it closely far more than to control it.
Get your starter going this week. Feed it on a steady schedule. Bake that first loaf even when it’s imperfect — especially when it’s imperfect. Note what you notice. Change one thing. Bake it again. Repeated patiently, that loop is exactly how every capable sourdough baker got to where they are. There’s no shortcut through it, and honestly, that’s the part that makes it satisfying.
Harold turns five next year. My loaves these days look nothing like that first sad brick. Yours will get there too, given time. I’m genuinely glad you found your way here — now go get your hands into some dough.
Frequently Asked Questions
How long does it take to build an active sourdough starter?
Expect 7 to 14 days before your first starter becomes reliably active. By Day 10–14, once it doubles consistently, passes the float test, and smells pleasantly tangy, it’s ready for baking. Harold hit that reliable stage on Day 11. This timeline is normal—that’s simply the nature of the craft.
What should I feed my sourdough starter daily?
For beginners at room temperature, use a 1:1:1 ratio fed once a day: equal weights of starter, flour, and water. If your kitchen runs warm, feed twice daily instead. For example, keep 50g starter and add 50g all-purpose flour and 50g water. This builds rhythm and predictability.
How long does a complete sourdough bake take from start to finish?
Expect 24 to 36 hours from start to finish on your first bake. This includes autolyse, bulk fermentation, pre-shaping, bench rest, and an 8–16 hour cold proof in the fridge before baking. Both timelines are normal—that’s simply the nature of the craft.
What does mold on my starter mean and what should I do?
If you spot pink, orange, or fuzzy patches on your starter, that’s mold. Toss the entire batch and start fresh rather than trying to rescue it. Mold means you need to begin building a new culture from scratch.
About This Article

Written by Sam Whitaker. Sam Whitaker has been baking sourdough for over a decade, including three years baking commercially, and now works out of a home kitchen in the Pacific Northwest. Sam's eleven-year-old starter, Harold, is the foundation for every recipe and troubleshooting guide on Sourdough Rising — real bread tested over and over until it works. More about this site.
Scope and limits. Sam is a home baker with no formal culinary training. Follow current food safety guidance for storage and handling, particularly with enriched or filled doughs.
Verify this against a primary source
Specifics change, and your situation may differ from the one described here. These are the authorities worth checking directly:
- USDA FoodData Central — flour and ingredient composition data
- FoodSafety.gov — safe handling and storage