I remember the exact moment I realized I had been sabotaging almost every loaf I baked for the better part of a year. I was standing in my kitchen at 11pm, cutting into what was supposed to be a beautifully open, airy sourdough — and staring at a dense, gummy crumb that could have doubled as a doorstop. It wasn’t the first time. It wasn’t even close to the fiftieth. And the frustrating part? My process looked right. My shaping was improving. My scoring was clean. What I couldn’t see was the invisible variable destroying everything: temperature.
Sourdough temperature problems are, without exaggeration, responsible for more failed loaves than any other single factor. I know this because I lived it — and then I spent three years running a home microbakery baking 40 to 60 loaves a week, where a temperature miscalculation didn’t just ruin one loaf. It ruined a whole batch. When money and customer orders are on the line, you get very serious about understanding what heat actually does to your dough.
This is what I wish someone had told me in year one.
Why Temperature Controls Everything in Sourdough
Sourdough fermentation is biology, not magic. The wild yeast and lactic acid bacteria in your starter are living organisms with a very specific preferred operating range. The primary yeast species in most mature starters — Saccharomyces cerevisiae and various Kazachstania species — ferment most actively between roughly 75°F and 82°F (24°C to 28°C). The lactic acid bacteria that produce flavor, primarily Lactobacillus strains, have their own temperature preferences that shift the flavor profile depending on conditions.
Here’s the practical consequence: a dough fermenting at 65°F is not just “slower” than one fermenting at 78°F. It is biologically doing something different. The ratio of acetic acid to lactic acid production changes. The enzyme activity in the flour changes. The gluten development behaves differently. You are not baking the same bread — you’re baking a different chemical reaction.
I didn’t understand any of this for my first year of baking. I followed timing instructions from recipes as if they were laws. “Bulk ferment for 4 hours.” Okay. But 4 hours at what temperature? That single unasked question is behind most sourdough temperature problems I see people struggling with today.
The Specific Mistake I Made (Repeatedly)
My kitchen in the old house ran cold. During winter months, ambient temperature would drop to around 62°F to 65°F overnight. I was mixing dough after work, leaving it to bulk ferment overnight, and then shaping in the morning — following the same timeline every time regardless of what the actual dough temperature was.
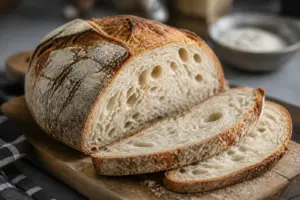
The result was chronically under-fermented dough. It looked like it had risen. It had some bubbles. But the fermentation hadn’t completed, which meant the gluten structure wasn’t fully developed, the starches weren’t properly broken down, and the oven spring I expected simply didn’t happen. Dense crumb. Gummy interior. Thick crust that was tough instead of crackly.
The fix, when I finally found it, was almost insultingly simple: I started taking my dough temperature. Not guessing. Not assuming. Actually measuring.
Dough Temperature Is the Number That Actually Matters
Ambient air temperature is a proxy. Dough temperature is the truth. These two numbers can be several degrees apart depending on your flour temperature, your water temperature, and even friction from mixing. Professional bakers calculate something called Desired Dough Temperature (DDT) — a target internal temperature for the dough after mixing, typically around 75°F to 78°F for most sourdough recipes.
The formula is straightforward. If your target DDT is 76°F, and your flour is at 68°F, and your kitchen is at 70°F, then your water needs to compensate. You’re working backwards to hit a specific starting temperature that will drive a predictable fermentation.
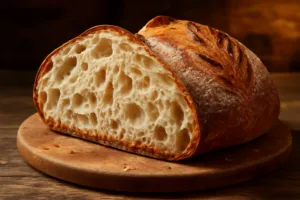
Once I started hitting a consistent DDT in that 75°F to 78°F window, my bulk fermentation times became predictable for the first time. Four hours actually meant four hours. Not four hours that might really need six, or four hours that actually needed three. Consistency replaced guesswork, and my loaves immediately improved.
The Cold Proof Problem I Almost Missed
Here’s a sourdough temperature problem that gets less attention: the retard, or cold proof. Most home bakers (myself included) refrigerate shaped loaves overnight. But not all refrigerators run at the same temperature, and even within the same fridge, the shelf position matters significantly.
My fridge runs at 38°F on the middle shelf and closer to 34°F near the back bottom. A loaf proofing at 34°F is essentially in a near-stall. I’ve pulled loaves from the back of the fridge that were barely proofed at all, sent them straight to a screaming hot Dutch oven, and wondered why they blew out on the side instead of opening along the score. That’s a classic under-proofed bake. The temperature was the culprit.
Now I keep a dedicated probe in the fridge and I know exactly where to place my bannetons for a reliable cold proof. Speaking of which — the vessel your dough proofs in matters too, because a good banneton holds its shape during that cold retard and makes scoring significantly cleaner.
What I Use
After years of relying on guesswork and suffering for it, these are the tools I actually reach for:
- For measuring dough and water temperature: The TempPro TP02S Digital Food Thermometer is what I use daily. The extra-long probe is the detail that matters here — you can reach into the center of a bulk ferment container without disturbing the dough, and it reads fast. I’ve gone through cheaper thermometers that drift over time; this one has stayed accurate across heavy weekly use.
- For a backup and fridge monitoring: The Lonicera Digital Cooking Thermometer earns its place because of the backlit display and its waterproof build — useful when you’re working with wet dough and wet hands constantly. I keep one near the sink specifically for checking water temperature before it hits my dough.
- For shaping and cold proofing: The Superbaking 9″ Rattan Banneton Proofing Baskets are what I currently use at home. Splinter-free rattan, proper depth, and they come with liners — which matters when you’re proofing at higher hydration and don’t want to fight the dough out of the basket after an overnight retard.
An Honest Caveat
I want to be clear about something: temperature control will not save a neglected starter or fix poor shaping technique. I’ve seen bakers get the thermometer, nail their DDT, and still struggle — because their starter wasn’t at peak activity when they mixed, or because their bulk was fine but their shaping was too loose to hold structure in the oven. Temperature is the most important variable, but it’s one lever in a system. Getting it right removes the biggest unpredictable element. The rest still takes practice.
Also worth saying: every kitchen is different. The ranges I’ve described here (75°F to 78°F DDT, 75°F to 82°F bulk environment) are starting points, not universal rules. Bakers in humid climates, at altitude, or working with very high-extraction flours may need to adjust. The goal is to understand the principle, then calibrate to your own conditions.
This post contains affiliate links. As an Amazon Associate I earn from qualifying purchases.
What Changes When You Fix This
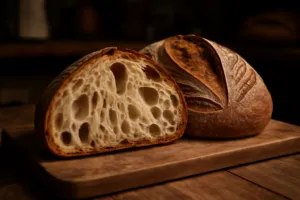
When I finally got consistent temperature control dialed in during the microbakery years, three things happened almost immediately. My bulk fermentation times became predictable within about 30 minutes. My crumb opened up noticeably — not because I changed hydration or technique, but because properly fermented gluten actually holds the gas it produces. And my bakes became consistent enough that I could troubleshoot anything else with confidence, because I’d eliminated the biggest variable.
Eleven years in, I still take my dough temperature every single time I mix. Not because I’m being obsessive — because the ten seconds it takes has saved me from more ruined loaves than I can count. If you’re troubleshooting sourdough temperature problems right now, start with a thermometer before you change anything else. Measure what’s actually happening inside your dough. Everything else follows from there.
The Thermometer That Revealed What I Couldn’t See
I was controlling everything I could see—timing, shaping, scoring—but dough temperature is invisible until you measure it. Every degree matters in fermentation, and I was flying blind, baking whatever came out of my fridge without knowing if it was 65°F or 75°F. That invisible variable was the real saboteur.
What works
- Reads dough temperature in seconds—no more guessing whether your bulk fermentation is actually on track or already overproofed.
- Thin probe slides into the center of your dough without collapsing the structure or leaving a hole that matters.
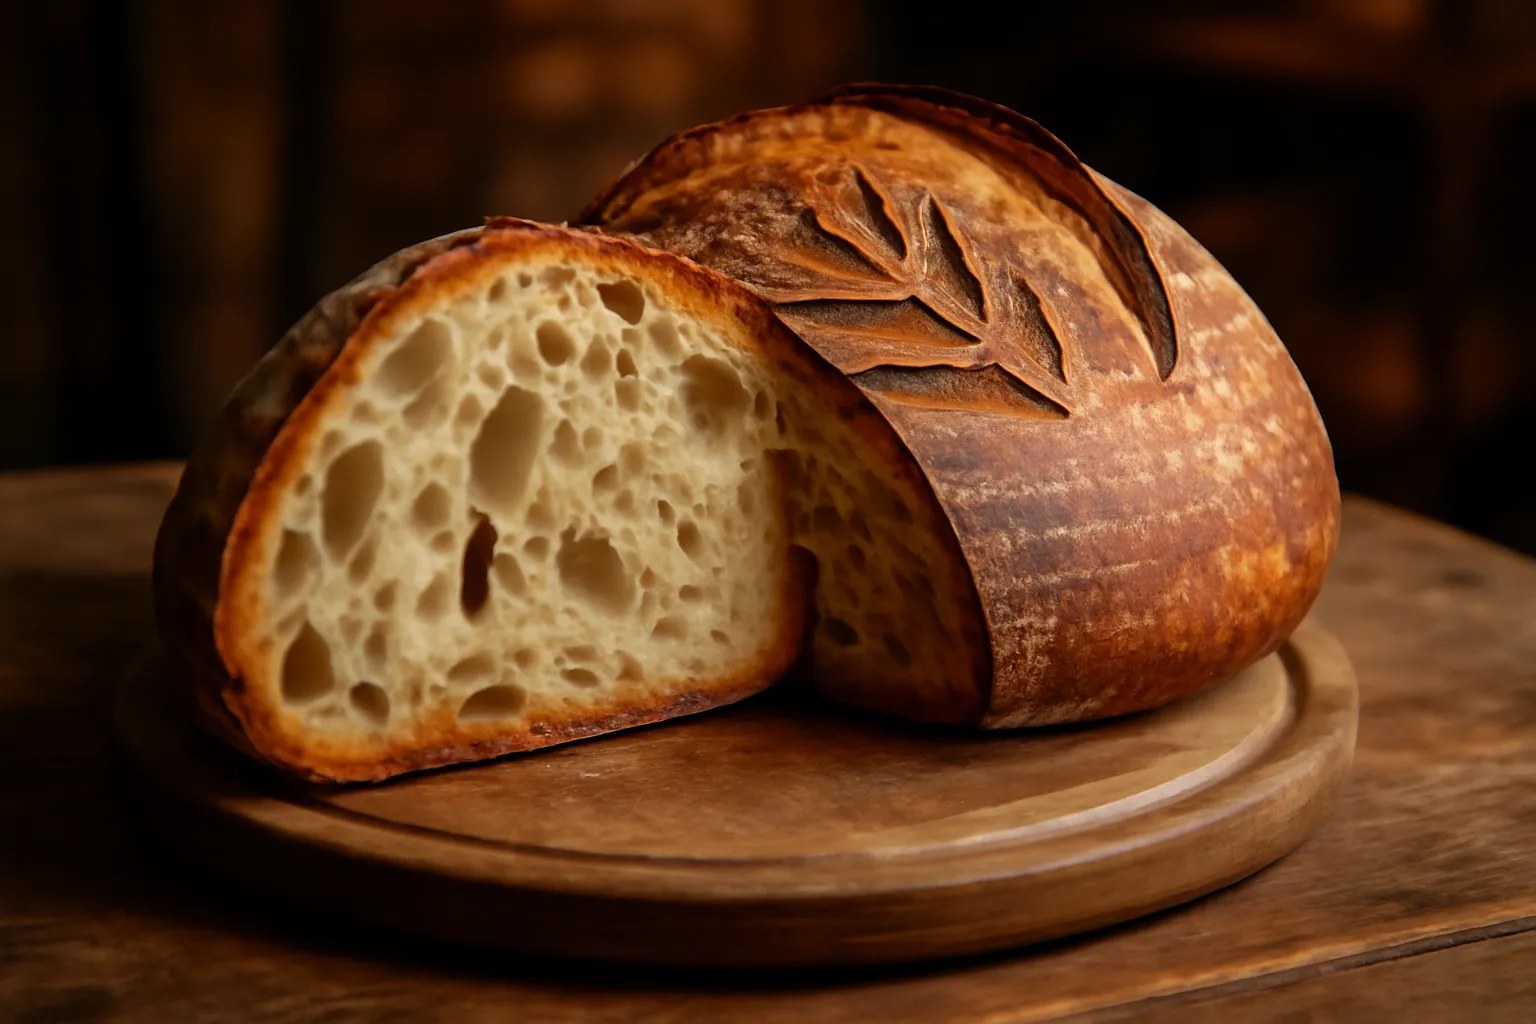
- Precise enough to catch the difference between a 76°F bulk and a 78°F bulk, which is exactly the difference between an open crumb and a gummy one.
What doesn’t
- The display is small and hard to read in dim kitchen light—I’ve squinted at it more times than I’d like to admit.
- Battery life is shorter than you’d expect for something you use three or four times per bake cycle.
I almost returned it after the first week because the readings seemed inconsistent, until I realized I wasn’t letting it stabilize long enough in the dough. Once I committed to waiting those extra five seconds, everything clicked. Pick up the TempPro TP02S Digital Food Thermometer and stop losing loaves to invisible temperature swings.
This post contains affiliate links. As an Amazon Associate, I earn from qualifying purchases at no extra cost to you.