
It was 6 AM on a Tuesday, and I was staring at what looked like a deflated pancake on my kitchen counter. Three days of feeding, nurturing, and carefully tending to my sourdough starter. Five hours of bulk fermentation. Two hours of final proof. And this was the result: a loaf so dense and flat that my husband suggested we use it as a coaster.
That’s the moment I realized I had no idea what I was doing.
I’d started baking sourdough on a whim during a rainy weekend, armed with nothing but Pinterest boards and an optimistic attitude. What followed was months of kitchen disasters, wasted flour, and a humbling education in the science and patience that real bread baking demands. But those failures taught me more than any perfect loaf ever could. After eleven years of sourdough obsession, plus running a home microbakery for three years, I’ve learned what actually separates a beautiful, open-crumb loaf from that sad, dense pancake. Today, I’m sharing the 10 sourdough tips for beginners that I wish someone had given me on day one—the lessons that transformed me from a frustrated baker to someone who genuinely understands this craft.
10 Sourdough Tips for Beginners: Starting With the Right Foundation
Before we dive into the specific tips, let me be honest: sourdough isn’t difficult, but it is particular. It requires attention, consistency, and patience—three things I didn’t have much of that first Tuesday morning. But here’s what transformed everything: understanding that sourdough is less about following a recipe like a chemistry experiment and more about learning to read your dough and trust your instincts. The 10 sourdough tips for beginners I’m about to share are all built on that principle.
Tip 1: Start Your Starter Right (And Be Patient With It)
Your starter is everything. It’s the living heart of your bread, and you can’t rush it. When I started, I made starter on a Monday and tried to bake with it by Wednesday. It wasn’t strong enough, and I didn’t realize it. A good starter takes 5 to 7 days minimum to develop reliable strength, and honestly, it’s even better after two to three weeks.
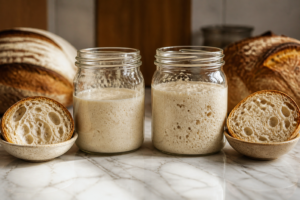
Feed it at room temperature, roughly equal parts flour, water, and starter. Keep it somewhere consistently warm (65–75°F is ideal). You’ll know it’s ready when it reliably doubles within 4 to 8 hours of feeding and smells pleasantly tangy and yeasty, not acetone-sharp or musty.
Tip 2: Temperature Controls Everything (More Than You Think)
This was my breakthrough moment. I was fermenting my dough on a cold kitchen counter in winter, and everything took twice as long as it should. Sourdough fermentation is temperature-dependent. A 2°F difference can mean the difference between a 4-hour bulk ferment and an 8-hour slog.
Aim for 75–78°F during bulk fermentation for most recipes. If your kitchen is cold, place your dough in a turned-off oven with the light on, or use a proofing box. If it’s too warm, fermentation accelerates and things get unpredictable. Temperature consistency is honestly more important than following the exact recipe timing.
Tip 3: Learn to Read Your Dough, Not Just the Clock
This is where sourdough stops being a recipe and becomes intuition. A recipe might say “bulk ferment for 4 hours,” but your dough doesn’t know that. It cares about temperature, hydration, and starter strength. By the end of bulk fermentation, your dough should increase by about 50 to 75% in volume, feel airy and alive when you touch it, and show some visible bubbles on top.
The windowpane test—gently stretching a small piece of dough to see if it’s transparent without tearing—is your friend. Poke tests work too. A dough ready for shaping should spring back slowly, not immediately.
Tip 4: Hydration Affects Everything (Start Lower Than You Think)
Beginners often chase those beautiful, open-crumb Instagram photos and jump straight to 80 to 85% hydration doughs. Please don’t do this. I did, and I made soup. Start at 75% hydration until you understand how water behaves in dough and how your hands can manipulate it during shaping. Higher hydration doughs are stickier, harder to handle, and way more forgiving of fermentation mistakes—but only once you know what you’re doing.
Work your way up as you gain confidence. You’ll get those beautiful open crumbs eventually, I promise.
Tip 5: Shaping Tension Is Non-Negotiable
That flat pancake I made? Poor shaping. Shaping creates surface tension that allows your dough to rise up during the oven spring instead of spreading out like a pancake. You want to fold the dough over itself firmly, creating a tight surface while leaving the seam side facing down in your banneton.
This took me about two dozen loaves to understand. Watch videos. Practice on your counter. Feel the resistance of the dough. Tight shaping doesn’t mean you’re being rough—it means purposeful, controlled tension.
Tip 6: Cold Fermentation Is Your Secret Weapon
Once I discovered cold fermentation, everything changed. After shaping, refrigerate your dough for 8 to 48 hours before baking. This does several things: it slows yeast activity so you have more control, it gives your gluten time to fully relax and strengthen, and it develops deeper, more complex flavor. It’s also incredibly convenient for a home baker’s schedule.
Plus, cold dough is easier to score, and it creates better oven spring. This single tip elevated my bread from decent to genuinely impressive.
Tip 7: Invest in a Dutch Oven (But Choose Wisely)
Steam is essential for sourdough. During the first 15 to 20 minutes of baking, steam keeps the crust flexible, allowing the bread to expand fully before the crust sets. A Dutch oven traps that steam beautifully. I use an enameled cast iron Dutch oven, and it’s the single best tool I own for bread baking.
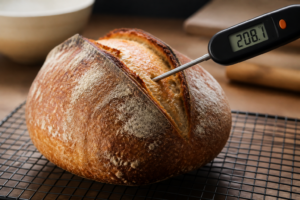
Make sure your Dutch oven can handle 500°F (most enameled versions can). Preheat it for at least 30 minutes before baking. The thermal mass will give your bread incredible oven spring and a gorgeous, shattered crust.
Tip 8: Scoring Serves a Purpose (Not Just Aesthetics)
That beautiful score on artisan sourdough? It’s not just for looks. Scoring is a cut that directs where your dough expands during baking. Without it, your dough will expand randomly, often splitting in unpredictable places. A confident, angled score about a quarter-inch deep tells your dough exactly where you want it to open.
Use a sharp blade (a lame is ideal, but a fresh razor blade works too). Cold dough from the fridge is much easier to score cleanly than room-temperature dough. And score with confidence—hesitant, shallow cuts don’t work nearly as well as one decisive, purposeful cut.
Tip 9: Understand Gluten Development (You Don’t Need a Mixer)
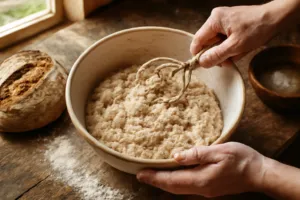
I used to think I needed a stand mixer to develop gluten. I don’t. The stretch-and-fold technique, done every 30 minutes during the first two hours of bulk fermentation, develops gluten beautifully through your hands. Wet hands, gentle stretches pulling the dough toward the center, rotating the bowl as you go.
You’ll feel the dough get stronger and tighter with each round. It’s meditative, it saves money, and honestly, you develop a real feel for your dough when you’re touching it regularly.
Tip 10: Keep Notes and Bake Consistently
This was my game-changer. After that first failure, I started writing down everything: ambient temperature, exact fermentation times, hydration percentage, how my dough felt at each stage, and what the final loaf looked like. Over dozens of bakes, patterns emerged.
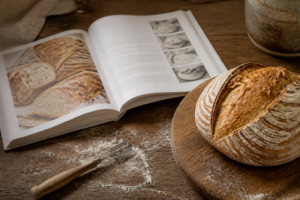
Consistency matters in sourdough more than most baking. Bake on the same day each week at the same time. Feed your starter on a schedule. Use the same flour (different flours hydrate differently). Your notes will become your sourdough manual—more valuable than any blog post or book.
The One Tool That Would’ve Saved Me Months of Failed Starter Experiments
Most beginners kill their sourdough starter before it ever becomes viable because they can’t accurately track temperature and fermentation progress. Getting real-time visibility into what’s happening inside your jar makes the difference between a thriving culture and a moldy mess.
What Works
- Eliminates guesswork by showing exact fermentation temperatures and activity levels throughout the day
- Helps you dial in optimal feeding schedules based on actual rise patterns, not just recipes
- Works for both starter maintenance and final dough fermentation tracking
What Doesn’t
- Replace the need to learn basic fermentation principles—it’s a tool to inform better decisions, not a substitute for knowledge
- Guarantee perfect bread if your technique, flour quality, or hydration ratios are off
Check current pricing on Amazon. Disclosure: As an Amazon Associate I earn from qualifying purchases.
This post contains affiliate links. As an Amazon Associate, I earn from qualifying purchases.