I’ll never forget the Tuesday morning I cut into what I thought was my masterpiece loaf, only to find a dense, gummy crumb that practically stuck to my knife. After eleven years of sourdough baking—including three years running my own microbakery—I was genuinely baffled. I’d nailed the fermentation. The crust was golden and crispy. The scoring looked perfect. But the inside? Ruined. My family looked disappointed. I wanted to throw the whole thing away.
I spent the next two weeks obsessing over every variable I could think of. Was it my starter? The hydration? The ambient temperature? I tore through my dog-eared baking notes, adjusted my bulk fermentation by an hour, changed my proofing method—nothing worked consistently. Then, in a moment of frustration, I realized I’d been baking sourdough for over a decade without ever actually measuring my sourdough bread internal temperature. I was guessing. And that guess was costing me flour, time, and my baker’s confidence.
If you’re struggling with undercooked, gummy sourdough, or if you’re baking by feel alone like I was, this post is going to change everything for you. The answer isn’t complicated—but it’s life-changing.
Why I Ignored Temperature (And Why That Was a Mistake)
When you’re a self-taught baker who started baking before watching YouTube tutorials became the norm, you pick up habits that stick around for decades. I learned sourdough from library books and trial-and-error. The books talked about “poke tests” and “spring-back,” about trusting your hands and your instincts. Nobody talked about thermometers. Thermometers were for meat. Thermometers were for people who lacked confidence.
I wore that “trust your gut” approach like a badge of honor—right up until my gut was wrong, and I was wasting ingredients.
The real problem was that I couldn’t distinguish between a loaf that was truly done and one that just felt done from the outside. A sourdough crust continues to set and firm up even after the crumb has finished baking. You can have a beautiful, crispy exterior but an underbaked center. I was pulling loaves out at the exact moment they looked finished, not realizing the inside still had another five to ten minutes of work to do.
The Game-Changing Discovery: Sourdough Bread Internal Temperature
Here’s what changed everything: sourdough bread internal temperature.
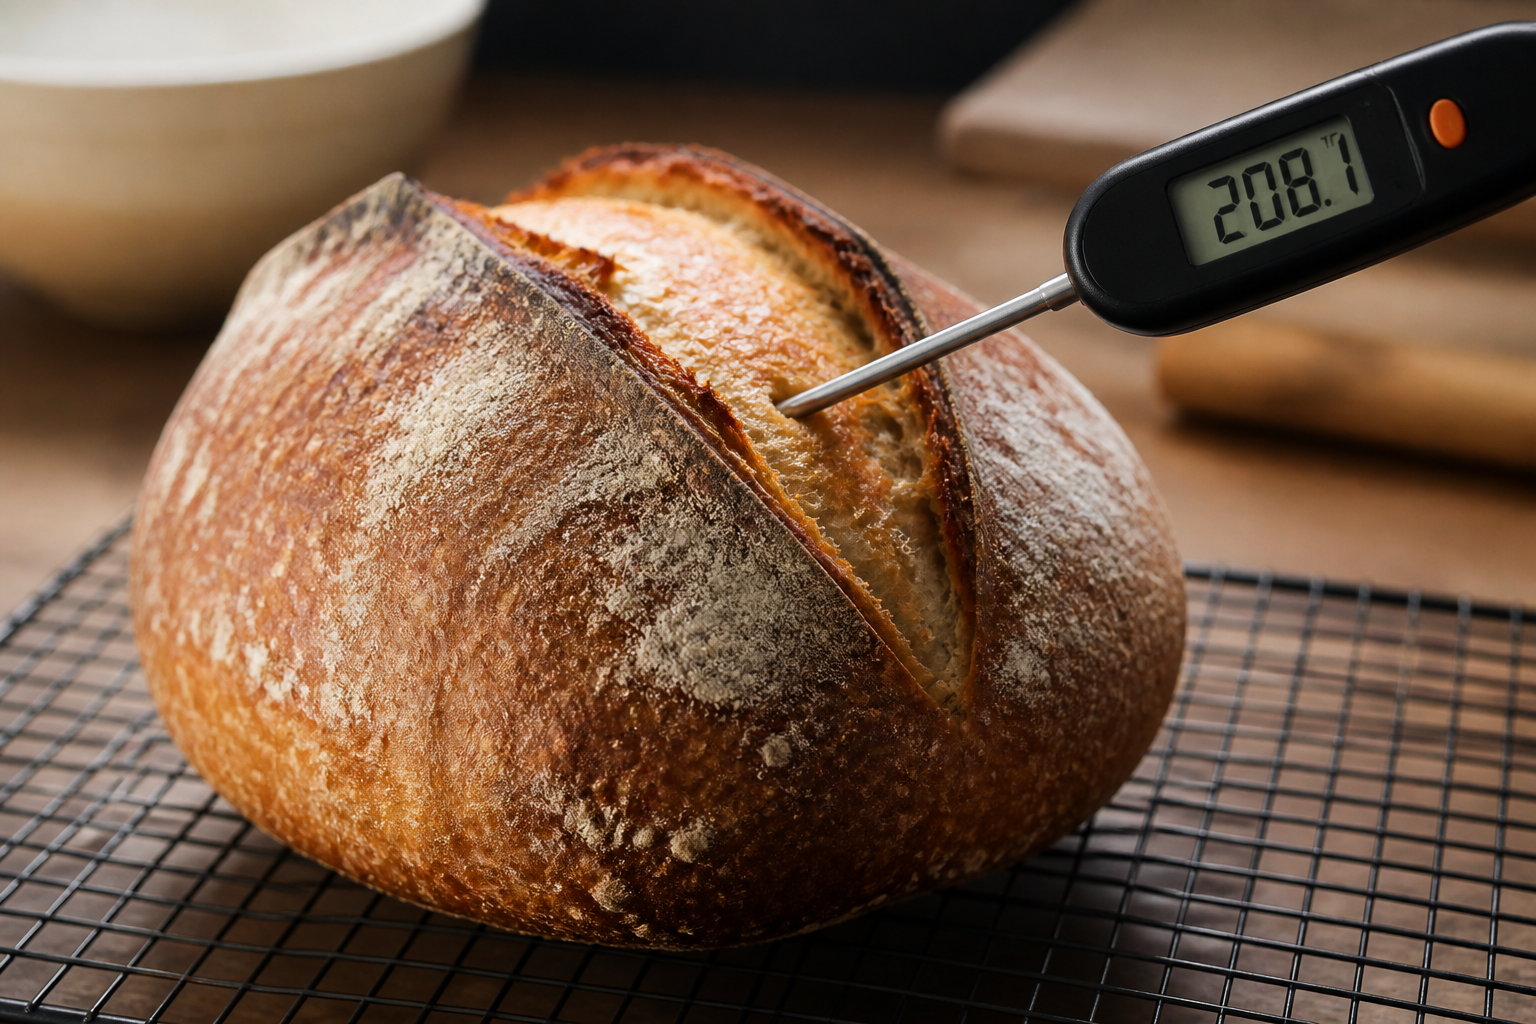
I did some actual research—talking to other bakers, reading modern baking science books, and finally just buying a decent thermometer. Within one weekend, I learned that properly baked sourdough should reach an internal temperature of between 205°F and 210°F at the center of the loaf. Most of my gummy loaves were coming out at 195°F to 200°F. That five-to-ten-degree difference was the difference between slightly underbaked bread and perfectly set crumb structure.
Why those specific temperatures? Because at around 205°F to 210°F, the starches in your dough have fully gelatinized, and the gluten network has set completely. The proteins have coagulated enough that they can properly support the crumb’s structure. Below that, and you’re left with a gummy, dense center that feels heavy and sticky. It’s not just underproofed—it’s underbaked.
The moment I started actually checking the internal temperature instead of relying on visual cues alone, my loaves transformed. It was almost embarrassing how simple the fix was.
How to Check Your Sourdough Bread Internal Temperature
This is the part that intimidated me for no good reason. Here’s exactly what you do:
- Remove your loaf from the oven when it’s reached full golden-brown color (usually 35 to 45 minutes depending on your oven and loaf size)
- Insert a reliable instant-read thermometer into the center of the loaf, angling slightly downward. You want to hit the absolute center, not just the surface
- If it reads below 205°F, return it to the oven for another 3 to 5 minutes and check again
- Once you hit 205°F to 210°F, you’re done
That’s it. The bread will be perfectly baked—not gummy, not overdone, just right.
What I Learned About Oven Variables
One thing that using a thermometer taught me very quickly is that every oven is different. I was baking in the same oven I’d used for years, but that didn’t mean I actually knew how it performed. Once I started measuring, I realized my oven ran about 15 degrees hotter than the dial suggested. That small difference had actually been pushing some loaves into overdone territory while leaving others underbaked—depending on where they sat on my rack.
Using a thermometer gave me data. Data meant I could finally troubleshoot accurately instead of just guessing.
My Recommendations: Thermometers That Actually Work
Not all kitchen thermometers are created equal, especially when you’re trying to nail the center of a hot loaf. Over the past three years since this breakthrough, I’ve tested several options in my kitchen. Here are the ones I actually recommend—and actually use:
The Thermometer That Stopped Me From Guessing at Doneness
Gummy crumb almost always means underbaked interior, but I was relying on visual cues and the “hollow sound” tap test—both of which failed me repeatedly. Once I started measuring actual internal temperature, the guesswork ended.
What works
- Reads the center crumb temperature in under a second, so you’re not leaving the oven door open long enough to crash your oven spring.
- The instant-read display is clear enough to read at a glance, even when you’re squinting at a hot loaf in dim kitchen light at 6 a.m.
- Consistently shows when you’ve hit the 205–210°F sweet spot where the crumb sets properly without drying out the crust.
What doesn’t
- The probe is thin enough to leave only a pinhole, but you still need to know where to aim—stab too close to the edge and you’ll get a false reading.
- Battery life isn’t exceptional; I’ve had to replace it twice in two years of regular use, which is annoying when you’re mid-bake.
I almost returned this after my first loaf still came out slightly underbaked (I’d tested at 202°F and pulled too early), but I realized the problem was user error, not the tool. Now it’s indispensable. Grab the Feinbäck Pro Instant Read Food Thermometer and stop second-guessing yourself.
This post contains affiliate links. As an Amazon Associate, I earn from qualifying purchases at no extra cost to you.