My first sourdough loaf came out of the oven looking like a deflated frisbee. It was dense, gummy in the middle, and had a crust so pale it looked like it had never seen heat. I had followed a recipe. I had done everything “right.” And I had absolutely no idea what had gone wrong.
That was 11 years ago. In the years since, I’ve baked thousands of loaves — including three years running a home microbakery where I was producing 40 to 60 loaves every single week. I’ve had to understand fermentation not as a hobby but as a production variable I had to control. I’ve ruined batches that represented real money and real time. And I’ve read enough food science to know why almost every beginner mistake happens at the biochemical level.
I’m not a trained baker. I have no culinary degree. Everything I know came from obsessive practice and a refusal to accept “just try again” as an explanation. My starter — the same one I built from scratch in my kitchen — is still alive and active today, 11 years later.
If I could go back to day one, here is exactly what I would tell myself.
1. Your Starter Is Not the Problem (Yet)
Every beginner assumes their starter is broken. It smells weird. It’s not doubling. It has a grey liquid on top. It looks dead. I spent the first two weeks convinced I had done something fundamentally wrong.
Here’s what actually happens: a new starter is a microbial competition. Wild yeast and lactic acid bacteria are fighting for dominance in a flour-and-water environment. In the first five to ten days, you’re going to see erratic behavior — dramatic rises, then nothing, then a foul smell that some people describe as acetone or vomit. That smell is actually the sign that acetic acid bacteria are temporarily winning. They will lose. Keep feeding.
The honest caveat here: some starters genuinely do fail, usually because of chlorinated tap water killing off the microbes, or because the ambient temperature is below 65°F and fermentation has essentially stalled. Use filtered or room-temperature water that’s been left out for an hour, and keep your starter somewhere that stays between 70°F and 78°F. A spot on top of the refrigerator often works well in cooler homes.
Give your starter a full two weeks of consistent once-daily feedings before you start worrying.
2. Temperature Controls Everything — Not Time
This is the single most important thing I learned during my microbakery years, and it took an embarrassingly long time to internalize it.
Every recipe that says “bulk ferment for 4 hours” is lying to you — not intentionally, but structurally. That number is meaningless without knowing the dough temperature. Sourdough fermentation is driven by enzyme activity and microbial metabolism, both of which are acutely sensitive to temperature. At 78°F, your bulk ferment might be done in 4 hours. At 68°F, the same dough might need 7 or 8 hours. At 65°F, you might need 10 to 12 hours.
I baked through two Chicago winters in a cold rented kitchen where ambient temperature hovered around 64°F. I nearly quit because nothing was working — until I started using a probe thermometer and tracking dough temperature instead of the clock. Once I started targeting 75°F–78°F dough temperature during bulk fermentation, my consistency went from about 50 percent to well over 90 percent.
Buy a probe thermometer before you buy anything else. Know your dough temperature, not just your room temperature.
3. Underfermentation Is Far More Common Than Overfermentation
If your bread is dense, gummy, or has a tight, irregular crumb, your first instinct might be to blame shaping or the flour. In most cases — especially as a beginner — the loaf was underfermented.
Beginners are nervous about overproofing. There’s a lot of content online about overproofed dough being a catastrophic failure state, so new bakers tend to rush the process. But underfermented dough hasn’t produced enough gas or developed enough gluten structure to hold that gas. The result is a loaf that looks fine going into the oven and comes out brick-like.
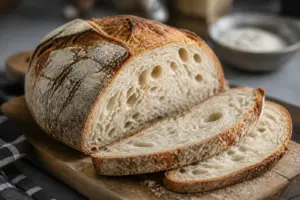
The reliable sign that bulk fermentation is complete: your dough should have grown by 50 to 75 percent, feel light and airy rather than dense when you handle it, show bubbles on the surface and sides, and jiggle like Jell-O when you shake the container. If you’re not seeing all of those things, give it more time.
Overfermentation is real, but for most beginners baking at home, it takes significant effort to actually get there. Stop cutting bulk short.
4. Dutch Oven Baking Is Not Optional
I tried to bake sourdough on a baking stone with steam from a pan of boiling water. I tried a covered roasting pan. I tried covering the loaf with a metal bowl. None of it worked reliably, and for two months I couldn’t figure out why my crust was thick and dull instead of crackly and caramelized.
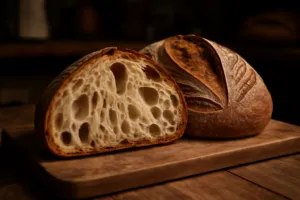
The Dutch oven solves this completely. When you place your dough into a preheated Dutch oven and bake it covered for the first 20 minutes, the moisture trapped inside creates the steam environment that keeps the crust extensible during oven spring. Without that steam, the crust sets too early, restricts expansion, and you get a small, pale, dense loaf. This is basic food science — the same principle professional bakers solve with deck ovens that inject steam.
Preheat your Dutch oven in the oven at 500°F for at least 45 minutes. Bake covered for 20 minutes, then uncovered for 20 to 25 minutes until the internal temperature reaches 205°F to 210°F. That’s the process. Don’t skip the covered phase.
5. The Loaf You’re Eating Is a Record of Decisions Made 12 to 24 Hours Ago
This is the mindset shift that changed how I approached every bake. Sourdough feedback is delayed. When you cut into a loaf and find a problem, the mistake that caused it happened long before you put the dough in the oven. This means you have to learn to read your dough in process — not just after baking.
Start keeping a baking journal. Write down your flour, hydration percentage, starter percentage, water temperature, room temperature, bulk fermentation start and end times, dough behavior at each stage, bake temperature, and your assessment of the final loaf. This sounds tedious. It is, at first. But after ten or fifteen bakes with notes, you will start to see patterns that no recipe can teach you, because those patterns are specific to your kitchen, your flour, and your starter.
I still keep notes on every bake. After 11 years, they still tell me things I didn’t know.
This post contains affiliate links. As an Amazon Associate I earn from qualifying purchases.
What I Use and Recommend
I want to be straightforward here: the right equipment makes an enormous difference for beginners, especially when you’re still learning to read your dough. These are tools worth investing in from the start rather than improvising around.
For getting started with a starter and your first proofing setup, this Complete Sourdough Starter Kit with Banneton Bread Proofing Basket and Sourdough Starter Jar gives you the essentials in one place — the banneton, the jar, and the tools to get your starter off the ground without hunting down pieces individually.
If you’re looking for a more complete kit with gifting in mind or want everything organized together, this Sourdough Bread Baking Supplies and Starter Kit with Bread Proofing Basket and Tools is a solid option that covers proofing, scoring, and starter management in one package.
For the Dutch oven — which, as I said above, is not optional — I’ve been impressed by the Umite Chef 5QT Enameled Cast Iron Dutch Oven with Lid and Cotton Potholders. The 5-quart size is ideal for a standard 900-gram to 1,000-gram sourdough loaf, the enameled surface is easy to clean, and the lid creates the steam seal you need for proper oven spring.
One Last Thing
Sourdough is genuinely difficult in the beginning. I want to be honest about that because most beginner content makes it sound like a few simple steps and a weekend project. It’s not. It’s a fermentation process with multiple variables operating simultaneously, and it takes time to develop the intuition to manage them.
But that difficulty is also why it’s so satisfying. Every loaf you bake is teaching you something — about your kitchen, your flour, your starter, your hands. After 11 years, I’m still learning. The bread keeps improving. That’s the whole point.
Start with the basics, track your process, trust the science, and give yourself permission to bake bad loaves. They’re part of how you get to the good ones.
The Banneton That Stopped My Dough From Spreading Into a Pancake
In those early years, I didn’t realize that shaping and proofing were two entirely different skills — and that without proper support during the final rise, even a well-fermented dough will flatten out and lose all its structure. A banneton isn’t just a nice-to-have; it’s the difference between a loaf that holds its shape and one that spreads into a sad, flat disk.
What works
- The cane is tightly woven enough that even a wet dough won’t stick to it during a long cold proof, which means you’re not fighting with your dough when it comes time to score and bake.
- It actually supports the dough’s shape — I noticed immediately that loaves proofed in it had taller oven spring and better structure than my previous method of using a floured bowl.
- The kit includes a starter jar and other basics, so if you’re starting from scratch, you’re not hunting down five different purchases just to get going.
What doesn’t
- You still have to flour it properly — too little and you’re pulling dough threads; too much and you get flour streaks baked into your crust that look sloppy.
- It needs to dry completely between uses or it’ll start growing mold, which means you can’t just rinse it and throw it away like a regular bowl.
I remember one winter when I was being lazy about drying it thoroughly and actually had to toss one out after finding fuzzy growth inside the grooves. Since then I’ve been religious about air-drying it between bakes, and it’s been bulletproof. If you’re ready to stop guessing whether your dough will hold its shape, grab the Complete Sourdough Starter Kit with Banneton Bread Proofing Basket and Sourdough Starter Jar.
This post contains affiliate links. As an Amazon Associate, I earn from qualifying purchases at no extra cost to you.