I want to tell you about the morning I served my in-laws what I can only describe as crispy, golden cardboard. It was a Sunday, everyone was gathered around my kitchen table in their pajamas, coffee was brewing, and I had proudly announced I was making homemade waffles from scratch. What came off my waffle iron was technically a waffle in the same way that a deflated pool float is technically a floaty thing. They were pale in the middle, somehow burnt on the edges, and had the structural integrity of wet paper. My father-in-law, bless his heart, ate three of them and said nothing. That was the day I started researching sourdough discard waffles, and honestly, it changed everything.
This post contains affiliate links. As an Amazon Associate, I earn from qualifying purchases.
The Problem With My Old Waffle Recipe (And Why Discard Fixed It)
For years I was using a standard from-scratch waffle batter. Flour, baking powder, eggs, milk, butter, a little sugar. By all accounts a perfectly respectable recipe. And yet, the results were inconsistent at best. Sometimes they were great. Sometimes they were the cardboard incident. I could never figure out what I was doing differently.
Then I started keeping a sourdough starter, and like every new sourdough baker in existence, I was drowning in discard. I had a jar in the back of the fridge that was growing at an alarming rate, and I felt genuinely guilty every time I scooped some out and tossed it. So I started experimenting. Pancakes first, then crackers, then muffins. And finally, waffles.
Here is the thing nobody tells you about sourdough discard in waffles: it is not just a clever way to use up leftovers. The discard actually improves the batter in a few really meaningful ways. The natural acidity in the starter tenderizes the gluten, which gives you a more delicate crumb inside. The fermentation byproducts contribute to browning, which means you get that deep, even golden color all the way across the waffle, not just on the edges. And the flavor. Oh, the flavor. There is a subtle tang that makes the whole thing taste more complex, more interesting, more like something you would pay twelve dollars for at a brunch spot.
What You’ll Need to Make Sourdough Discard Waffles
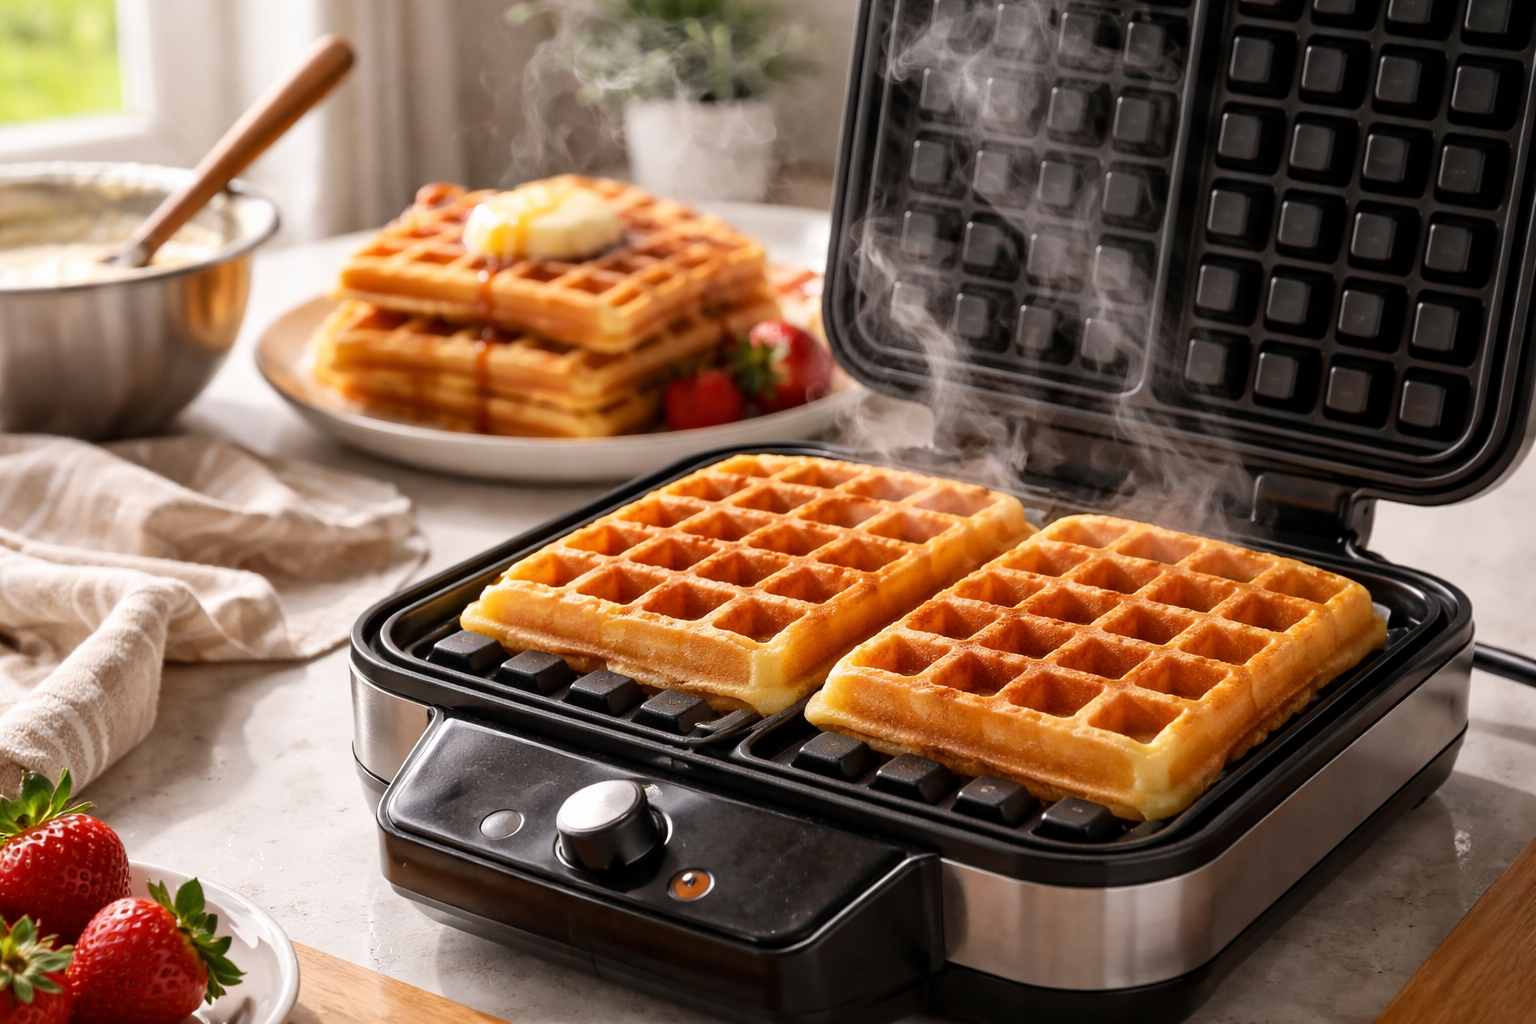
The Waffle Iron (This Matters More Than You Think)
I spent two years using a sad little waffle iron I found at a garage sale for three dollars. I loved that thing the way you love a car that keeps breaking down. Eventually I upgraded, and it made a genuinely noticeable difference. Here are a few options I would recommend depending on your budget and counter space.
If you want something with rotating plates for truly even cooking, the BELLA Classic Rotating Belgian Waffle Maker is a solid choice. The rotating mechanism helps the batter spread evenly and the adjustable browning control means you can dial in exactly how dark you like your waffles. The removable drip tray is also a small miracle for cleanup.
For something more compact that stores upright and takes up minimal counter space, I really like the Gourmia Belgian Waffle Maker. The ceramic nonstick plates are easy to clean and the upright storage design is genuinely clever for smaller kitchens.
If you want a no-fuss, budget-friendly option that just works, the Oster Nonstick Belgian Waffle Maker is straightforward and reliable. Ceramic nonstick surface, easy to use, easy to clean. Sometimes simple is exactly right.
The Syrup Situation
I am going to be opinionated here: real maple syrup is non-negotiable on sourdough waffles. The slightly tangy waffle and the deep caramel notes of a good dark maple syrup are made for each other. I keep two favorites on hand. Hidden Springs Maple Organic Vermont Maple Syrup, Grade A Dark Robust is absolutely wonderful, with that rich, almost molasses-like depth you get from darker syrup. I also love Butternut Mountain Farm Pure Vermont Maple Syrup, Grade A Dark for its bold, full flavor. Both come in a generous 32-ounce size, which sounds like a lot until you make waffles every weekend for a month and suddenly it is not.
Ingredients for the Batter
- 1 cup sourdough discard (unfed, straight from the fridge is fine)
- 1 cup all-purpose flour
- 1 cup buttermilk (or whole milk with a splash of white vinegar)
- 2 large eggs
- 4 tablespoons melted butter, slightly cooled
- 1 tablespoon sugar
- 1 teaspoon vanilla extract
- 1 teaspoon baking powder
- 1/2 teaspoon baking soda
- 1/2 teaspoon salt
How to Make Them (And the Tips That Actually Make a Difference)
Whisk your wet ingredients together first: discard, buttermilk, eggs, melted butter, and vanilla. In a separate bowl, whisk the dry ingredients: flour, sugar, baking powder, baking soda, and salt. Fold the dry into the wet until just combined. This is important. Do not overmix. A few lumps in the batter are completely fine and actually preferable. Overmixed batter develops too much gluten and gives you a tough, chewy waffle instead of a light, crispy one.
Let the batter rest for five to ten minutes before you start cooking. This gives the baking powder and baking soda time to activate and allows the gluten to relax just slightly. You will notice the batter puffs up a little and looks almost airy. That is exactly what you want.
Preheat your waffle iron fully before adding any batter. This is the mistake I was making for years with my old recipe. A properly preheated iron creates immediate contact heat that sets the outside of the waffle quickly and produces that crispy exterior while keeping the inside fluffy. If you pour batter onto a cold or lukewarm iron, the waffle steams instead of sears, and you end up with something soft and pale throughout. Ask me how I know.
Grease the plates even if they are nonstick. A light brush of melted butter or a quick spray before each waffle makes a real difference in color, crispiness, and release. Do not skip this step just because the packaging says nonstick.
One more tip: resist opening the iron early. Wait until the steam slows down. That visible steam means the waffle is still releasing moisture and is not done yet. When the steam slows to almost nothing, that is when your waffle is ready. Opening too early is how you tear waffles in half and feel personally victimized by a kitchen appliance.
The Happy Ending (And Why My In-Laws Now Request These Every Visit)
About a month after the cardboard incident, my in-laws came back for another visit. I had been practicing my sourdough discard waffles almost every weekend by that point. I knew the batter, I knew my iron, I knew exactly when to open the lid. I plated up a stack of waffles that were deep golden brown all the way across, crispy on the outside, soft and almost custardy in the center, with that faint sourdough tang that made them taste genuinely interesting.
My father-in-law took one bite, looked up, and said, “These are the best waffles I have ever had. What did you do differently?” I resisted the urge to tell him about the three cardboard rounds he politely ate without complaint. I just smiled and said I had been working on the recipe. Which was true. I had been working on it for about thirty years of mediocre waffles followed by one month of sourdough revelation.
If you have a jar of discard sitting in your fridge right now, please make these this weekend. Sourdough discard waffles are genuinely one of the best uses for your starter, and once you taste them you will understand immediately why they are worth keeping in your regular rotation. Your family will notice. Your in-laws will request them by name. And you will never, ever go back to the old recipe.