I still remember standing at my kitchen counter at 11pm on a Tuesday, staring at a completely deflated loaf. Not just a little flat. Pancake flat. The kind of flat that makes you question every decision you’ve ever made, including the one where you thought sourdough baking was a relaxing hobby. I had done everything right — or so I thought. My starter was bubbly, my bulk ferment looked beautiful, my shaping felt confident. What I had skipped was learning how to pre-shape sourdough. That one 90-second step I had been casually glossing over in every tutorial I watched? Yeah. That was the thing that had been quietly ruining my loaves for weeks.
This post contains affiliate links. As an Amazon Associate, I earn from qualifying purchases.
If you have ever pulled a loaf out of the oven that looked more like a frisbee than a country boule, there is a good chance pre-shaping was the missing piece for you too. Stick with me, because once this step clicks, everything else in your baking process starts to make so much more sense.
Why Pre-Shaping Sourdough Is Not Optional (Even Though It Feels Like It Is)
Here is the thing about pre-shaping that nobody really emphasizes enough in beginner tutorials: it is not about making your dough look pretty. It is about building the internal structure that makes your final shape possible. When you skip it, you are essentially asking your dough to do two jobs at once during final shaping, and dough, much like me at 11pm, simply cannot perform well under that kind of pressure.
After bulk fermentation, your dough is relaxed, extensible, and honestly a little floppy. That is great for fermentation, but terrible for shaping. Pre-shaping gently organizes the gluten network, creates a light outer tension, and gives the dough a chance to rest and tighten up before you ask it to hold a real shape. Think of it like gathering yourself before a big moment. The bench rest that follows pre-shaping is not dead time. It is recovery time, and it is what makes your final shaping feel smooth instead of like wrestling a wet paper bag.
The day I finally understood this, I was watching a video for probably the fourth time, and I paused on the pre-shape section instead of skipping ahead. Something shifted. I grabbed my dough scraper and tried it slowly, and for the first time my dough actually cooperated during final shaping. It was one of those small kitchen revelations that makes you want to call someone.
What You Will Need: My Gear for Pre-Shaping
You do not need a lot of fancy equipment, but having the right scraper genuinely changes the experience. Here is what I keep on my counter every single bake day.
My absolute workhorse is the OXO Good Grips Stainless Steel Multi-Purpose Scraper and Chopper. The handle is comfortable even when my hands are doughy, and it is sturdy enough to get underneath sticky dough without tearing it. I have had mine for years and it is still going strong.
If you want something more budget-friendly that still performs beautifully, the Amazon Basics Multi-Purpose Bench Scraper is a fantastic option. The measurement markings are actually useful, and the non-slip grip makes it easy to control when you are moving dough quickly across the counter.
For a set that covers all your bases, I love the Ecavria Bench Scraper set, which comes with both a rigid stainless steel scraper and flexible bowl scrapers. That combination is exactly what you need for pre-shaping and for getting every last bit of dough out of your mixing bowl cleanly.
I also keep the SAPID Silicone Dough Scraper set nearby for anything that needs a gentle touch, especially when my dough is on the softer, more hydrated side. The curved flexible scrapers are brilliant for coaxing dough off the counter without deflating it. And if you want a scraper set with a little personality, the SCHVUBENR Dough Scraper Set in black and green is both functional and genuinely good-looking on the counter.
How to Pre-Shape Sourdough: A Step-by-Step Walkthrough
Let me walk you through exactly what I do now, because once I nailed this routine, my loaves transformed almost immediately.
Step 1: Turn Out Your Dough Gently
After bulk fermentation is complete, lightly flour your work surface and turn your dough out of the container. Try to do this in one confident, smooth motion. You want to preserve the gas and structure that fermentation built, so no pressing, no punching, and no rough handling. If you are dividing the dough for two loaves, use your bench scraper to cut it cleanly with a single firm stroke rather than sawing back and forth.
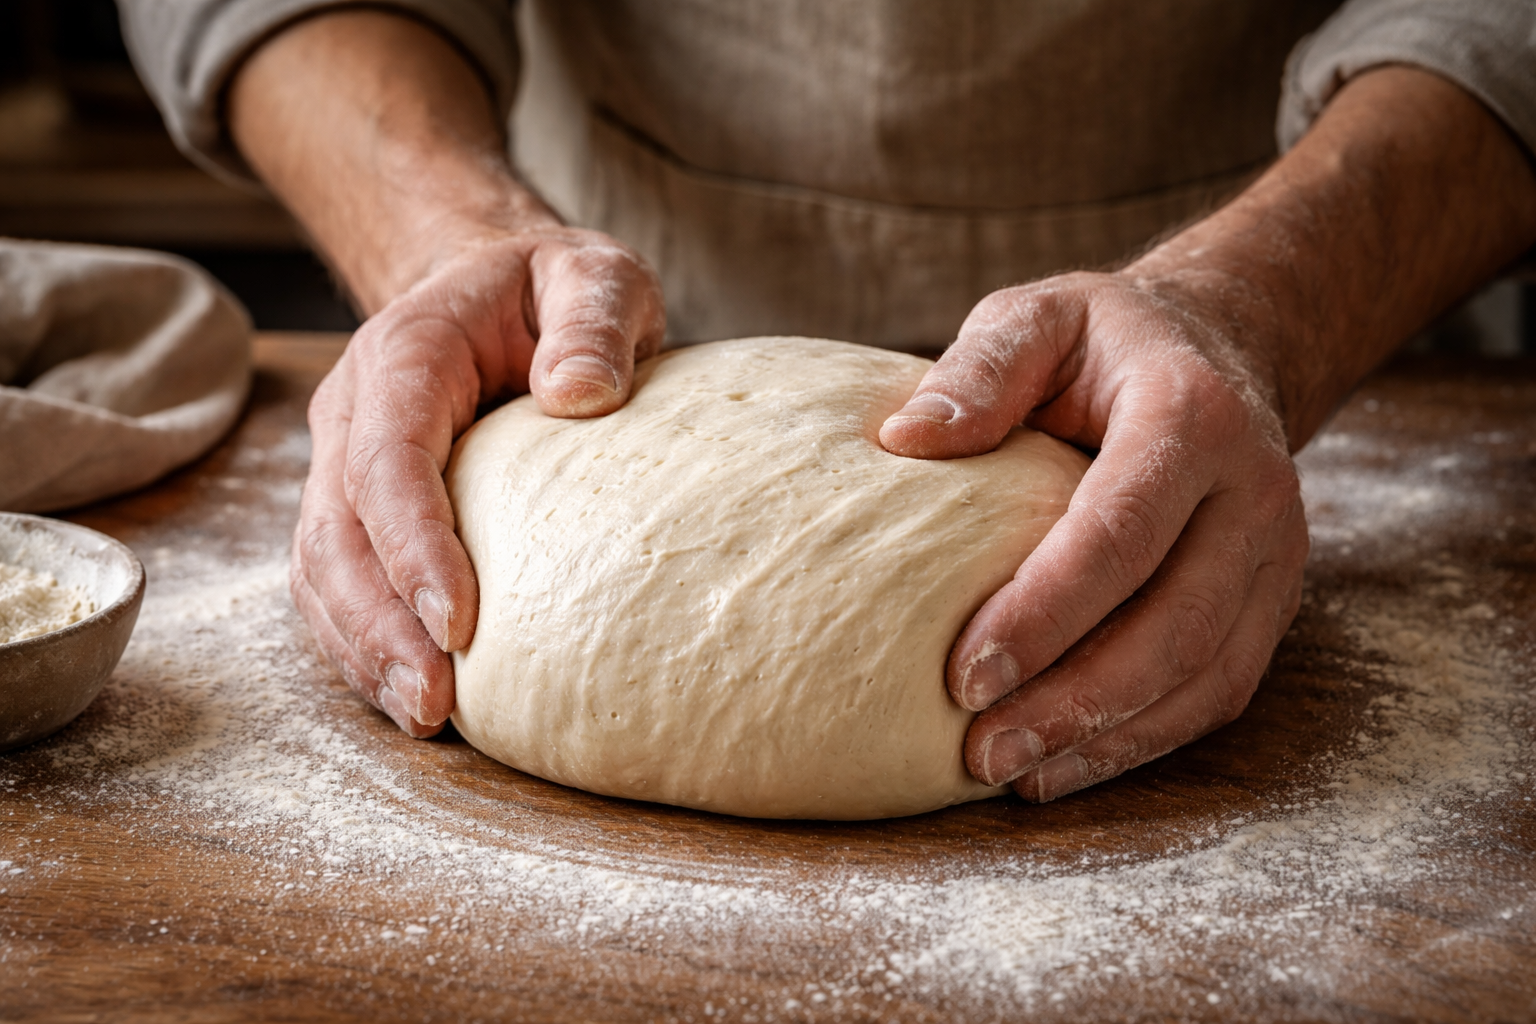
Step 2: Shape into a Loose Round
Using your bench scraper in one hand and your other hand on top of the dough, gently drag the dough toward you across the counter surface while simultaneously tucking the far edge underneath. The friction between the dough and the counter is your friend here. You are not manhandling it into shape. You are coaxing it. Repeat this dragging and tucking motion, rotating the dough slightly each time, until it forms a loose but cohesive round with a little surface tension. This should take about 30 to 60 seconds per piece.
Step 3: The Bench Rest
Once your dough is in a loose round, leave it uncovered on the counter for 20 to 35 minutes. This bench rest allows the gluten to relax after being worked, which sounds counterintuitive but is exactly what makes final shaping so much smoother. The dough will spread slightly. That is normal and good. You will notice it still holds its basic round shape, which tells you the pre-shape did its job.
Step 4: Check Before You Proceed
Before moving on to final shaping, do a quick poke test. The dough should feel like it has a little resistance but also some give. If it tears when you try to handle it, it needs a couple more minutes to rest. If it completely flops with no tension at all, your pre-shape may need a bit more work next time, and you might want to tighten your technique slightly.
Common Pre-Shaping Mistakes (I Have Made Every Single One)
- Using too much flour on the counter, which reduces the friction you need to build tension
- Working too slowly and letting the dough stick and tear instead of moving with confidence
- Skipping the bench rest entirely because it feels like wasted time (this was my biggest mistake for months)
- Being so gentle that no surface tension forms at all, which leaves the dough just as floppy as before
- Pre-shaping too tightly and degassing the dough, which leads to a dense final loaf
Finding the right pressure takes a few bakes to figure out. You want just enough tension that the surface feels slightly taut when you cup the dough in your hands, but not so much that it tears or feels tight under your palms. When you hit that sweet spot, you will know it. The dough almost seems to cooperate with you.
The Loaf That Finally Worked
Two weeks after that disastrous Tuesday night, I baked again. I took my time with the pre-shape. I paid attention to the bench rest. I moved with a little more confidence during the shaping process because the dough actually had the structure to support it. When I pulled the loaf out of the Dutch oven, it had risen. Really risen. There was a proper ear on the score, a golden dome, and a hollow thump on the bottom that I had been chasing for months.
I actually teared up a little, which I realize sounds dramatic for bread, but if you have been in the sourdough trenches, you understand completely.
Learning how to pre-shape sourdough properly was the turning point in my baking journey, and I truly believe it is one of the most underloved techniques in the entire process. It takes 90 seconds. It costs nothing extra. And it is the difference between a loaf that spreads and a loaf that soars.
If you have been skipping it, try it on your next bake. Really try it. Give the bench rest the full time it needs. Move with intention. Then come back and tell me how