I want to tell you about the night I accidentally set off my smoke alarm three times, convinced my husband I was “definitely burning the house down this time,” and somehow ended up with the best flatbread I have ever made in my life. If you have been searching for a sourdough naan recipe cast iron style that actually works on a home stovetop, buckle up, because this story has a genuinely embarrassing beginning and a very delicious ending.
This post contains affiliate links. As an Amazon Associate, I earn from qualifying purchases.
It started innocently enough. I had leftover sourdough discard sitting in my fridge, a craving for the pillowy, charred naan from my favorite Indian restaurant, and the kind of overconfident energy that only comes from having successfully baked two loaves in a row without incident. I figured: how hard could it be? I have a starter, I have flour, I have a pan. I am basically a tandoor oven in human form.
Reader, I was not a tandoor oven in human form.
My first attempt involved not preheating the pan nearly long enough. The naan came out pale, floppy, and vaguely sad. It looked like something that had given up on its dreams. My husband, bless him, ate it without complaint and said it was “interesting.” That is the sourdough baker’s equivalent of a participation trophy.
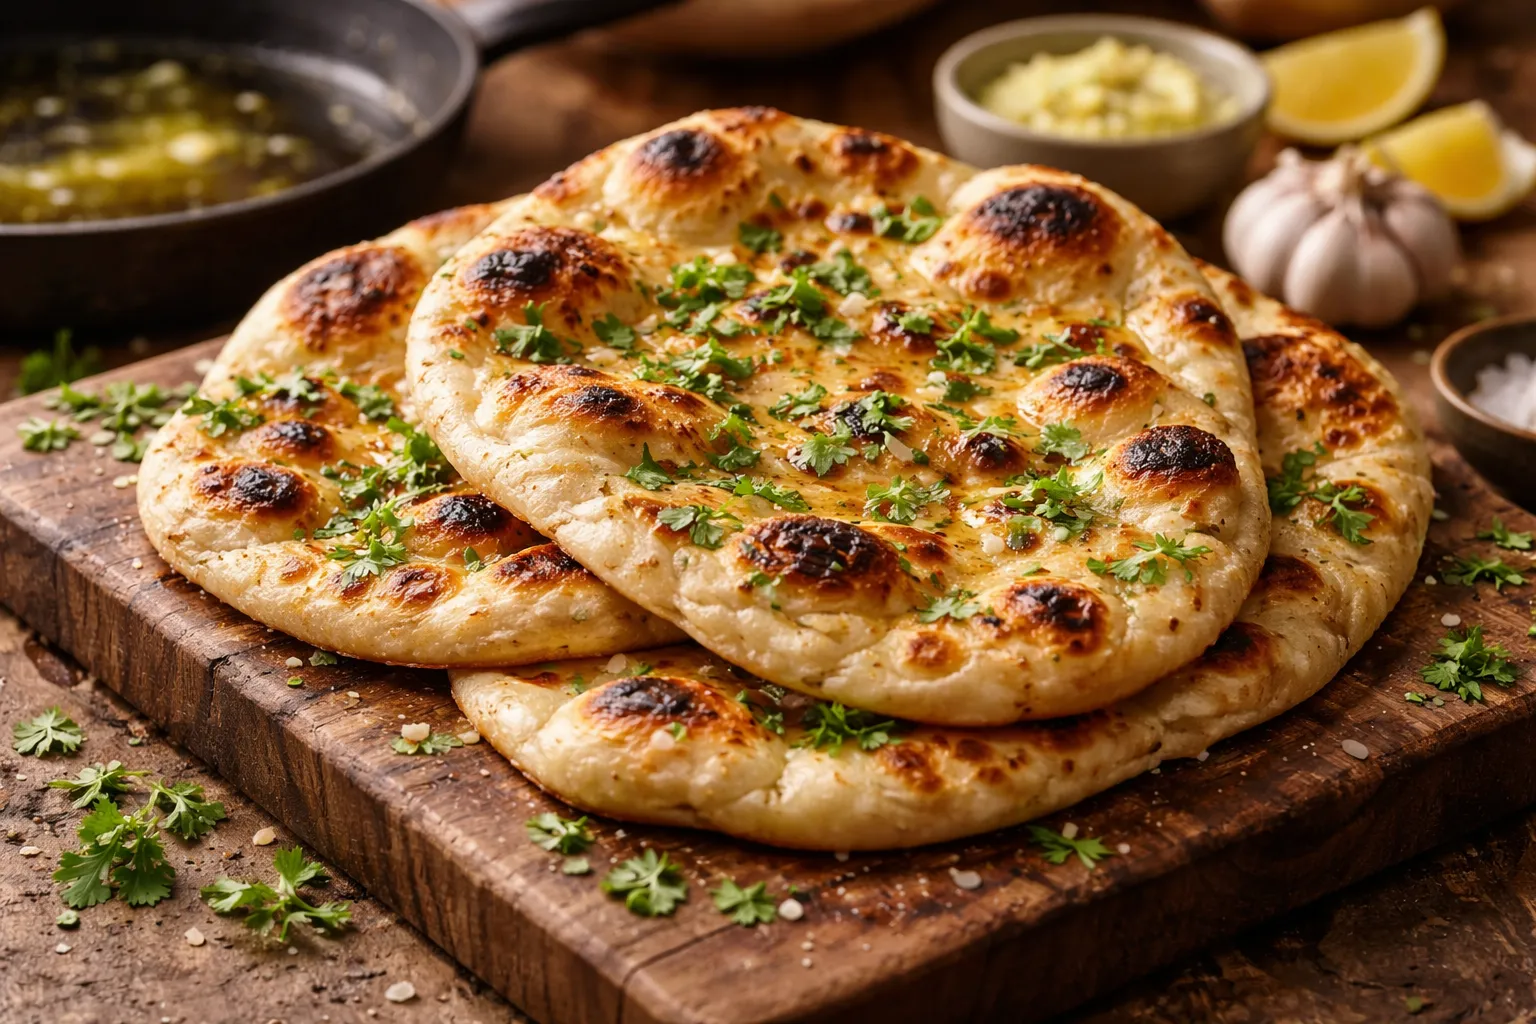
What You’ll Need: My Gear for This Sourdough Naan Recipe Cast Iron Method
Before we get into what finally worked, let me walk you through the equipment I ended up using, because the right pan makes an almost embarrassing difference here.
After my sad floppy naan debut, I did some research and realized the problem was heat retention. A thin pan just cannot hold the kind of aggressive, even heat that mimics a tandoor. Cast iron is the answer, full stop. I have three Lodge pans in rotation and any one of them will do the job beautifully here.
- Lodge Seasoned Cast Iron Skillet, 12 Inches (PFAS-Free) — This is my most-reached-for pan. It holds heat like a champ and the 12-inch size gives you plenty of room to cook naan without it touching the sides.
- Lodge Seasoned Cast Iron Skillet with Silicone Handle Holder, 12 Inches — Same great pan, but this one comes with a silicone handle grip, which I wish I had owned the night I grabbed a screaming-hot handle with my bare hand. Do not be me.
- Lodge Seasoned Cast Iron Dual Handle Pan, 12 Inches — The dual handles make it slightly easier to maneuver when you are shuffling it under your broiler for that extra char. A solid option if you do a lot of high-heat cooking.
- Kevala Clarified Butter Ghee, 2 lb — Authentic naan flavor comes from brushing with ghee right off the pan. The high smoke point also means it handles the heat without burning. This one is grass-fed and the 2-lb size lasts a wonderfully long time.
- Spring Sunrise Organic Grass-Fed Ghee, 16 oz — If you want a smaller jar or prefer USDA Certified Organic, this one is gorgeous. The flavor is rich and nutty and it makes brushing that final naan feel genuinely luxurious.
You will also need a rolling pin, a clean work surface, and a kitchen fan. Trust me on the fan. Learn from my smoke alarm situation.
The Dough: Building Flavor with Your Sourdough Starter
Here is where sourdough naan gets genuinely exciting. Traditional naan uses commercial yeast or sometimes yogurt for leavening. When you swap in an active sourdough starter or even discard with a small amount of yeast for insurance, you get a depth of flavor that is just not possible otherwise. The mild tang plays beautifully against the char and the ghee.
The Basic Dough Formula
- 1 cup (240g) active sourdough starter, fed and bubbly OR 1 cup discard plus 1/2 teaspoon instant yeast
- 2 cups (240g) all-purpose flour, plus more for dusting
- 1/2 cup (120g) full-fat plain yogurt (this is key for tenderness)
- 1 tablespoon olive oil or neutral oil
- 1 teaspoon sugar
- 3/4 teaspoon fine sea salt
Mix everything together until a shaggy dough forms, then knead for about five minutes until smooth and just slightly tacky. If you are using an active starter, cover the bowl and let it bulk ferment at room temperature for four to six hours, or in the fridge overnight. The overnight cold ferment is my favorite approach because the flavor gets even more complex and you wake up ready to cook. If you are using discard plus yeast, one to two hours at room temperature will do it.
The yogurt is non-negotiable. I tried skipping it once to see what would happen. What happened was a slightly tougher, less pillowy naan and a mild disappointment I still think about. The yogurt adds fat and tenderness that transforms the texture into something genuinely restaurant-quality.
Shaping Your Naan
Divide the rested dough into six to eight equal balls. On a lightly floured surface, roll each one out into an oval or teardrop shape, roughly 8 to 9 inches long and about 1/4 inch thick. Do not obsess over perfect shapes. Irregular edges look rustic and beautiful and more importantly they tell people you made this yourself, which is part of the charm.
The Cast Iron Method: How to Get That Gorgeous Char at Home
Here is the technique that finally cracked it open for me, and the thing that turned my smoke alarm saga into a genuine victory. The secret is preheating the pan for longer than you think is reasonable. We are talking a full five minutes over medium-high heat, completely dry, with zero oil in the pan. The pan should be hot enough that a drop of water skitters across the surface and evaporates almost instantly.
Place one rolled naan directly onto the dry, scorching pan. Do not touch it. Within about 60 to 90 seconds, you will see the dough start to puff dramatically in spots and the bottom will develop those gorgeous dark char marks. Flip it once and cook for another 60 seconds on the second side.
Optional but magnificent: slide the whole pan under a broiler for 30 seconds after flipping. This hits the top surface with direct heat and creates bubbles and char that make the naan look like it came out of an actual tandoor oven. This was the step that caused smoke alarm incident number two in my house. Open a window, turn on your fan, and consider it the price of delicious bread.
The moment the naan comes off the pan, brush it generously with ghee. This is not the moment for restraint. The ghee melts into all the little pockets and bubbles and the smell alone is enough to make everyone in your household wander into the kitchen with an expression of confused joy. Stack the finished naans and cover them loosely with a clean towel to keep them warm and pliable while you cook the rest.
Optional Add-Ins Worth Trying
- Minced garlic pressed gently onto the surface before cooking for classic garlic naan
- Fresh cilantro scattered on top right after brushing with ghee
- Nigella seeds (kalonji) pressed into the dough before rolling for a slightly oniony, nutty flavor
- A pinch of chili flakes mixed into the ghee for a gentle heat
The Happy Ending (And Why You Should Make This Tonight)
So here is how the smoke alarm story ends. On my third attempt, armed with better technique, a properly preheated Lodge cast iron, and zero shame, I made eight pieces of the