I want to tell you about the time I confidently handed my neighbor a loaf of what I called my “best sourdough yet” — only to watch her slice into it and find a raw, gummy, completely unbaked center. She was very polite about it. I was not very calm about it. That loaf went straight into the trash, I went straight to the internet, and somewhere between a meltdown and a revelation, I finally figured out what makes a truly reliable classic white sourdough boule recipe tick. That was about 198 loaves ago. Now? I make this bread in my sleep, and it comes out right every single time.
If you have been chasing a white sourdough boule that has a crackly crust, an open, chewy crumb, and that deep tang you only get from a well-fermented dough, you are in exactly the right place. I have made enough mistakes with this bread to fill a small memoir, and I have packed everything I learned into this post so you can skip the gummy disasters and go straight to the good stuff.
The Embarrassing Backstory (AKA Why I Became Obsessed)
Let me back up. The neighbor incident happened on a Sunday afternoon in October. I had been baking sourdough for about three months at that point, and I was dangerously overconfident. My loaves looked gorgeous on the outside — beautifully scored, deeply colored, shaped like they belonged in a Parisian bakery window. The problem was I kept cutting into them too early. I had also been bulk fermenting by the clock instead of by the dough, which meant I was loading underdeveloped, under-proofed loaves into the oven and then wondering why they looked fine but tasted like paste inside.
So when I handed that loaf over the fence and she said, “Oh, the inside is still a little… wet?” I wanted to dissolve into the earth. But something clicked. I stopped guessing. I started watching. I learned what a properly fermented dough actually feels like, smells like, and looks like. And I stopped pulling my bread out of the oven before it was truly done. Small changes. Massive difference.
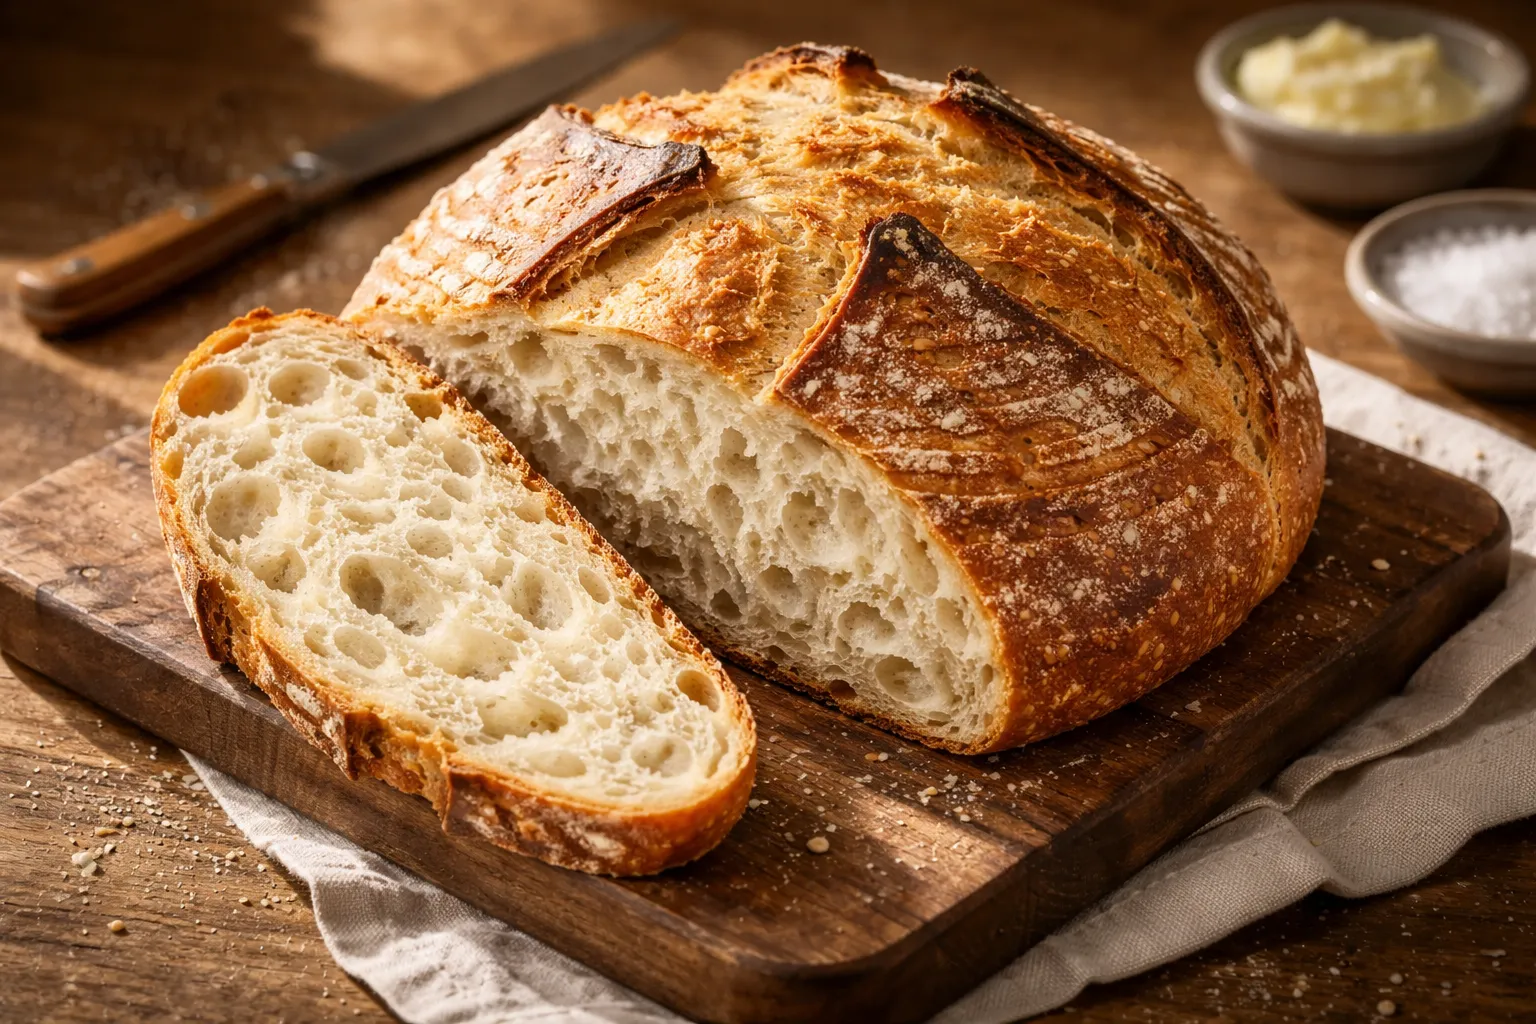
The Dutch Oven That Finally Stopped My Centers From Staying Raw
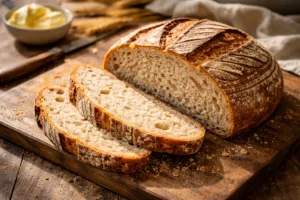
That gummy center on my neighbor’s loaf? It came from uneven heat and steam loss halfway through the bake. A heavy, well-seasoned Dutch oven traps steam aggressively in the first 20 minutes and distributes heat so evenly that your boule bakes through predictably, every single time.
What works
- The 5-quart capacity gives your boule real room to expand without the lid touching the dough, and the cream white interior is easy to watch the bake progress without lifting the lid.
- Enameled cast iron heats evenly and holds temperature so consistently that even a 10-minute ring around the bottom of the boule gets the same crust color as everywhere else.
- The weight is substantial enough that steam stays trapped and doesn’t escape through tiny gaps—I’ve never had a pale, flat-topped loaf since switching to this.
What doesn’t
- It’s heavy enough that you need both hands and a solid grip when pulling it out of a 500°F oven—one slip and you’re explaining a cast iron shaped burn to an ER nurse.
- The lid doesn’t fit quite as snugly as bare cast iron Dutch ovens, so if your oven runs cool or your steam seal isn’t perfect, you might lose a little oven spring on the very first loaves.
I had a moment of panic on loaf number 52 when I thought the enamel was chipping—turned out to be flour dust—but that small doubt disappeared the moment I pulled out a boule with a perfectly baked crumb from edge to center. Get the Umite Chef 5QT Enameled Cast Iron Dutch Oven in Cream White and stop guessing whether your center is done.
This post contains affiliate links. As an Amazon Associate, I earn from qualifying purchases at no extra cost to you.