Sourdough Discard Muffins: My Chaos-Morning Solution That Tastes Like a Bakery Made Them

It was 7:14 on a Tuesday morning, my daughter’s school bus was coming in sixteen minutes, and I had just discovered that the only breakfast food in the house was a suspicious banana and about a cup and a half of sourdough discard that I’d been “definitely going to use soon” for the past three days. What happened next involved a mixing bowl, a moderate amount of panic, and — somehow — the best sourdough discard muffins I have ever eaten in my entire life.

This post contains affiliate links. As an Amazon Associate, I earn from qualifying purchases.

I wish I could tell you I am the kind of baker who wakes up early, feeds her starter on schedule, and has a serene, flour-dusted morning routine. I am not that baker. I am the baker who forgets to feed her starter, stores discard in three different jars in the fridge with no labels, and then absolutely scrambles to use it before it becomes a science experiment. If that sounds familiar, this recipe was written specifically for you and me both.

Why Sourdough Discard Muffins Deserve a Permanent Spot in Your Rotation

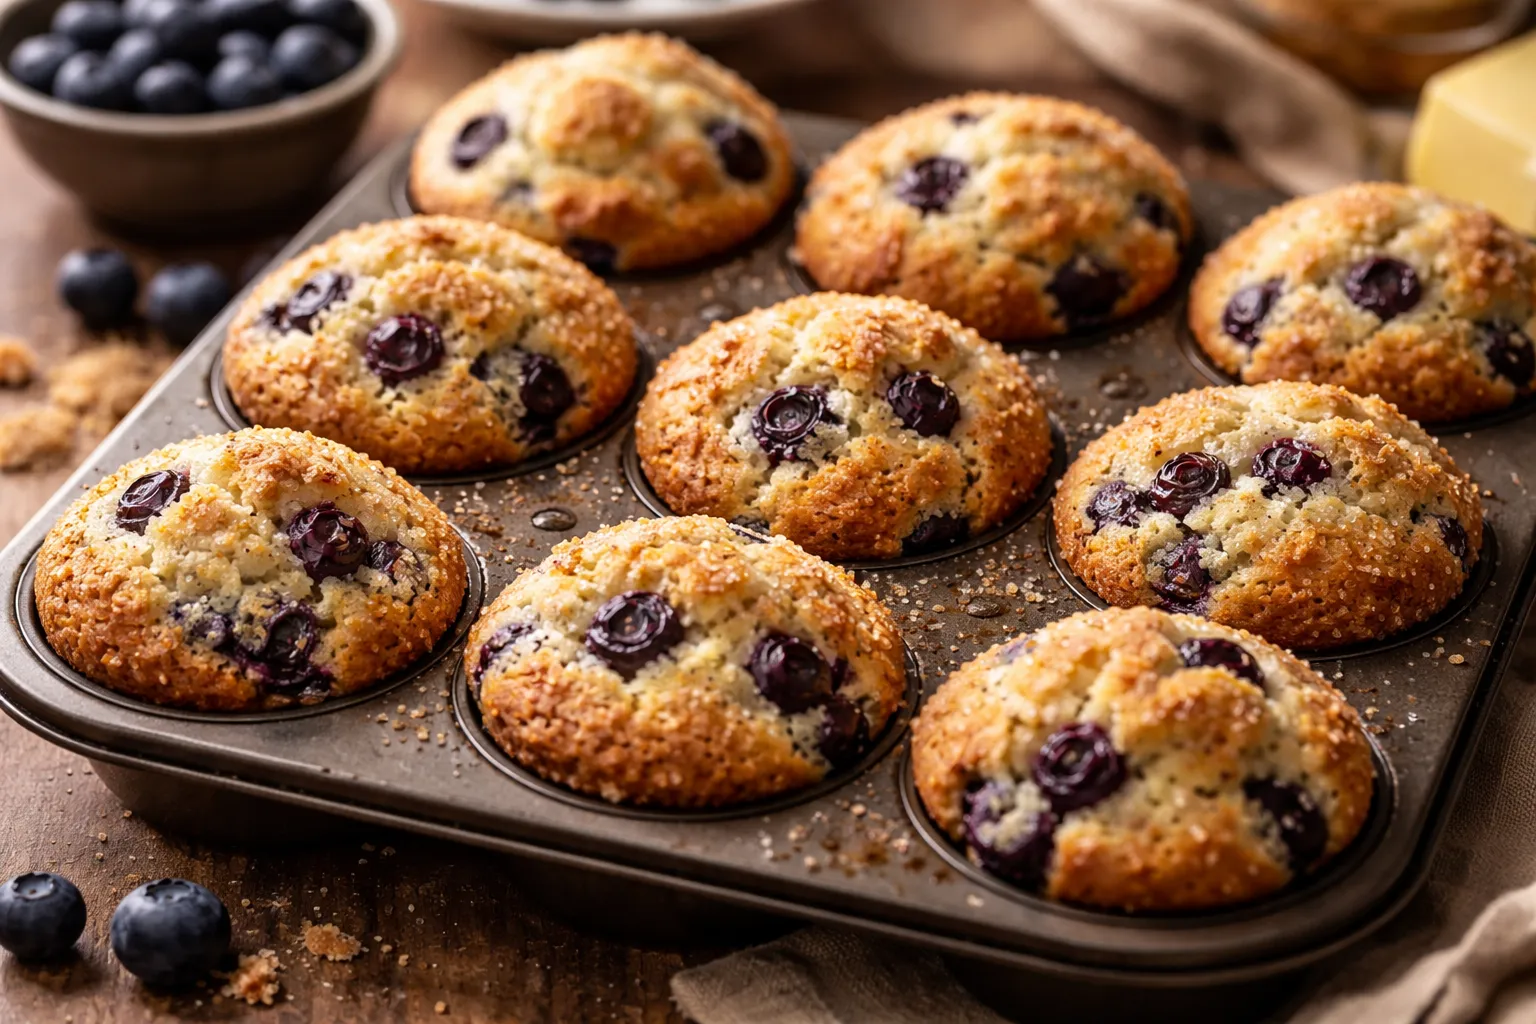
Here is the thing about sourdough discard that took me an embarrassingly long time to fully appreciate: it is not just a workaround or a sad consolation prize for the flour you did not get to put into a proper loaf. The discard is genuinely, functionally wonderful in quick breads and muffins. The mild tang it brings balances sweetness in a way that keeps muffins from tasting like cupcakes pretending to be breakfast. The natural acidity also reacts beautifully with baking soda, which means you get a gorgeous rise and a tender, open crumb without any yeast activity or proofing time required.

Discard that has been sitting in your fridge for two to five days is actually ideal here. It has developed more acidity than fresh discard, which deepens the flavor and gives those baking soda bubbles even more to work with. If yours has a little liquid sitting on top, that is just hooch, totally normal, just stir it right back in before measuring.
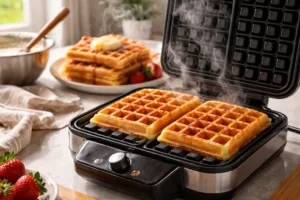
What You’ll Need: Gear That Makes Muffin Mornings Easier

Let me talk about muffin pans for a second, because on that chaotic Tuesday I was using a warped, sticky, ancient pan that I had inherited from someone who clearly did not believe in nonstick coating, and half my muffins came out looking like they had been in a car accident. Since then I have upgraded, and the difference is genuinely significant. Here are the pans I now keep in rotation and actually trust.

My current everyday favorite is the Bake Choice 2 Pack Muffin Pan for Baking, which comes as a set of two standard 12-cup nonstick carbon steel pans and includes 100 natural cupcake liners. The nonstick release is reliable, the pans heat evenly, and having 100 liners included means I have not had to hunt through my cabinet for liners in months. For the price, this set is an absolute no-brainer.

If you want a single solid workhorse pan at a budget-friendly price, the GoodCook Everyday Nonstick Steel Muffin Pan has been quietly dependable for years and years. Simple, sturdy, gets the job done without fuss.

For those of you who care about bakeware materials and want something made without PFAS, I really like the Wilton Gold Non-Stick 12-Cup Muffin Pan. Cold-rolled steel construction, excellent browning, and Wilton’s quality is something I have trusted for a long time in my kitchen.

Silicone fans, I see you. The Vinino 2 Pack Silicone Muffin Pan with a metal reinforced frame is a genuinely smart design because the frame keeps it stable when you are carrying a full pan to the oven, which is exactly where floppy silicone pans have failed me in the past. BPA free, dishwasher safe, and the muffins just pop right out. Similarly, the Redfly 2 Pack Silicone Muffin Pans are another BPA-free option with a flexible, easy-release design that is also dishwasher safe and pulls double duty as egg bite molds if you are into that sort of thing.

The Sourdough Discard Muffin Recipe (Panic-Tested and Approved)

Ingredients

  • 1 and 1/2 cups (180g) all-purpose flour
  • 1 cup (240g) sourdough discard, unfed, room temperature or cold
  • 1/2 cup (100g) granulated sugar
  • 1/3 cup (75ml) neutral oil or melted butter
  • 2 large eggs
  • 1/3 cup (80ml) whole milk or buttermilk
  • 1 teaspoon vanilla extract
  • 1 teaspoon baking soda
  • 1/2 teaspoon baking powder
  • 1/2 teaspoon fine salt
  • 1 teaspoon cinnamon (optional but highly recommended)
  • 1 cup mix-ins of your choice: blueberries, chocolate chips, chopped walnuts, diced apple, whatever you have

Instructions

Preheat your oven to 400 degrees Fahrenheit. This high starting temperature is intentional. It creates a burst of steam in the first few minutes of baking that pushes the muffin tops up into those beautiful domed peaks you see at bakeries. Line your muffin tin or grease it well.

In a large bowl, whisk together your wet ingredients: the discard, eggs, oil or melted butter, milk, vanilla, and sugar. Do not skip this step or try to do everything in one bowl. Keeping wet and dry separate until the last moment is the single biggest thing you can do for muffin texture.

In a separate bowl, whisk together the flour, baking soda, baking powder, salt, and cinnamon. Pour the dry ingredients into the wet ingredients and stir with a fork or spatula until just barely combined. You want streaks of flour still visible. This is not a mistake. Overmixed muffin batter develops too much gluten and produces dense, tunnel-filled, rubbery muffins, and I say this as someone who has produced many dense, tunnel-filled, rubbery muffins in her day.

Fold in your mix-ins gently with two or three turns of the spatula. Divide the batter evenly among the 12 cups, filling each about three-quarters full. Bake at 400 degrees for 5 minutes, then reduce the heat to 375 degrees without opening the oven and bake for another 13 to 15 minutes, until a toothpick comes out clean and the tops are golden and gorgeous.

Let them cool in the pan for five minutes before moving to a wire rack. If you can wait that long.

Quick Tips for the Best Results

  • Room temperature discard blends more smoothly, but cold discard works in a pinch and I have used it straight from the fridge many times
  • If your discard is very thick, reduce the milk by a tablespoon or two; if it is quite runny, add a tablespoon of extra flour to compensate
  • Tossing fresh berries in a teaspoon of flour before folding them in prevents them from sinking to the bottom
  • These muffins freeze beautifully for up to three months, so I always make a double batch on a calm weekend and save Tuesday-morning-me from herself

The Twist Ending (And Why I Now Keep My Discard Stocked on Purpose)

So back to that Tuesday. I threw the batter together in about eight minutes, shoved the pan into the oven, ran upstairs to get my daughter dressed, and came back down