I still remember the morning I walked into my kitchen, lifted the lid off my starter jar, and was met with nothing. No bubbles. No dome. No rise. Just a flat, sad puddle of flour and water that smelled faintly of nail polish remover. I had been so focused on my baking schedule that I completely lost track of my sourdough starter feeding schedule — and my starter paid the price. That one neglectful stretch taught me more about keeping a healthy, active starter than any recipe ever had. If you’ve been there, or you’re just starting out and want to avoid that hollow feeling, you’re in exactly the right place.
Why Your Sourdough Starter Feeding Schedule Matters More Than You Think
A sourdough starter is a living community of wild yeast and beneficial bacteria, and like any living thing, it thrives on consistency. When you feed it on a regular schedule, you’re doing two things: you’re giving the organisms the fresh flour and water they need to eat and multiply, and you’re training them into a predictable rhythm. That rhythm is what gives you a starter that peaks reliably, rises powerfully, and produces bread with that gorgeous, complex flavor we’re all chasing.
When the schedule slips — whether it’s a busy week, a forgotten alarm, or just life happening — the balance inside the jar tips. The acetic acid builds up, the yeast activity drops, and you end up with that flat, vinegary mess I described above. The good news is that consistency doesn’t have to mean perfection. It just means paying attention and building a routine that works for your life.
How to Set Up a Feeding Routine That Actually Works
The Counter Starter: Feeding Every 12 to 24 Hours
If you bake frequently — say, a few times a week — keeping your starter on the counter at room temperature is the way to go. At around 70–75°F (21–24°C), most starters need to be fed every 12 to 24 hours. My personal rhythm is a morning feed, every single day. I wake up, make coffee, and feed my starter. It’s become as automatic as brushing my teeth.
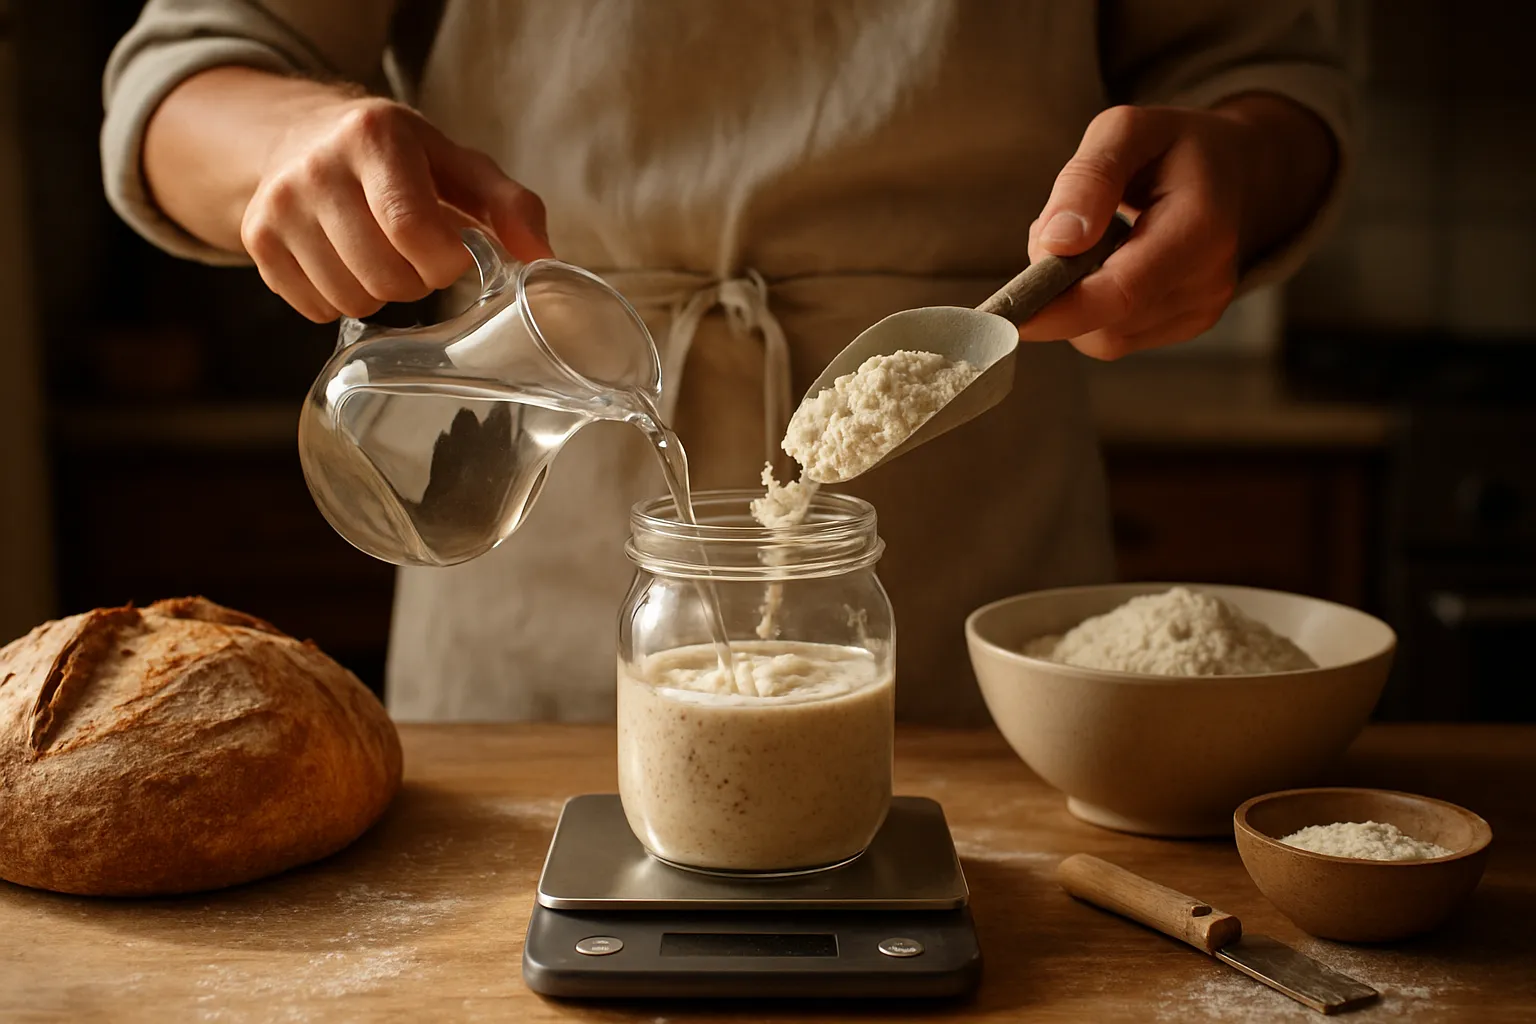
My standard ratio is 1:5:5 — one part starter, five parts flour, five parts water by weight. So I’ll keep 20 grams of starter and add 100 grams of flour and 100 grams of water. This gives the organisms plenty of fresh food and keeps the acidity in check. Adjust your ratio based on how quickly your starter rises and falls — a hotter kitchen means faster fermentation and potentially more frequent feedings or higher ratios.
The Fridge Starter: Feeding Once a Week
If you’re a weekend baker or you travel often, the refrigerator is your best friend. Cold temperatures slow fermentation dramatically, so you only need to feed your starter about once a week. Pull it out, let it come to room temperature for an hour or two, discard down to about 50 grams, feed it with equal weights of flour and water, let it peak on the counter, then pop it back in the fridge. Simple, sustainable, and it keeps your starter healthy between baking sessions.
One tip I’d pass along: always feed your starter before you put it back in the fridge, not after it’s already exhausted. Storing a hungry starter slows it down even further and can encourage off-flavors to develop.
Reading the Signs: Is Your Starter Ready?
Your starter will always tell you where it is in the fermentation cycle — you just have to learn its language. A healthy, active starter will double or even triple in size after feeding, develop a domed top, and be full of bubbles throughout. The smell should be pleasantly tangy and yeasty, almost like yogurt or beer. When you drop a small spoonful into a glass of water and it floats — the classic float test — you know it’s ready to leaven bread.
Don’t just rely on the clock. Use your eyes and nose. Temperature, flour type, and hydration all affect timing, and your starter’s peak might shift by a few hours depending on the season.
Stop Guessing Your Feeding Ratios — Weigh Instead
The difference between an underfeeding and an overfeeding mistake is often just a few grams, but those grams determine whether your starter rises on schedule or collapses mid-week. I spent months eyeballing my 1:1:1 feeds until I realized I was actually doing 1:1.3:0.8, which explained why my timing was always off.
What works
- Reads to 0.1 grams, so you catch small discrepancies in your feeding ratios that throw off your entire weekly schedule.
- Compact enough to sit permanently on the counter next to your starter jar — no digging it out of a drawer and breaking your routine.
- Auto-shutoff doesn’t matter much for feeding, but the fast stabilization means you’re not standing there waiting for the number to stop bouncing.
What doesn’t
- Platform is narrow, so feeding vessels with a wider base want to tip toward the edge — you’re constantly resetting it.
- Display can be hard to read at certain angles in dim kitchen lighting, which matters when you’re bleary-eyed at 6 a.m. doing your morning feed.
I almost returned mine after the first week of rebalancing jars, but I realized the discipline of weighing was fixing my inconsistency faster than any schedule adjustment ever could. Get a Etekcity Food Kitchen Scale and stop wondering if this week is going to be different.
This post contains affiliate links. As an Amazon Associate, I earn from qualifying purchases at no extra cost to you.