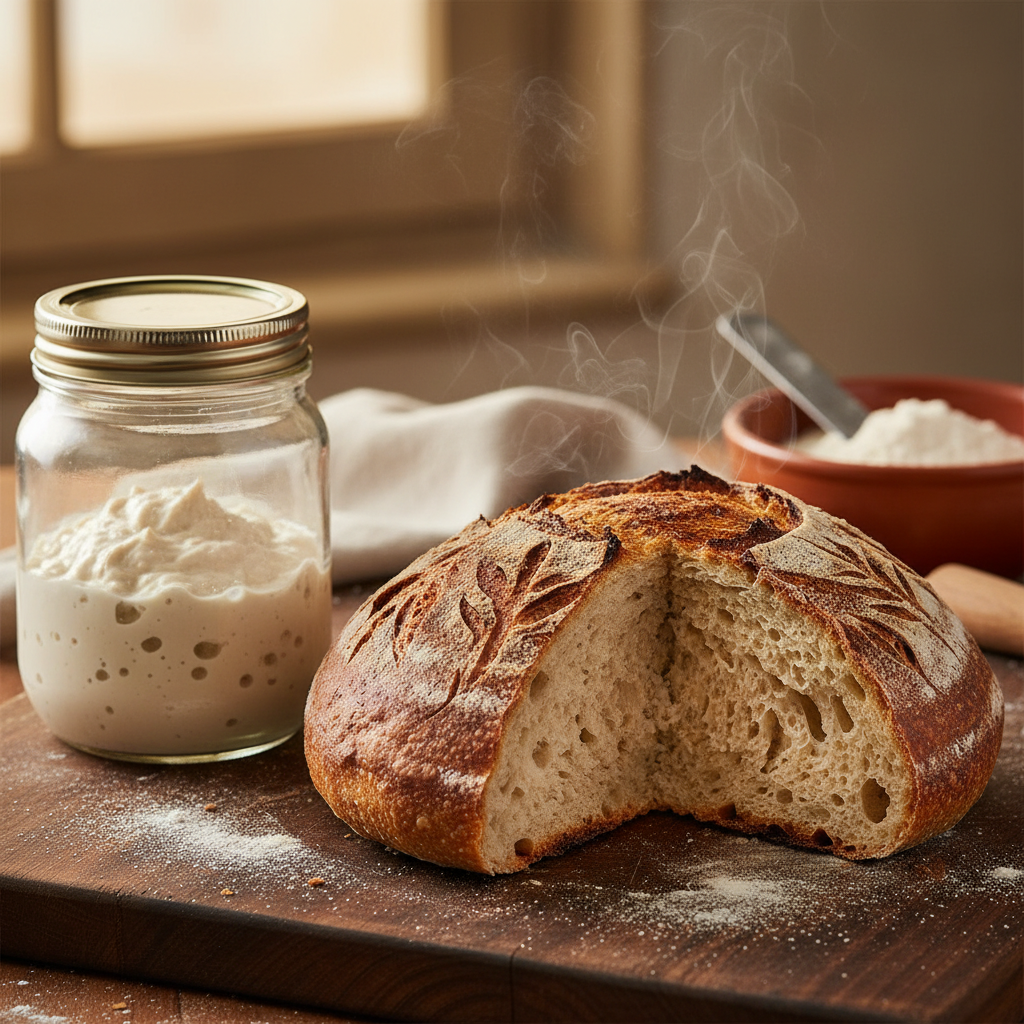
Choosing the right sourdough proofing basket, or banneton, can feel daunting. These baskets are essential tools for any sourdough baker. They help your dough hold its shape during its final rise, known as the proof. Consequently, the size of your basket directly impacts the final look and texture of your loaf. A basket that is too large will result in a flat, wide bread. Conversely, a basket that is too small can cause your dough to overflow and lose its structure. This guide will help you select the perfect size for beautiful, artisanal loaves every time.
. Source
What is a Proofing Basket?
A King Arthur Baking – Proofing Baskets & … is a container that supports your dough during its final proof. Bakers traditionally use baskets made from coiled cane, but you can also find them made from wood pulp, plastic, or even wicker. The primary function is to provide structure, preventing the wet dough from spreading out as it rises. Additionally, the basket’s material and texture play a crucial role. For example, a cane banneton wicks a small amount of moisture from the dough’s surface. This process creates a thin, durable skin that is easier to score before baking and contributes to a crispier crust. Source
Why Basket Size is Crucial
The relationship between your dough and your basket is a delicate balance. The right size provides gentle support, encouraging the dough to rise upwards instead of outwards. This upward push is what leads to a tall loaf with a dramatic, open crumb, a quality bakers call “oven spring.” King Arthur Baking: Proofing B…
When your basket is too large, the dough spreads horizontally, resulting in a flatter loaf with a tighter crumb structure. On the other hand, a basket that’s too small will cause the dough to overflow, creating an uneven shape and potentially deflating during the transfer to your baking vessel. The ideal basket size allows your dough to rise about 75-80% of the basket’s height, leaving room for expansion without overflow.
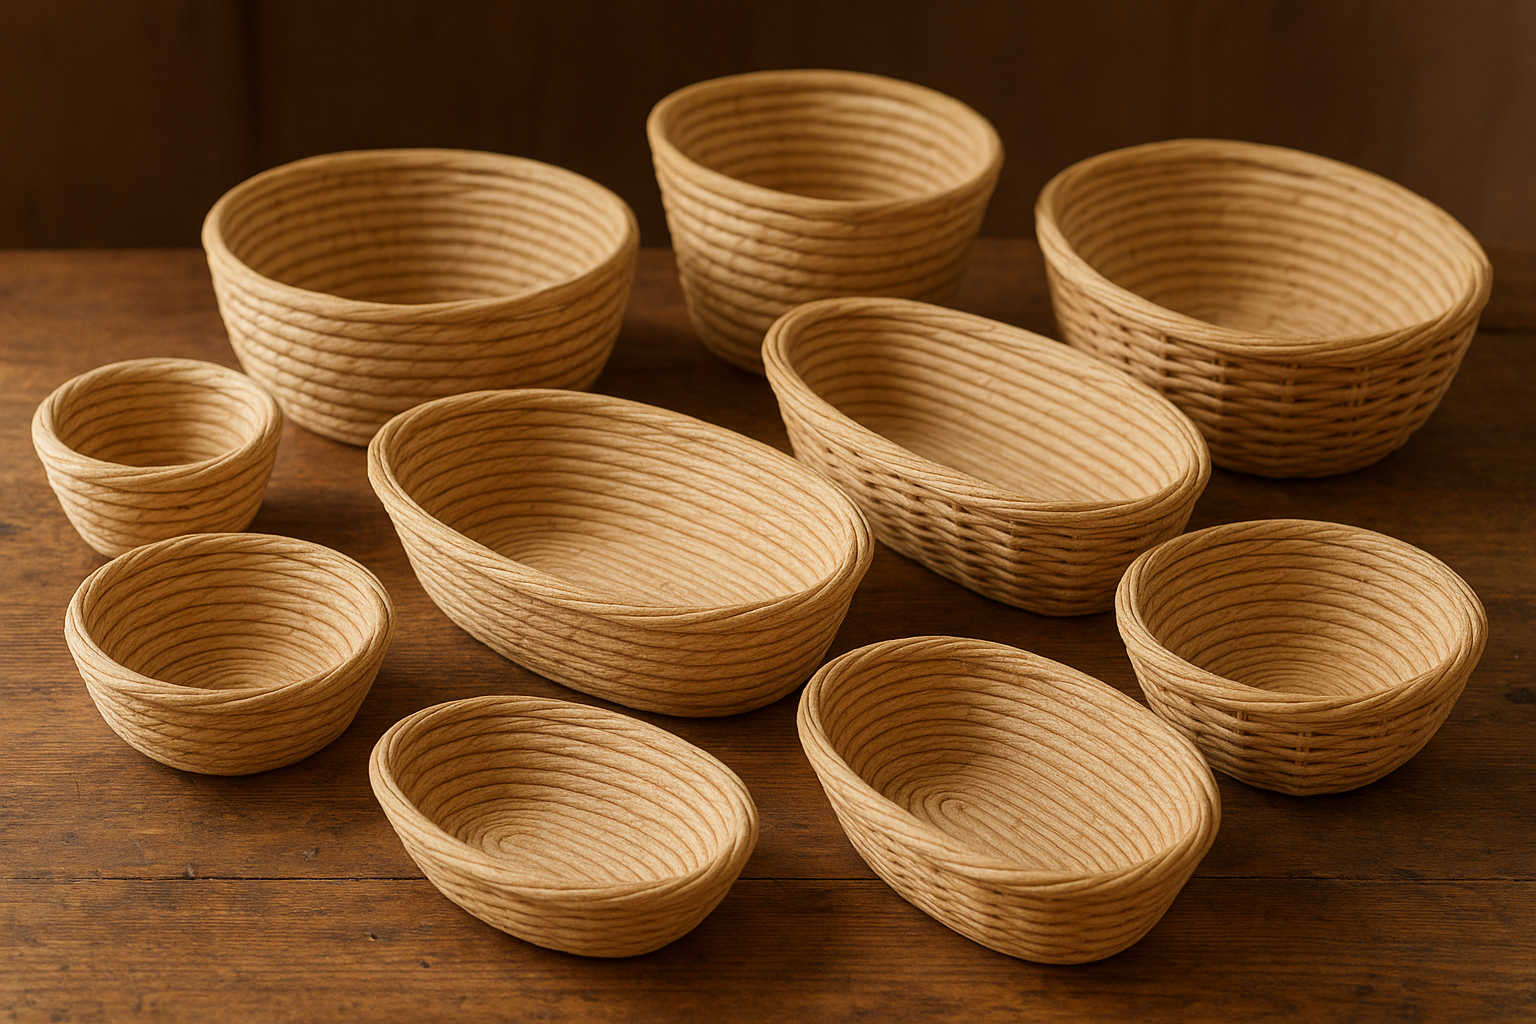
Common Proofing Basket Sizes
Proofing baskets come in various sizes to accommodate different loaf weights and shapes. Understanding these standard sizes will help you match your recipe to the perfect basket.
Round Baskets
8-inch (20cm) Round: Ideal for smaller loaves weighing 500-700 grams. Perfect for single-person households or when you want to experiment with different flavors in smaller batches.
9-inch (23cm) Round: The most versatile size, suitable for loaves weighing 700-900 grams. This is the standard size most home bakers start with, as it accommodates most standard sourdough recipes.
10-inch (25cm) Round: Best for larger loaves weighing 900-1200 grams. Great for family-sized loaves or when you want to make an impressive centerpiece bread.
Oval Baskets
9×5-inch (23x13cm) Oval: Perfect for batard-shaped loaves weighing 700-900 grams. The oval shape creates an elegant, elongated loaf that’s easier to slice for sandwiches.
10×6-inch (25x15cm) Oval: Accommodates larger batards weighing 900-1200 grams. This size is popular among experienced bakers who prefer the batard shape for its superior crust-to-crumb ratio.
How to Choose the Right Size
Selecting the perfect basket size depends on several factors:
- Recipe weight: Check your recipe’s final dough weight. Most recipes specify this, but if not, calculate it by adding all your ingredients. Your basket should accommodate about 75-80% of the basket’s volume.
- Desired loaf shape: Round baskets create boules (round loaves), while oval baskets create batards (oval loaves). Consider which shape you prefer for slicing and presentation.
- Family size: Larger families may benefit from bigger baskets, while smaller households might prefer 8-9 inch baskets to avoid waste.
- Oven capacity: Ensure your chosen basket size will fit in your Dutch oven or baking vessel. Measure your baking equipment before purchasing.
Round vs. Oval: Which Should You Choose?
Both shapes have their advantages. Round baskets (boule shape) are traditional and create a classic artisan look. They’re excellent for table presentation and work well with most recipes. Oval baskets (batard shape) create longer loaves that are easier to slice uniformly, making them ideal for sandwiches and toast. Many bakers find batards easier to score and achieve more consistent results.
Caring for Your Proofing Basket
Proper care extends your basket’s life and ensures consistent results:
- After each use: Allow the basket to dry completely before storing. Never store a damp basket, as this can lead to mold growth.
- Cleaning: Gently brush out any flour or dough remnants with a dry brush. Avoid washing with water, as this can cause the cane to warp or develop mold.
- Storage: Store in a dry, well-ventilated area. Some bakers hang their baskets to ensure proper air circulation.
- Seasoning: New baskets benefit from a light dusting of rice flour before first use. This helps create a non-stick surface and develops the characteristic spiral pattern on your loaves.
Tips for Using Proofing Baskets
Master these techniques to get the most from your proofing basket:
- Flour generously: Use rice flour or a 50/50 blend of rice and all-purpose flour to prevent sticking. The rice flour creates a barrier that keeps your dough from adhering to the basket.
- Pre-shape before final proof: Shape your dough into a tight ball or oval before placing it in the basket. This ensures even rising and a uniform final shape.
- Seam side up: Place your shaped dough seam-side up in the basket. This allows the smooth top to rest against the basket, creating the beautiful spiral pattern on your finished loaf.
- Cover during proofing: Cover your basket with a clean kitchen towel or plastic wrap to prevent the dough from forming a skin during the final rise.
- Don’t overproof: Watch for the dough to rise to about 75-80% of the basket height. Overproofing can cause the dough to stick or collapse when you invert it.
Conclusion
Choosing the right proofing basket size is essential for achieving the perfect sourdough loaf. By matching your recipe weight to the appropriate basket size, you’ll ensure your dough has the right support to rise beautifully. Whether you choose round or oval, the key is finding a basket that allows your dough to rise to about 75-80% of the basket’s capacity. Start with a 9-inch round basket if you’re unsure—it’s the most versatile size that works with most standard recipes. With proper care and technique, your proofing basket will become an indispensable tool in your sourdough baking journey.
When your basket is too large, the dough spreads horizontally, resulting in a flatter loaf with a tighter crumb structure. On the other hand, a basket that’s too small will cause the dough to overflow, creating an uneven shape and potentially deflating during the transfer to your baking vessel. The ideal basket size allows your dough to rise about 75-80% of the basket’s height, leaving room for expansion without overflow.
Common Proofing Basket Sizes
Proofing baskets come in various sizes to accommodate different loaf weights and shapes. Understanding these standard sizes will help you match your recipe to the perfect basket.
Round Baskets
8-inch (20cm) Round: Ideal for smaller loaves weighing 500-700 grams. Perfect for single-person households or when you want to experiment with different flavors in smaller batches.
9-inch (23cm) Round: The most versatile size, suitable for loaves weighing 700-900 grams. This is the standard size most home bakers start with, as it accommodates most standard sourdough recipes.
10-inch (25cm) Round: Best for larger loaves weighing 900-1200 grams. Great for family-sized loaves or when you want to make an impressive centerpiece bread.
Oval Baskets
9×5-inch (23x13cm) Oval: Perfect for batard-shaped loaves weighing 700-900 grams. The oval shape creates an elegant, elongated loaf that’s easier to slice for sandwiches.
10×6-inch (25x15cm) Oval: Accommodates larger batards weighing 900-1200 grams. This size is popular among experienced bakers who prefer the batard shape for its superior crust-to-crumb ratio.
How to Choose the Right Size
Selecting the perfect basket size depends on several factors:
- Recipe weight: Check your recipe’s final dough weight. Most recipes specify this, but if not, calculate it by adding all your ingredients. Your basket should accommodate about 75-80% of the basket’s volume.
- Desired loaf shape: Round baskets create boules (round loaves), while oval baskets create batards (oval loaves). Consider which shape you prefer for slicing and presentation.
- Family size: Larger families may benefit from bigger baskets, while smaller households might prefer 8-9 inch baskets to avoid waste.
- Oven capacity: Ensure your chosen basket size will fit in your Dutch oven or baking vessel. Measure your baking equipment before purchasing.
Round vs. Oval: Which Should You Choose?
Both shapes have their advantages. Round baskets (boule shape) are traditional and create a classic artisan look. They’re excellent for table presentation and work well with most recipes. Oval baskets (batard shape) create longer loaves that are easier to slice uniformly, making them ideal for sandwiches and toast. Many bakers find batards easier to score and achieve more consistent results.
Caring for Your Proofing Basket
Proper care extends your basket’s life and ensures consistent results:
- After each use: Allow the basket to dry completely before storing. Never store a damp basket, as this can lead to mold growth.
- Cleaning: Gently brush out any flour or dough remnants with a dry brush. Avoid washing with water, as this can cause the cane to warp or develop mold.
- Storage: Store in a dry, well-ventilated area. Some bakers hang their baskets to ensure proper air circulation.
- Seasoning: New baskets benefit from a light dusting of rice flour before first use. This helps create a non-stick surface and develops the characteristic spiral pattern on your loaves.
Tips for Using Proofing Baskets
Master these techniques to get the most from your proofing basket:
- Flour generously: Use rice flour or a 50/50 blend of rice and all-purpose flour to prevent sticking. The rice flour creates a barrier that keeps your dough from adhering to the basket.
- Pre-shape before final proof: Shape your dough into a tight ball or oval before placing it in the basket. This ensures even rising and a uniform final shape.
- Seam side up: Place your shaped dough seam-side up in the basket. This allows the smooth top to rest against the basket, creating the beautiful spiral pattern on your finished loaf.
- Cover during proofing: Cover your basket with a clean kitchen towel or plastic wrap to prevent the dough from forming a skin during the final rise.
- Don’t overproof: Watch for the dough to rise to about 75-80% of the basket height. Overproofing can cause the dough to stick or collapse when you invert it.
Conclusion
Choosing the right proofing basket size is essential for achieving the perfect sourdough loaf. By matching your recipe weight to the appropriate basket size, you’ll ensure your dough has the right support to rise beautifully. Whether you choose round or oval, the key is finding a basket that allows your dough to rise to about 75-80% of the basket’s capacity. Start with a 9-inch round basket if you’re unsure—it’s the most versatile size that works with most standard recipes. With proper care and technique, your proofing basket will become an indispensable tool in your sourdough baking journey.
A high-quality glass container is essential for maintaining your sourdough starter, allowing you to monitor its activity and health while keeping it fresh. Sourdough Starter Container Glass. This complete starter jar kit provides everything you need to begin your sourdough journey, including a wide-mouth jar and helpful accessories. Sourdough Starter Jar Kit. Monitoring temperature is crucial for sourdough success, and a reliable thermometer helps you maintain the ideal conditions for your starter. Sourdough Starter Thermometer. A dedicated warmer mat ensures your starter stays at the perfect temperature, especially important in cooler environments. Sourdough Starter Warmer Mat. Precise measurements are key to consistent sourdough results, and a digital kitchen scale ensures accuracy in every recipe. Digital Kitchen Scale. Testing pH levels helps you understand your starter’s health and activity, giving you insights into its fermentation process. Sourdough pH Test Strips. An established starter culture from around the world can jumpstart your sourdough baking with unique flavor profiles. Sourdough Starter Culture International. Wide-mouth glass jars with secure lids are perfect for storing and feeding your sourdough starter while keeping it visible. Glass Storage Jars with Lids. A cast iron Dutch oven creates the perfect steam environment for achieving that coveted crispy, golden sourdough crust. Dutch Oven Cast Iron Sourdough. A banneton proofing basket helps your dough maintain its shape during the final rise while creating beautiful patterns on your loaf. Sourdough Banneton Proofing Basket. A scoring lame with sharp blades allows you to create beautiful decorative patterns and control how your bread expands during baking. Scoring Lame with Blades. A bench scraper is an essential tool for handling sticky dough, dividing portions, and cleaning your work surface. Bench Scraper Dough Cutter. High-quality parchment paper prevents sticking and makes transferring your dough to the oven effortless. Parchment Paper Baking Sheets. A sturdy cooling rack allows air to circulate around your freshly baked bread, preventing a soggy bottom and ensuring even cooling. Wire Cooling Rack Stainless Steel. A baking stone or steel provides consistent heat distribution, helping you achieve professional-quality sourdough with a perfect crust. Baking Stone Pizza Steel. A comprehensive sourdough cookbook provides detailed recipes, troubleshooting tips, and techniques to elevate your baking skills. Sourdough Bread Cookbook. This artisan baking guide offers advanced techniques and recipes for creating bakery-quality sourdough at home. Artisan Sourdough Baking Book. A detailed starter guide helps you understand the science behind sourdough and troubleshoot common issues. Sourdough Starter Guide. Professional bread baking books offer insights from master bakers, helping you refine your technique and expand your repertoire. Professional Bread Baking Book. Understanding the science behind sourdough fermentation helps you make informed decisions about feeding schedules and temperature control. Sourdough Science Book. A techniques book provides step-by-step instructions and visual guides for mastering various bread-making methods. Bread Making Techniques Book. A troubleshooting guide helps you identify and fix common sourdough problems, from weak starters to dense loaves. Sourdough Troubleshooting Guide.
As an Amazon Associate, I earn from qualifying purchases.