I pulled open the oven door, slid out the baking stone, and stared at what can only be described as a sad, tan frisbee. No pocket. No puff. Just a flat, chewy disc that looked more like a hockey puck than anything I had ever eaten at a Middle Eastern restaurant. It was my fourteenth attempt at a sourdough pita bread recipe, and I was starting to wonder if I was fundamentally broken as a baker.
This post contains affiliate links. As an Amazon Associate, I earn from qualifying purchases.
That was about six months ago. Fast forward to today, and I am pulling pillowy, perfectly pocketed sourdough pitas out of my oven on a weekly basis, stuffing them with falafel, roasted vegetables, and anything else I can find in the refrigerator. The journey from frisbee to fluffy took me forty flat attempts, a lot of wasted flour, and one genuinely embarrassing phone call to my mom asking if she thought I should just give up baking altogether. She laughed. I did not. But I got there, and I am going to tell you exactly how.
Why Sourdough Pita Is Harder Than It Looks (And Why It Is So Worth It)
Here is the thing about pita bread that nobody warned me about: the pocket is not just about the recipe. It is about heat, timing, hydration, and a tiny bit of faith. The pocket forms when a thin disc of dough hits an extremely hot surface and the steam inside has nowhere to go but up, splitting the layers apart in a dramatic little balloon. Miss any one of those variables and you get a frisbee. I missed all of them, repeatedly, for weeks.
The sourdough element adds another layer of complexity. Commercial yeast is predictable and fast. Your starter is alive, opinionated, and deeply personal. The fermentation affects gluten development, hydration absorption, and how the dough behaves under extreme heat. Once I understood that, I stopped blaming myself quite so much and started treating the process like a conversation rather than a command.
And the flavor payoff? Absolutely extraordinary. There is a gentle tang, a depth of flavor, and a chewiness that store-bought pita simply cannot touch. Once you nail it, you will never go back.
What You Will Need: My Gear for Getting the Pocket Every Time
Let me save you from my early mistakes right here. The single biggest game changer in my pita journey was investing in a proper baking stone. I had been using a dark sheet pan, which simply cannot hold or deliver the kind of intense, even heat that pita needs to puff. The moment I switched to a real cordierite stone, everything changed.
Here are the tools I now use and genuinely trust:
- Unicook Pizza Stone, Heavy Duty Cordierite Pizza Pan for Oven and Grill, Thermal Shock Resistant, 15 x 12 Inch — This is the stone I use most often. It is heavy, it preheats beautifully, and it holds heat incredibly well even when you are loading cold dough onto it. Thermal shock resistant means it can handle my chaotic baking schedule.
- LUNVARION Pizza Stone 15×12 Inch Rectangular, Premium Cordierite Heat-Resistant Baking Stone — Another fantastic option if the Unicook is out of stock. Same cordierite construction, same reliable heat retention, and it works beautifully for bread and pita alike.
- HANS GRILL Pizza Stone, Rectangular 15 x 12 Inch with Free Wooden Peel — This one comes with a wooden peel included, which is a great value if you are just getting started. The stone itself is durable cordierite and handles high oven temperatures without complaint.
- JIAFUEO Pizza Peel 12 inch, Bamboo Pizza Paddle Spatula — Transferring rolled pita dough to a screaming hot stone is not the moment you want to improvise. This bamboo peel makes it easy and keeps your hands far from the heat.
- Natural Bamboo Pizza Paddle, 12 Inch, Eco-Friendly and Durable — A slim, lightweight alternative peel that slides under delicate pita rounds without stretching or tearing them. I keep two peels in rotation on busy bake days.
You will also need a kitchen scale, a rolling pin, and an active, bubbly sourdough starter that has been fed within the last eight to twelve hours.
The Sourdough Pita Bread Recipe That Finally Worked For Me
The Dough
Combine 100 grams of active sourdough starter with 300 grams of warm water and whisk until loosened. Add 500 grams of bread flour, 10 grams of salt, and 15 grams of olive oil. Mix until a shaggy dough forms, then knead for about eight minutes until smooth and slightly tacky. The dough should feel soft but not sticky. Cover and let it bulk ferment at room temperature for four to six hours, or until it has grown by about 50 percent and feels airy when you press it gently.
Here is where I went wrong for months: I was using an under-fermented dough. It looked fine, but the gluten had not relaxed enough to allow those layers to separate cleanly under heat. Give it the full ferment. Do not rush it.
Shaping and Rolling
Divide the dough into eight equal pieces, around 115 grams each. Shape each piece into a smooth ball and let them rest, covered, for twenty minutes. This rest is not optional. Skipping it means the gluten fights your rolling pin, and you end up with thick, uneven rounds that bake inconsistently.
Roll each ball into a circle roughly 6 to 7 inches wide and about 3 to 4 millimeters thick. Even thickness matters enormously here. A pita that is thicker in the center and thin at the edges will puff unevenly or not at all. Take your time. I use a light dusting of flour and steady, even pressure.
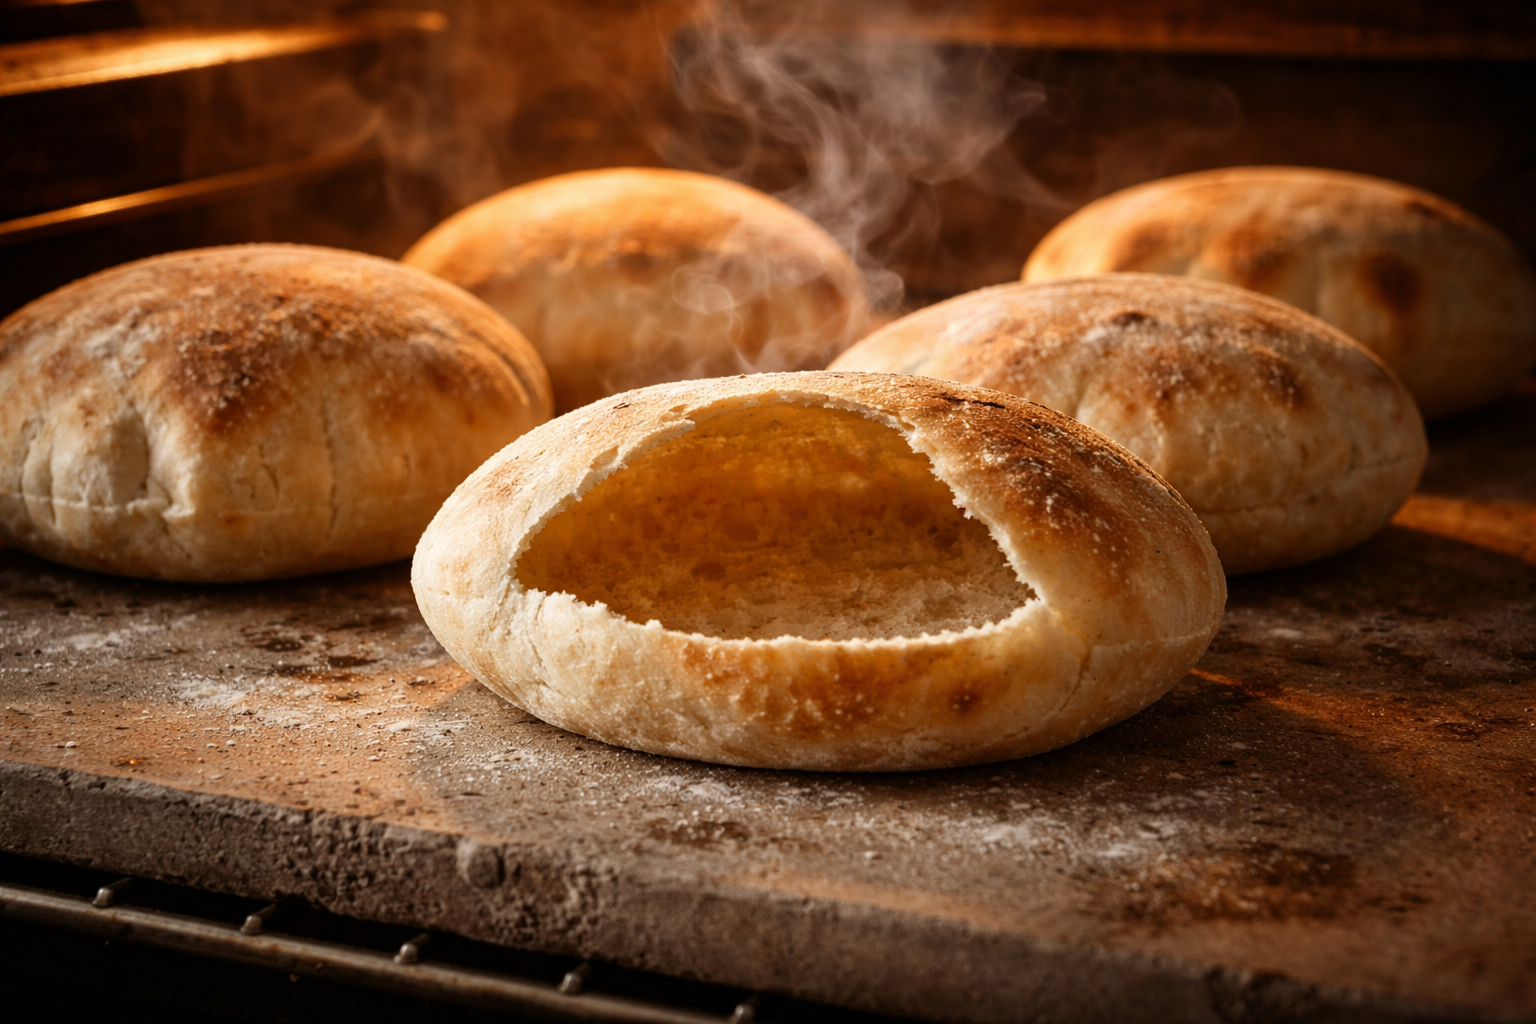
The Bake: Where the Magic Happens
Place your baking stone on the middle rack and preheat your oven to 500 degrees Fahrenheit, or as hot as your oven will go, for at least 45 minutes. This step is non-negotiable. I know it feels excessive. I ignored it for a long time. Please do not ignore it. The stone needs to be fully saturated with heat before a single piece of dough touches it.
Slide each rolled pita onto your bamboo peel, then transfer it quickly onto the hot stone. Close the oven. Within two to three minutes, you will see the pita start to puff up. Do not open the oven door during this time. Watch through the window if you have one. It is genuinely thrilling. Bake for four to five minutes total until the pita is lightly golden and fully puffed. Transfer to a clean kitchen towel and fold it over to trap the steam, which keeps the pitas soft and pliable as they cool.
The Lessons That Finally Unlocked Everything
After all those flat failures, here is what I learned condensed into the tips I wish someone had handed me on day one:
- Your starter must be genuinely active. If it has not peaked or is sluggish, wait. A weak starter means weak gas production and no pocket.
- Even thickness when rolling is as important as the recipe itself. Use a ruler if you need to. I did, and I am not embarrassed about it.
- Preheat your stone for a full 45 minutes at maximum temperature. This is the single change that turned my baking around.
- Do not over-flour your work surface. Too much flour can seal the layers together and prevent the pocket from forming.
- Wrap finished pitas in a towel immediately. The steam they release softens the crust and makes them flexible enough to fold without cracking.
The Moment Everything Changed
I remember my forty-first batch with unusual clarity. I had done everything right by that point, finally: active starter, full ferment, evenly rolled rounds, stone preheated for almost an hour. I slid the first pita onto the stone using my bamboo peel, set the timer, and stepped