I still remember the loaf that changed everything for me. It was a Tuesday night, I was exhausted, and my shaped dough was sitting on the counter waiting for its final proof. Instead of staying up to bake it, I did something I thought was a mistake — I covered it, shoved it in the fridge, and went to bed. The next morning I pulled it out half-expecting disaster. What came out of the oven instead was the most complex, deeply flavorful loaf I had ever made. That happy accident introduced me to the world of cold fermentation sourdough flavor, and I have never looked back.
This post contains affiliate links. As an Amazon Associate, I earn from qualifying purchases. I only recommend products I personally use and trust in my own baking.
What Actually Happens During Cold Fermentation
Here is the thing most baking guides gloss over: fermentation does not stop in the refrigerator. It slows way down, yes, but the wild yeast and lactic acid bacteria in your dough keep working — just at a much more leisurely pace. And that slow, extended activity is exactly where the magic happens.
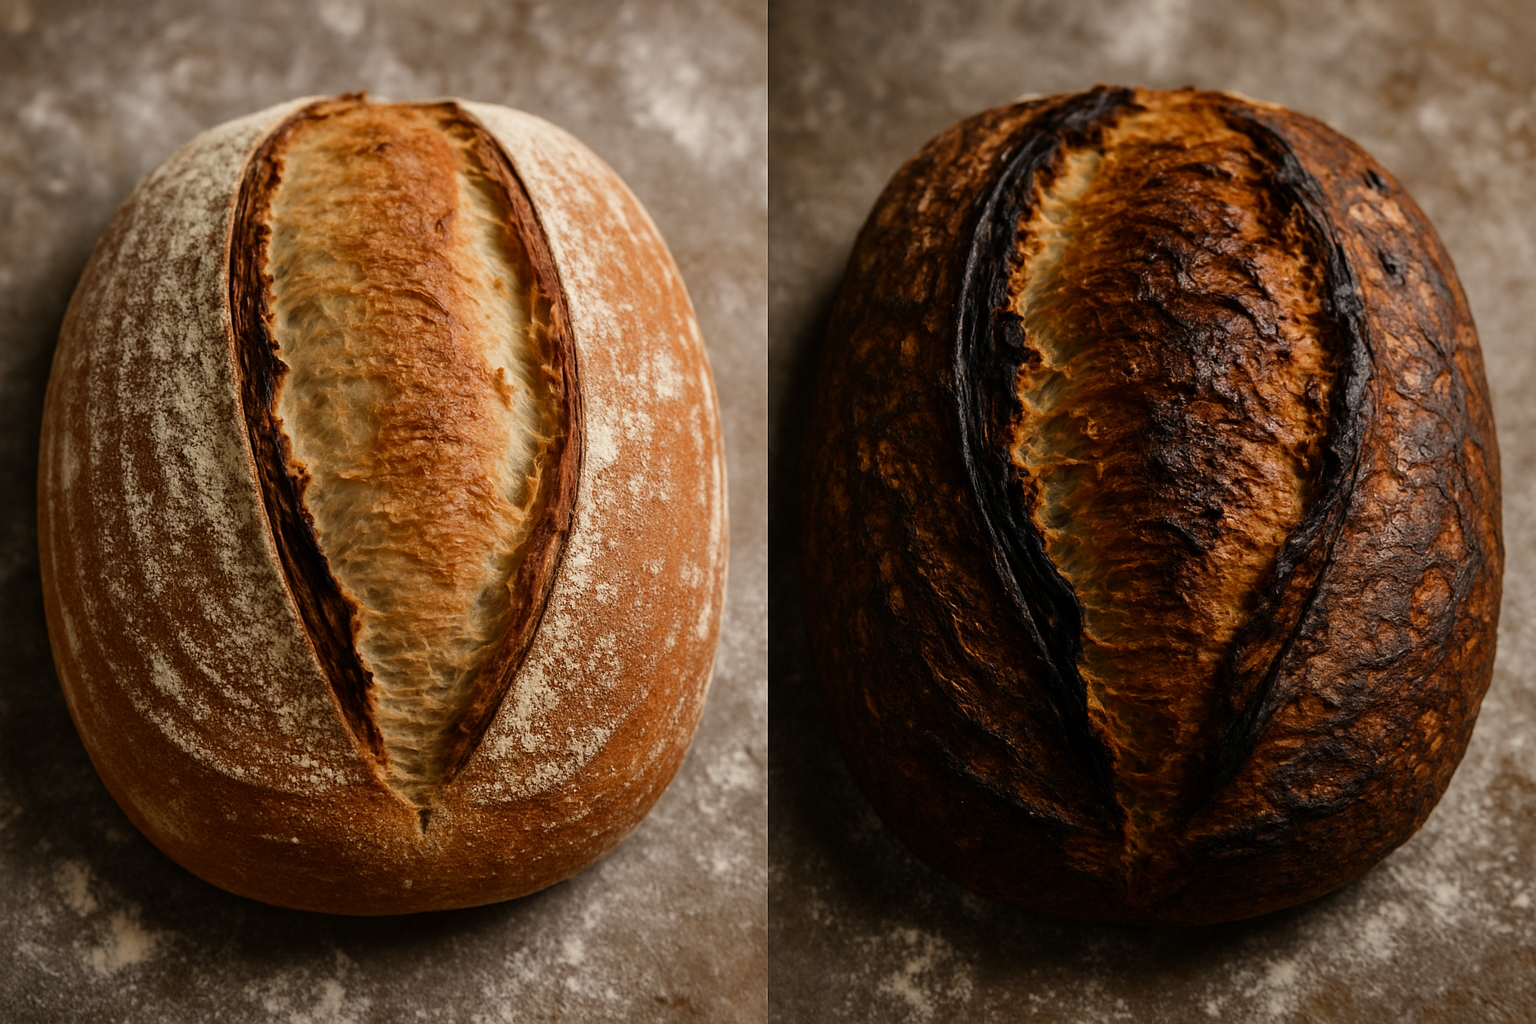
At room temperature, your dough ferments quickly and efficiently. The yeast produces carbon dioxide fast, giving you a good rise, but the flavor-building bacteria barely have time to do their best work. Drop that dough into a cold environment — somewhere between 34°F and 40°F — and you dramatically slow the yeast while allowing the bacteria to keep producing lactic and acetic acids at a controlled rate. Lactic acid gives your bread that smooth, yogurt-like tang. Acetic acid is sharper and more vinegary. The balance between them, shaped largely by temperature and time, determines the specific flavor profile of your finished loaf.
A longer cold ferment also gives enzymes more time to break down the complex starches and proteins in your flour. This improves digestibility, deepens color during baking, and contributes to that gorgeous open, irregular crumb structure that sourdough bakers obsess over. So when you refrigerate your dough overnight — or even for 48 to 72 hours — you are not just buying yourself convenience. You are actively building a better loaf.
Cold Fermentation Sourdough Flavor: How to Control It
Once you understand what is happening inside the dough, you can start making intentional choices about the cold fermentation sourdough flavor profile you want to develop. Here are the variables that matter most.
Time in the Fridge
A standard overnight cold proof runs about 8 to 12 hours and produces a mild, balanced tang with excellent oven spring. Push it to 24 hours and the sourness deepens noticeably. Go 48 to 72 hours and you get a pronounced, complex acidity with incredible crust color. I recommend starting at overnight and working your way up over several bakes to find what you love.
Hydration and Flour
Stiffer, lower-hydration doughs tend to produce more acetic acid, which means a sharper, more assertive sour flavor. Wetter, higher-hydration doughs favor lactic acid production, giving you something creamier and more nuanced. Whole wheat and rye flours accelerate fermentation significantly because of their higher enzyme activity and mineral content, so keep that in mind when extending your cold proof.
Starter Quantity and Timing
Using a smaller percentage of starter — say 10 to 15% instead of 20% — means fermentation moves more slowly from the start, which pairs beautifully with an extended cold proof. If you use a lot of starter and then refrigerate for 72 hours, you risk over-fermentation and a dense, gummy crumb. Balance matters. I also like to cold retard my shaped loaves rather than bulk-fermented dough, because the shaped structure holds up better over longer periods in the fridge.
Tools I Recommend for Cold Fermentation Success
Having the right gear makes a real difference, especially when you are letting dough ferment slowly in the refrigerator for extended periods. Here is what I rely on in my own kitchen.
For proofing baskets, I love the Sourdough Proofing Basket Gift Set with a 9-inch Round and 10-inch Oval Banneton. It comes with a bread lame, Danish whisk, bowl scraper, and linen liner — essentially everything you need to go from shaped dough to cold fridge to finished bake. The linen liners are especially great for long cold proofs because they wick away just enough moisture to give you a beautiful crust.
Another excellent option is the RORECAY Bread Banneton Proofing Basket Set, which includes both a 9-inch round and a 10-inch oval cane basket along with a dough whisk, lame, dough scraper, bowl scraper, and silicone brush. It is a fantastic all-in-one kit for anyone getting serious about sourdough.
If you prefer a simpler setup, the Banneton Bread Proofing Basket Set of 2 in natural rattan is a beautiful, no-fuss choice. The four included linen liners are generously sized and make cleanup a breeze after cold proofing sessions.
For bulk fermentation, nothing beats a clear container with measurement markings so you can actually see how much your dough has risen. I use the Cambro 4-Quart Food Storage Containers with Lids — the translucent walls and tight-fitting lid make them ideal for tracking dough rise and keeping everything sealed in the fridge. If you already have lids or want a slightly lower price point, the Cambro 4-Quart Container without Lid is the same restaurant-grade bucket and fits standard lids perfectly. I use these for bulk fermentation before shaping and they have been completely reliable for years.
My Go-To Cold Fermentation Process
Here is the simple framework I come back to again and again. Mix your dough and let it bulk ferment at room temperature until it has grown by about 50 to 75 percent and passes the poke test — it should spring back slowly when gently pressed. Shape your loaf, place it seam-side up in a well-floured banneton lined with a linen liner, cover it loosely with a shower cap or plastic wrap, and refrigerate it immediately.
Preheat your oven the next morning — or the morning after that — with a Dutch oven inside at 500°F for at least 45 minutes. Flip your cold dough directly from the fridge onto parchment, score it quickly, and load it into the blazing hot Dutch oven. The cold dough actually benefits from going straight into the heat — it slows the spread and gives you a taller, more dramatic rise before the crust